Skip to content

Fully Fabbable Tennis table paddles

Advertising
Advertising
?
Creation quality: 5.0/5 (1 vote)
Evaluation of members on the printability, utility, level of detail, etc.

  • 8.9k views
  • 41 likes
  • 392 downloads
  • 3 collections
  • 1 comment

License
3D design format
STL and ZIP Folder details Close
  • Handle.stl
  • Paddle.svg.zip

Learn more about the formats

Last update 2017-02-06 at 11:03
Publication date 2017-01-31 at 17:48
Design number 9268

3D printer file info

3D model description

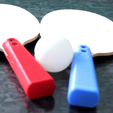
This thing was designed to be fully fabbable: the handles are 3D printable and the racket can be CNC milled or laser cutted.

3D printing settings

Required:
FABtotum personal fabricator
Pla (2 different colors)
Marple wood sheets 4mm thick (100x130mm)
4 M3x15 screws
4 M3 nuts

Procedure:

Handles
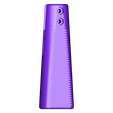
Handles are made using additive method.
Model has been made using Autodesk Fusion 360 and then replicate x2.
The .stl file can be downloaded Here.
It was sliced with Cura using these parameters :

Layer Height: 0.15mm
Fill density: 24%
Nozzle size: 0.4mm
Shel thickness 0.8mm

Print them using the FABtotum with two different PLA filaments.

Rackets
Rackets are made using subtractive method.
The shape was modeled using Inkscape: it was downloaded a paddle photo and traced the shape over it.
The gcode was generated using the online tool makercam.
There were generated 2 different toolpaths: one for the holes, one for the external shape.
The parameters used for both toolpaths are these:

Tool diameter: 2.5mm
Target depth: 4.2mm
Safety heigh: 2mm
Stock surface: 0mm
Step down: 0.3mm
Feed rate: 1000mm/min
Plunge rate: 200mm/min

After exporting the Gcode on the FABtotum, it will be necessary to add starting and ending codes which start and stop the spindle.

Starting code:
M3 S10000 ; set starting speed
G4 S3 ; give it 3 seconds to start the brushless motor.
Ending code:
G4 S5 ; five seconds before stopping the mill
M5 ; stop the milling motor
The stock material was positioned over a sacrifical board (in this case foam) and fastened using screws, the zero position was set in the lower left corner, on the top surface of the stock, using the fabUI.
After the milling process the rackets were smoothed using sandpaper.

The parts are assembled together using M3 screws and nuts.

Have fun!

Advertising


Issue with this design? Report a problem.

Would you like to support Cults?

You like Cults and you want to help us continue the adventure independently? Please note that we are a small team of 3 people, therefore it is very simple to support us to maintain the activity and create future developments. Here are 4 solutions accessible to all:

  • ADVERTISING: Disable your banner blocker (AdBlock, …) and click on our banner ads.

  • AFFILIATION: Make your purchases online by clicking on our affiliate links here Amazon.

  • DONATE: If you want, you can make a donation via Ko-Fi 💜.

  • WORD OF MOUTH: Invite your friends to come, discover the platform and the magnificent 3D files shared by the community!


Sharing and downloading on Cults3D guarantees that designs remain in makers community hands! And not in the hands of the 3D printing or software giants who own the competing platforms and exploit the designs for their own commercial interests.

Cults3D is an independent, self-financed site that is not accountable to any investor or brand. Almost all of the site's revenues are paid back to the platform's makers. The content published on the site serves only the interests of its authors and not those of 3D printer brands who also wish to control the 3D modeling market.

100% secure payment by credit card, PayPal, Apple Pay, Google Pay, etc.
View all payment options.