
Prints (1)
Description
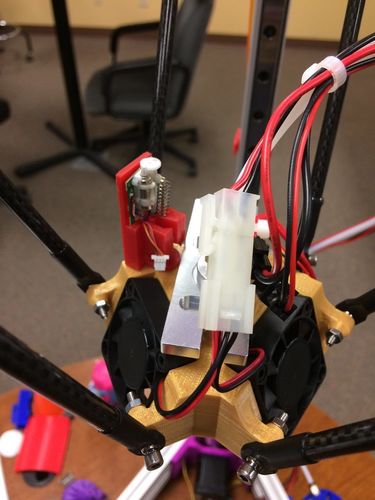
I built this retractable 3.3v z-probe for my latest Kossel-mini which is running a Makerbase SBase controller with Smoothieware.
Needed to complete:
- 1/16" brass rod for probe
- 3.3v micro servo (from nano heli)
- IR Slot sensor Sharp GP1S53VJ000F or similar with 5mm gap
- resistor ~60ohm (needs 35-40ma through LED to saturate the transistor)
- thread or floss
- hot glue gun
- wire and connector
Print the base out at .1 or .2 with 10-25% infill depending on your printer. You may need to drill out the guide hole and you will defiantly need to drill out the lead holes for the IR sensor.
Print the baffle at .1 with an opaque color filament.
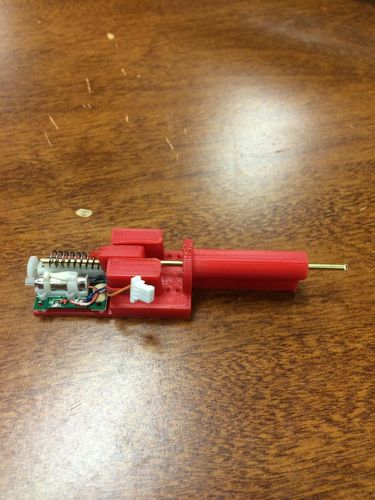
Use your wire cutters and cut the tip off of your brass rod at 90 degrees so you have a sharp edge on the end. Chuck the other end into your drill and use the rod as a drill bit to clean out the hole in the baffle. Once through, run up the speed on the drill for 5-10 seconds to get the plastic hot then let it cool in place to get a nice solid joint. Cut the brass rod to a suitable length, longer than you need to reach the bed. the length will be adjusted later.
Hot glue the servo to the base, then insert the sensor and wire up. It's simple, pin 2 and 4 go to ground. Pin 1 through resistor to 3.3v. pin 3 is signal back to your controller (uses controller pull-up). signal is active LOW. The servo connects as normal 3.3v, GND, and signal. So you have 4 wires from the sensor to your controller.
slide the probe into the guide hole and let it slide to the bottom. The probe should be completely free in the guide since it uses gravity to drop. You can alternately drill out the guide and install a piece of brass tubing if you prefer a tighter fit. Lower the servo then use the thread or floss to tie the servo to the baffle so the servo will pull the probe up out of the way.
You will need to adjust the probe length based on your mounting position. The servo has a 10mm throw and the probe triggers at about 3-4mm. when retracted the probe will be 2-4mm above the nozzle.
Version 2 of this probe will take the place of your JHead for printer setup. I use this probe for setting the Z height before each print. Works perfect and is very accurate.


Comments