Prints (0)
-
No Prints Yet
Be the first to upload a Print for this Design!
Description
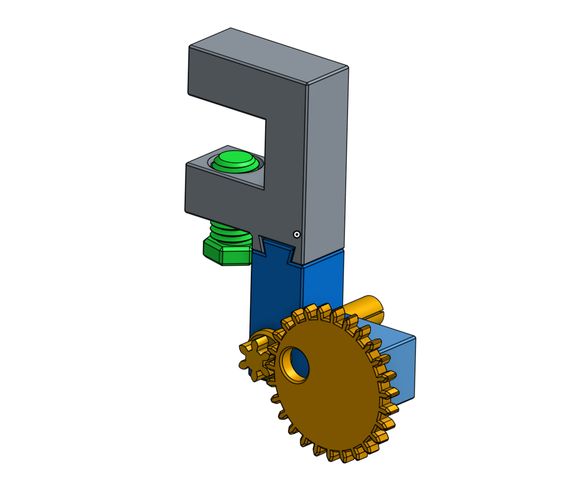
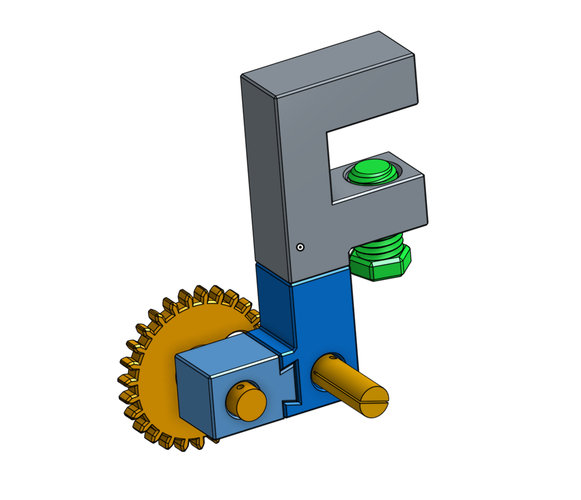
Table Clamp Paper Roller
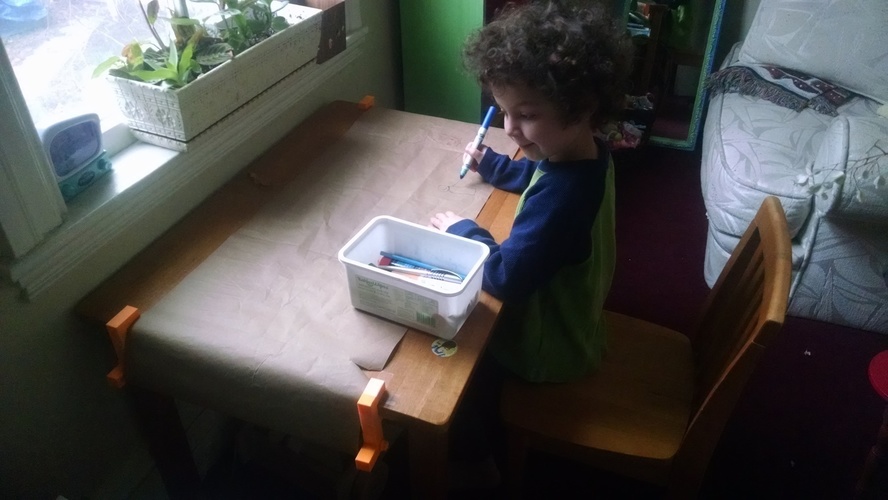
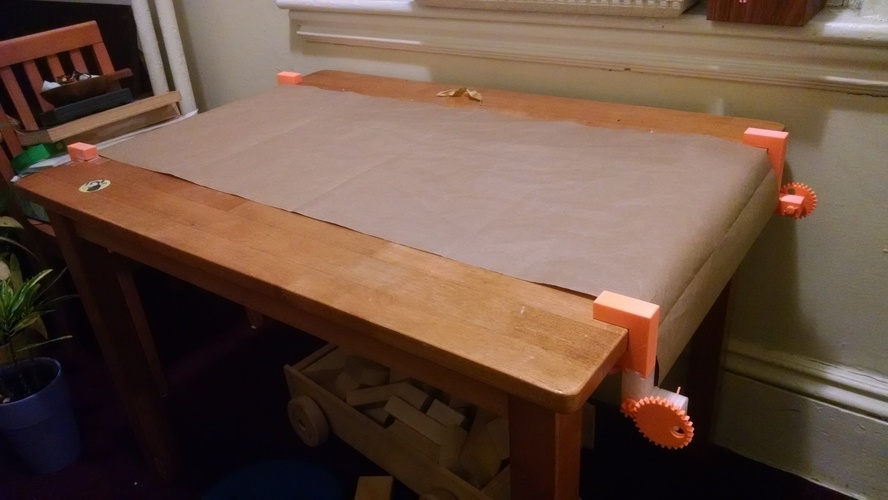
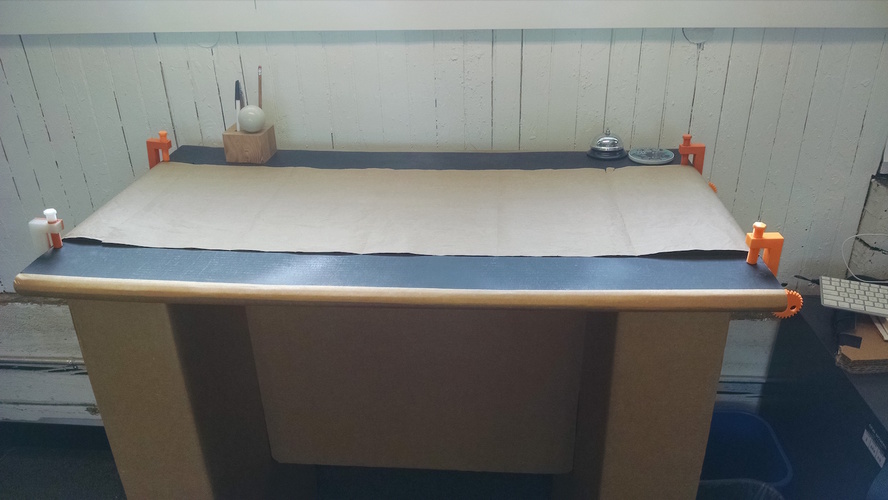
"Table Clamp Paper Roller" is a strange name, but I can't think of anything better to call it. Perhaps the "Roll-o-Tron 5000". It's rollers, that hold rolls of (recycled! from packages!) paper and clamp to any table, turning it into a Table of Maximum Art.
Here are a couple of videos that might help explain how it goes together:
The Idea
My idea was this: so many of the packages that you get in the mail come with giant reams of paper as padding. The folks who stuff packages are (happily) a bit lazy about jamming that paper in there, so it comes mostly intact. If you spend about 1 minute of your time, you can roll that paper up and get a 10-30 meter roll of middlin'-to-great craft paper. I've been compulsively hoarding this paper for some time, wondering what to do with it.
Then it occurred to me: make one of those paper roller tables! With CAD!
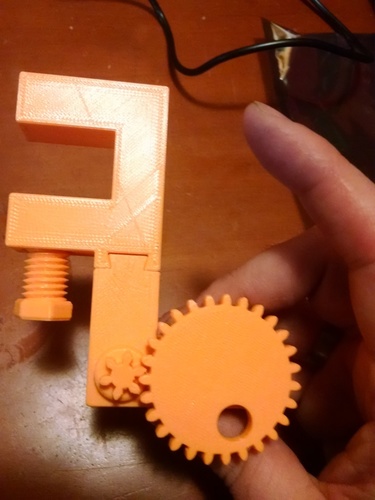
Design Goals My design goal was to create something that would be mechanically useful entirely with 3d-printed parts, and with no external hardware so that if you have a 3d printer, you can make a useful object. I also wanted to create a modular system. For example, if your paper roll is 100mm in diameter rolled up, you might want to extend the roll holder arm, but for my needs I don't need an arm that big. Or you might want to adjust the clamp mouth opening for your table thickness. Or you might want to re-use the clamping setup but design your own part that might clamp to it, such as an electronics vise or something.
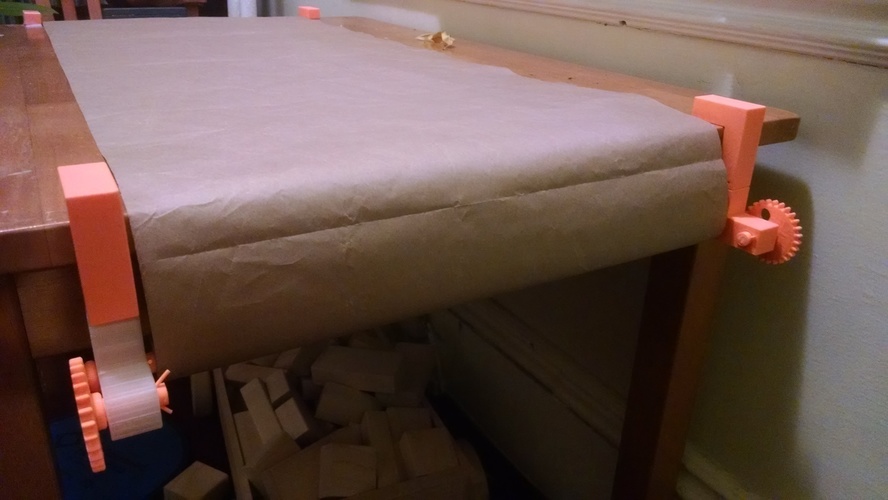
How It Works The way it works is: you print four full sets of parts, two for each side of your table. One end holds the rolled-up roll, and the other end cranks it across the table. The parts clamp to the table, and the assemblies are held together with dovetail joints. The rotating shafts (for the crank and the paper shaft) are kept from sliding out with 1.75mm filament cotter pins - you just break off a piece of filament and jam it through there to hold the assembly in place.
I find that it helps to tape the paper into the end you'll be cranking to get it started.
MOAR VARIABLES I designed the model in Onshape parametrically. You can find that model here. Almost every variable that matters, from the print tolerance and material thickness up to the overall dimensions of each piece, are set up as variables so you (I) can adjust the whole thing to work. I've even included a sketch that lets you create your own involute gears of variable pitch + diameter etc. You might need some familiarity with Onshape if you fiddle too hard (screw threads, for example, tend to be fiddly), but you should get familiar with Onshape anyhow because it is awesome.
The models I'm including here are an iteration that worked for my particular setup - table thickness and paper roll diameter. YMMV if you download those.
Print Settings I used a PrintrBot Simple Metal. It works quite well. I've also printed a set of these on a Type A Machines Series 1 Pro.
I printed these in PLA, on a variety of settings. Generally, if you go with 20-30% infill at 0.2mm (medium) resolution, you'll be fine, though I had luck going faster and thicker on the square parts. I had to print the "crank" at full infill to increase its strength, and I printed the shaft horizontally with supports so that it would have more strength perpendicular to the forces exerted on it. As I mentioned above, I've included factory files so you can see my setup if you've got Simplify3D.
Let me know if you make a print of this! I'd love to see it in the wild!
Comments