
Prints (0)
-
No Prints Yet
Be the first to upload a Print for this Design!
Description
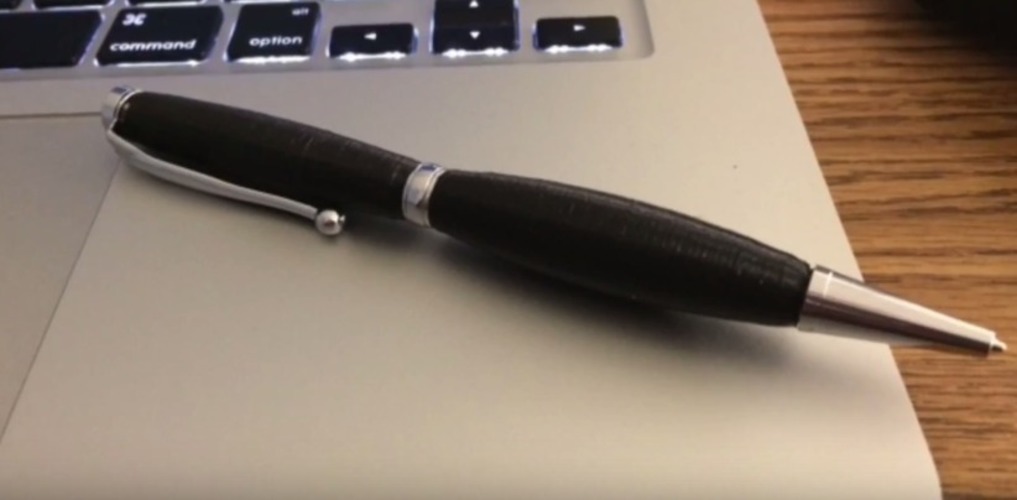
Summary One project I have seen students really take hold of.. literally, is the the Pens that can be turned out of wood or acrylic on a mini lathe. Its something that is pretty quick and easy for students to do and gives them something tangible they can take home after its complete to use or give to a friend or family member. The best part about this project is the pen kids are really inexpensive. Students can complete the whole project for around $2. After teaching this in my own classroom, then getting a 3D printer it wasn't long before I had students designing the Pens on the computer and 3D printing them out and putting them together! Its a quick project, the print time on it is a little less than an hour. Students can design them how ever they want or download one already created! I have more info on this project on my website, including a video of a print, as well as how to purchase the pen kits. www.teach3D.org Thanks! Project: Custom 3D Printed Ink Pen
Objectives: Students will learn the fundamentals of 3D printing and measurement. This lesson can be utilized with students starting with a 3D model on Inventor or your favorite modeling software and customizing it, or they can start from scratch, use a dial caliper and measure the components of the pen and design around them. Content Target: Students will understand that inventor can be used to create 3D objects using the revolve tool. Language Target: Students will demonstrate their understanding of the revolve tool on inventor by using it to design their own custom 3D Ink Pen. Audiences: Students at any grade level would be able to complete this simple 3D print. As long as they have access to a modeling program, computer, 3D printer and the parts to the pen. For younger students assistance on the assembly of the pen may be required. Students 7-12th grade could complete this project on their own. Preparation Students will need a 3D modeling program, computer, 3D printer and a pen kit. The pen kit must be purchased a head of time. You can find them by doing a google search. I purchase mine from www.pennstateind.com. You can also visit my own website at www.teach3D.org for a direct link to purchase the pen kits. Steps! To design your pen you can use any 3D modeling software. Inventor is the most ideal software if available to the school your at. Its free to schools and you can download a version of it here if you don't have one already. In the Tutorial page of the website you can find video tools on who to use Inventor. Another great option is Google Sketch up. You can download a plugin to convert sketch up files into .STL files which are 3D printable. Many schools that are one to one have chosen to use APPLE products and you can download a MAC version of Google Sketch up. It is one of the only programs that is comparable with MAC to create STL files. Download Sketch up for free here.
After you have created the pen you can convert it to an .STL file and print each part. The prints take about on hour per pen. This is a quick project that is inexpensive for students to create and take home with them.
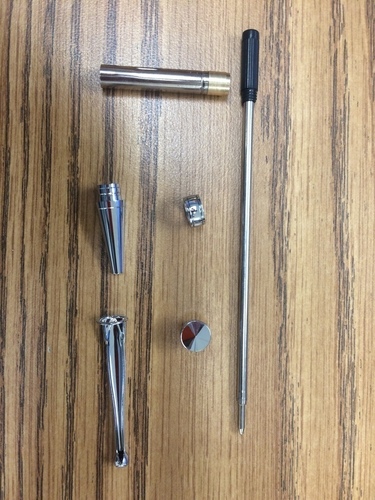
The parts I use for this project are from Penn state industries. They are made fro wood turning however if you measure the parts correctly they were perfect for replace the wood turned parts with 3D printed parts. They are assembled the same way and cost is minimal. Purchase pen kits here. Results The final product should be a fully functional twist action Ink Pen. Grading can be done based on the students ability to design within the given tolerances of the pen parts. You can give them these tolerances or let them measure the parts to find out what they are for themselves. Depending on the age group you may also have them print a dimensioned drawing of the designed pen or as an exploded view. They may also measure and redraw the purchased components for this project. I hope to create a 4 point rubric for this section and will share if I get it done!
Comments