Aller au contenu

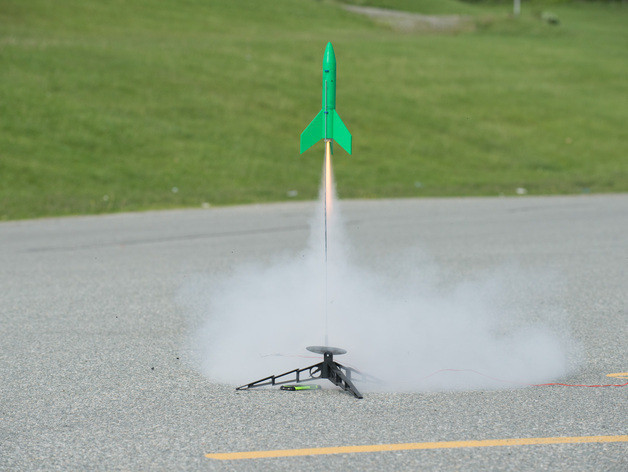
The "Proton MK 1" Model Rocket

Publicité
Publicité
?
Qualité de la création : 5,0/5 (1 vote)
Évaluation des membres sur l’imprimabilité, l’utilité, les détails, etc.

  • 9,2k vues
  • 37 j’aimes
  • 519 téléchargements
  • 1 commentaire

Licence
Format du design 3D
STL Détails du dossier Fermer
  • Engine_Mount_and__Fins.stl
  • Guiding_Hole.stl
  • Main_Body.stl
  • Nose_Cone.stl

En savoir plus sur les formats

Dernière mise à jour 2017-05-25 à 2h00
Date de publication 2015-07-01 à 21h14
Numéro du design 2595

Info sur le fichier 3D

Description du modèle 3D

The "Proton MK 1" is 3D printable model rocket for every one to use!
*More files and images coming soon!

To make this rocket you will also need to purchase the following materials:

1x 18" Nylon Parachute
https://www.allrocketengines.ca/Build/Parachutes/Nylon-Red-18

1x 24mm Motor Holder
https://www.allrocketengines.ca/Build/Motor-Mounts/BT-55-24

1x Elastic Shock Cord
https://www.allrocketengines.ca/Build/Shock-Cords/Ribbon

1x Wadding Paper Pack
https://www.allrocketengines.ca/Accessories/EstesWadding

Some D12-5 or D12-3 Rocket Engines
https://www.allrocketengines.ca/D/D12-5
https://www.allrocketengines.ca/D/D12-3

Optional Materials:

Launch Pad WITH Maxi Rods:
https://www.allrocketengines.ca/Launch-Equipment/Pads/Porta-Pad?cPath=19_150
https://www.allrocketengines.ca/Launch-Equipment/Rods/316

Remote Ignition System:
https://www.allrocketengines.ca/Launch-Equipment/Controllers/Electron-Beam?cPath=19_149

Paramètres d’impression 3D

BUILD INSTRUCTIONS:

Step 1: Print all the required parts (Nose cone, Body, Fin section)
(The guiding holes are optional, but recommended. Also the writing may require supports, but they are a hassle to remove if used.)

Step 2: Glue the body to the fin section with epoxy or the equivalent

Step 3: Glue the engine mount into the fin section, make sure the metal retainer is not glued down. (A rocket engine can be inserted in the mount during the drying process to prevent this)

Step 4: Cut a 1.5' section of your elastic shock cord and glue it to both the inside of the nose cone and body. (Make sure that it is glued in a way that the nose cone and body can be joined)

Step 5 (Optional): If the elastic shock cord snapped on your first launch repeat step 4 for extra strength.

Step 6: Tie all the strands of the parachute in a "Girth Hitch" around
the mid-point of the elastic shock cord.

(File includes 7, but only two are necessary) Step 7: Glue the guiding holes in the gap between two fins, one 1/2" down from the top of the body and one 1/2 above the bottom of the fin section.

Step 8: That's it for the assembly!

PRE-LAUNCH SET UP:

Step 1: Insert 3 sheets of the wadding paper into the body.

Step 2: Fold the nylon parachute tightly and insert it into the body.

Step 3: Take all the loose strands of the parachute or elastic and also insert the into the body.

Step 4: Close the body by joining the nose cone to it. (It is normal for the nose cone to be loose)

Step 5: Insert the engine into the mount.

Step 6: Insert the small igniter in the divot on the bottom of the engine and then also insert the white plug into the divot.

Step 7: Place the guiding holes of your rocket into the guiding rod of the launch pad.

Step 8: Connect the clips of your remote launch system and back up a safe distance.

Step 9: Launch!

Mots-clefs

Publicité


Vous rencontrez un souci avec ce design ? Signaler un problème.

Vous souhaitez soutenir Cults ?

Vous aimez Cults et vous avez envie de nous aider à continuer l’aventure en toute indépendance ? Sachez que nous sommes une petite équipe de 3 personnes et qu’il est donc très simple de nous soutenir pour maintenir l’activité et créer les futurs développements. Voici 4 solutions accessibles à tous :

  • PUBLICITÉ : Désactivez votre bloqueur de publicité (AdBlock, …) et cliquez sur nos bannières publicitaires.

  • AFFILIATION : Réalisez vos achats en ligne en cliquant sur nos liens affiliés ici Amazon.

  • DON : Si vous voulez, vous avez la possibilité de nous faire un don via Ko-Fi 💜.

  • BOUCHE À OREILLE : Invitez vos amis à venir découvrir le site et les magnifiques fichiers 3D partagés par la communauté !


Partager et télécharger sur Cults3D c’est garantir que les designs restent bien entre les mains de la communauté des makers ! Et non celles des géants de l’impression 3D ou du software qui possèdent les plateformes concurrentes et qui exploitent les designs pour leurs propres intérêts commerciaux.

Cults3D est un site indépendant et autofinancé qui n’a de compte à rendre à aucun investisseur ou aucune marque. La quasi totalité des revenus du site sont reversés aux makers de la plateforme. Les contenus publiés sur le site servent uniquement les intérêts de leurs auteurs et pas ceux des marques d’imprimantes 3D qui souhaitent aussi contrôler le marché de la modélisation 3D.

Paiement 100% sécurisé par carte bancaire, PayPal, Apple Pay, Google Pay, etc.
Voir toutes les solutions de paiement.