Skip to content

TPU Ball Cap (Baseball Hat) *Commercial Version*

Advertising
Advertising
?
Creation quality: 0.0/5 (0 votes)
Evaluation of members on the printability, utility, level of detail, etc.

  • 2.3k views
  • 1 like
  • 1 download

License
3D design format
STEP and STL Folder details Close
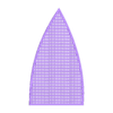
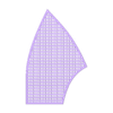
  • Ball Cap - BACK LEFT.stl
  • Ball Cap - BACK RIGHT.stl
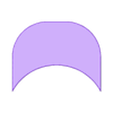
  • Ball Cap - BILL.stl
  • Ball Cap - CLIP FEMALE.stl
  • Ball Cap - CLIP MALE.stl
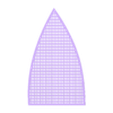
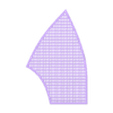
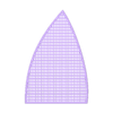
  • Ball Cap - FRONT LEFT.stl
  • Ball Cap - FRONT RIGHT.stl
  • Ball Cap - SIDE LEFT.stl
  • Ball Cap - SIDE RIGHT.stl
  • TPU Ball Cap - Modifiable STEP - Commerical Use.step

Learn more about the formats

Publication date 2022-09-02 at 22:54
Design number 829445

3D printer file info

3D model description

--Commercial Version--

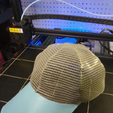
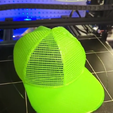
Who hasn't dreamed about printing a TPU Baseball hat?. This hat is designed to be assembled like a regular one made of material, in that the piece are flat and then have to be connected together.

TPU is surprisingly durable, yet very easy to work with. It is surprisingly easy to melt and fuse the pieces together using something like a soldering iron. The melted TPU has a similar consistency of hot glue melted in a hot glue gun. The result is a stunning hat that is hard to tell apart from a store bought one.


Important Note When Buying This Design:

  • If you purchase this design, you will be able to 3D print, modify and sell the physical prints as many times as you like.
  • You are not permitted to sell the digital model file in the original or a modified form.
  • Although this model has been printed and tested many times, there is no guarantee it will fit perfectly together as tolerances will vary depending on filament used and slicer settings. It is provided to you as-is with no warranty implied.

Assembly instructions and tips can be found on my TikTok at the following link: @3dsmurf - TPU Ball Cap Assembly

Here are some additional tips:
1. The pictured green hat is printed 2mm thick but the grey hat (and files) is 1mm think.
2. The green hat was printed in 95a durometer TPU, where the grey one was softer 90a.
3. The 90a is much more comfortable, but in my opinion is too soft for the bill. I suggest using both to get the best of both worlds if possible or change to PLA for the top few layers .
4. For the grey hat, I printed 2-3 layers of PLA on top of the bill which make it easier to bend the bill and have it keep its shape.
5. Overlap the 3mm border of the pieces, start at the bottom and spot weld the pieces together in 10mm increments using a soldering iron (see video above).
6. Smoothing the edges after spot welding is easiest if you hold the hat instead of squishing it flat on a surface because it's very easy to melt the delicate pattern on the hat with the side of your soldering iron.
7. After fusing pieces, while still malleable, I recommend using a wet finger dipped in water and rubbing it flat on a surface to smooth it further (like you would with a hot glue gun).
8. To attach the bill, the easiest method I used was setting the completed main body 'on' the bill (not behind/next to it). Attach it with a small spot weld from top/front in the center, then turn it over and attach the rest working from the center working your way out from the inside/bottom.
8. To bend the bill (if you want to), after the hat pieces were all fused, I used an elastic band to hold it against a form and heated it up with a hair dryer and then let it cool.
a. I just used the metal electric motor on the end of my wood lathe but anything in a diameter you like that won't melt should work.

3D printing settings

Follow your TPU manufacturers recommended settings. No supports needed.

Advertising


Issue with this design? Report a problem.

Would you like to support Cults?

You like Cults and you want to help us continue the adventure independently? Please note that we are a small team of 3 people, therefore it is very simple to support us to maintain the activity and create future developments. Here are 4 solutions accessible to all:

  • ADVERTISING: Disable your banner blocker (AdBlock, …) and click on our banner ads.

  • AFFILIATION: Make your purchases online by clicking on our affiliate links here Amazon.

  • DONATE: If you want, you can make a donation via Ko-Fi πŸ’œ.

  • WORD OF MOUTH: Invite your friends to come, discover the platform and the magnificent 3D files shared by the community!


Sharing and downloading on Cults3D guarantees that designs remain in makers community hands! And not in the hands of the 3D printing or software giants who own the competing platforms and exploit the designs for their own commercial interests.

Cults3D is an independent, self-financed site that is not accountable to any investor or brand. Almost all of the site's revenues are paid back to the platform's makers. The content published on the site serves only the interests of its authors and not those of 3D printer brands who also wish to control the 3D modeling market.

100% secure payment by credit card, PayPal, Apple Pay, Google Pay, etc.
View all payment options.