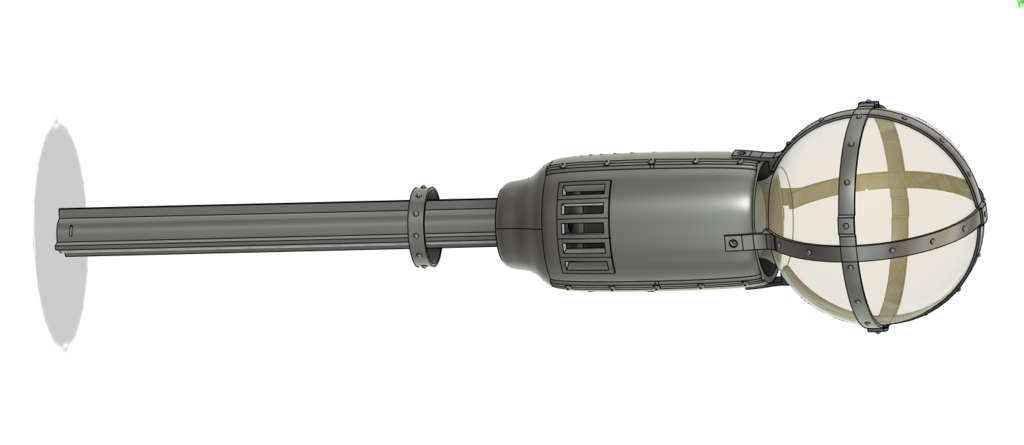
This is a cane for a steam punk costume.
The cane head fits a 3/4" schedule 40 PVC pipe. It is basically a new enclosure for a cheap 3" plasma ball lamp.
Some soldering is required.
Building this requires:
A 3" plasma lamp
A small phillips screwdriver,
5 M3 screws and the hex wrench to drive them.
A panel mount toggle switch (4.5mm radius)
Several lengths of wire
A soldering iron
First print the parts.
The bands were modeled separately so they wouldn't require supports and be stronger. I printed them on their sides and used a brim as they had less surface area. They will have to be glued.
The main body and battery compartment required supports.
The pipe bands are simply for decorating the length of the cane/pipe and are optional.
I painted all my parts brass before assembly.
Disassemble the lamp.
This is an example of the kind of lamp I used:
https://www.amazon.com/dp/B004HFKZAY
All the lamps I've seen consist of a sealed glass globe that is pressure fit into a rubber collar.
This collar is pressure fit (or slightly glued) into a plastic base that contains the circuit board with the power switch, and a battery compartment.
The circuit board has a wire that extends into a tube in the bulb. This wire presses against steel wool (sort of) to distribute the charge and produce a more even effect.
1- VERY gently remove the glass bulb.
It is obviously fragile. Don't break it. Don't lose any of the steel wool from the center tube. Set it aside in the cardboard holder it came in so it doesn't roll off your table...
Also remove and set aside the rubber collar that holds it. We will need it.
2- Disassemble the body
There are four screws in the base and two holding in the circuit board.
Cut the wires to the battery compartment near the batter compartment.
3- Reclaim the battery terminals
The lamp takes 4 AAA batteries. We need the battery terminals that have a single negative terminal (with a spring) and a single positive terminal (with the protrusion). We don't need any of the terminals that have multiple terminals.
Desolder the terminals and they can be easily pulled out with pliers.
Now for assembly
4- Battery holder
- Insert the positive terminal into the small slot at the end of the printed battery holder where the batteries are inserted. This might be difficult if there is too much solder left on the terminal as the slot is intentionally small.
- Insert the negative terminal into the end of the battery holder that screws to the main body.
- Solder a long red wire to the tab on the positive terminal that is now outside of the battery holder. The wire needs to be long enough to extend the length of the battery holder, into the main body, and with enough slack to go through the main body.
- Solder a shorter black wire to the negative terminal tab. It should extend through the main body to about the same distance as the positive wire.
- Pass the wires through the off-center hole in the base of the main body.
- Use an M3 screw to affix the battery holder to the main body.
5- Switch
- Make sure the switch on the circuit board is turned on. We aren't going to use it but it need to be on.
- Solder one side of the new switch to the positive batter wire
- Solder the other side of the switch to the positive wire on the circuit board
- Insulate the solder connections with electrical tape or heat shrink tubing
- Mount the switch in the body
This was a little tricky and require pliers just because the switch hole is at the bottom of the body.
6- Circuit board
- Solder the negative battery wire to the negative wire on the circuit board.
- Insulate it.
At this point you can insert batteries and test your wiring.
DON'T GET TOO CLOSE TO THE CIRCUIT BOARD!!
It won't kill you but it can give you a painful shock and possibly a small burn.
When the bulb is placed over the wire from the circuit board you should see the plasma ball effect.
- Insert the circuit board into the body
It should be fully inserted and not in contact with the switch. The board components should be facing the grate for ventilation.
7- Bands
At this point, you should be able to insert the rubber collar and gently push the bulb into the collar. When your switch is on the plasma effect should work. However it can't be used as a cane because the bulb is only pressure fit and will come out with very little force.
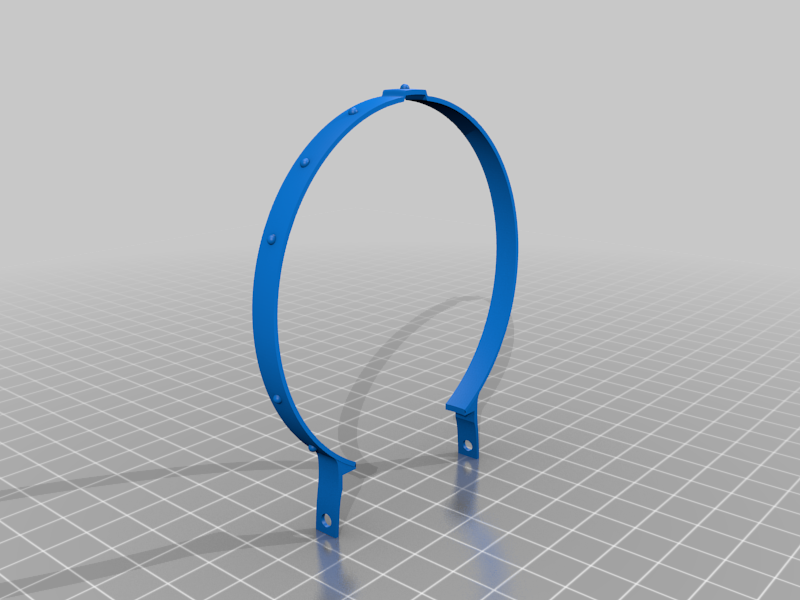
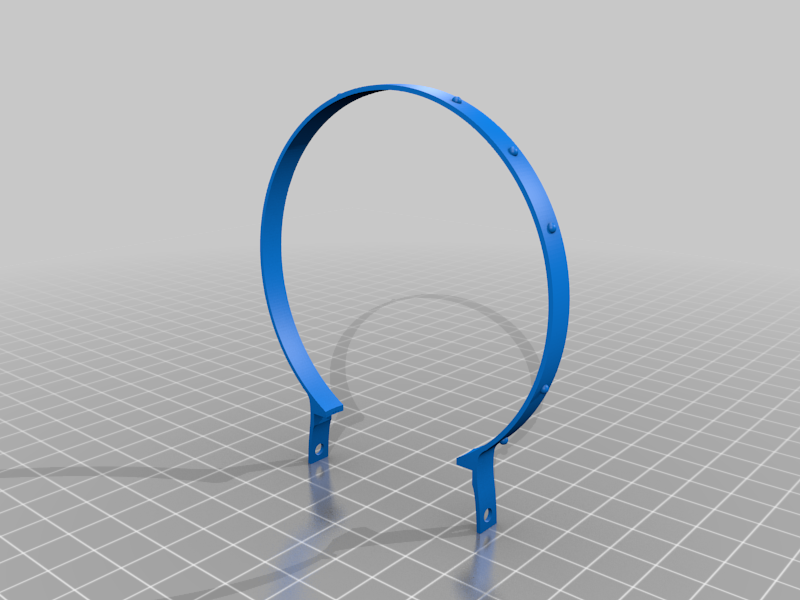
- Assemble the bands into a cage as in the pictures.
The top vertical band fits over the center of the vertical band where its rivet is missing.
Use a drop of super glue to permanently attach them.
The horizontal band fits over the center of all four legs of the vertical bands. They are also missing rivets in those spots.
- Fit the cage to the bulb
The cage should be flexible enough to gently push it over the bulb
- Screw on the cage
4 M3 screws affix the legs of the cage to the matching holes in the body.
The bulb is now secure. It is still fragile but it won't come off on its own.
Enjoy your steampunk costume accessory!
:format(webp)/https://fbi.cults3d.com/uploaders/24827967/illustration-file/d1b19757-1791-4400-bc2a-86990438ce5d/IMG_20220622_120245053.jpg)


/https://preview3d-images.cults3d.com/t7ismi70tcu9tcx6ho8k4roivm11)
/https://preview3d-images.cults3d.com/0flwl3b1327aondzpx07mvy8vru5)
/https://preview3d-images.cults3d.com/syqodlxoxkd9t9h665gbmfc92cj8)
/https://preview3d-images.cults3d.com/zj2nt0p0r3v8trsd57g73gml71ti)
/https://preview3d-images.cults3d.com/7tyvcq63fcsw0judxshfdyg6s4u8)
/https://preview3d-images.cults3d.com/jf2ig9y6nte5hi2xu0ekxjfxijd2)


