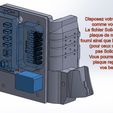
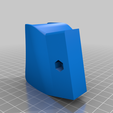
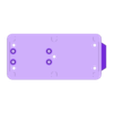
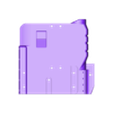
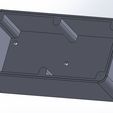
Bouclier/support Hub USB3 / alimentation pour la commande a distance des montures Celestron NexStar Evolution 6/8/9 pour astrophotographie.
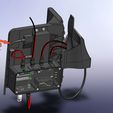
J'ai créer ce " Bouclier / support" car je désirais équiper mon C9 Evolution pour l’astrophotographie planétaire tout en pouvant le commander a distance (8 mètres chez moi) et je voulais centraliser le matériel et simplifier le câblage.
J'ai d'abord créer une version adaptée a mes besoin avec le matériel que j'avais déjà a disposition , puis je me suis dit que mon système pourrais intéresser d'autres personnes qui n'avais peut être pas le même matériel alors j'ai décidé de décliner mon système en trois versions:
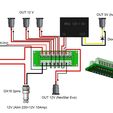
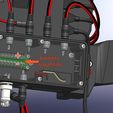
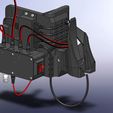
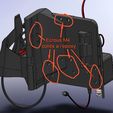
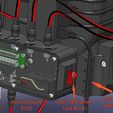
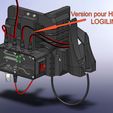
Version 1 : Ma version , qui comprends un Hub usb3 Logilink (4 ports) pour piloter une caméra ASI224mc , un focuser ZWO EAF ( support disponible ici : https://www.thingiverse.com/thing:4191869 ) et a l'avenir une deuxième camera avec un champ plus grand. J'ai fait un petit Hub d'alimentation qui reparti le 12v sur 4 sorties ( 1 pour la monture , 1 pour d’éventuelles résistances chauffantes , 1 pour le focuser et 1 supplémentaire) . Dans ce hub j'ai ajouté un régulateur 12v>5V qui alimente le hub usb.
L'alimentation principale viens d'un bloc 220v>12v 10 amp. fixé sur les trepied de la monture. Le 12v arrive au hub d'alimentation par une prise type GX16 2pins vissante.
le hub usb est relié au PC par une rallonge active de 7.5m.
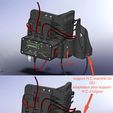
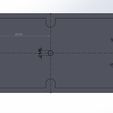
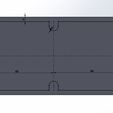
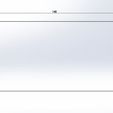
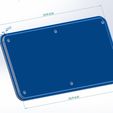
Version 2 : Dans cette version , aucun matériel définit !! Vous pouvez y monter vos propres périphériques via une "plaque de montage". Le bouclier est légèrement plus grand que la version 1. Je fourni le fichier SolidWorks de cette plaque pour que vous puissiez l'adapter a vos besoins. Pour ceux qui ne dessine pas avec SolidWorks , les cotes sont fournies également.
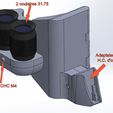
Version 3: Cette version est minimaliste , pour ceux que la commande a distance n’intéresse pas et qui désire simplement avoir leur raquette de commande sur la monture plutôt que sur un pied ( pas pratique , tire sur le câble...), avec en prime un petit support pour 2 oculaires en 31.75 mm ( ou tout autre accessoires que vous dessinerez en vous servant des 2 trous de fixations du support)
Les 3 versions ont en commun:
1) la fixation au bras de la monture , elle se fait avec 2 sangles VELCRO de 30 cm de long et 20 mm de large (Amazon)
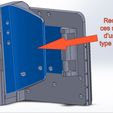
2) il sera nécessaire de collé dans la face intérieure du bouclier un tissus un peu épais type " feutre" pour protéger la monture et absorber les petites irrégularités ou éventuels petits défauts de conception. Une fois les sangles serrées je vous assure que rien ne bouge !.
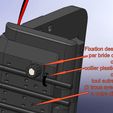
3) Pour posez votre raquette de commande vous avez le choix entre un support complet ou un adaptateur qui pourra recevoir le support d'origine de votre raquette. Les 2 se fixent au bouclier avec une vis CHC M5
4) Les versions 1 et 2 reçoivent des écrous M4 dans la face intérieure (pour la fixation du matériel ou de la plaque de montage) qu'il conviendra de coller avant la pose du tissu de protection . j'ai personnellement utilisé de la colle époxyde 2 composants.
Note 1:
Pour ma version (V1) et le hub d'alimentation j'ai fait très simple. Utilisez des borniers a souder sur un petit morceau de PCB de prototypage. Une rangée pour distribué le +12v et une deuxième pour la masse. Reliez les Jack femelles. Faites passer le +12v par l'interrupteur avant d'arriver au bornier !. Il peut être nécessaire d’insérer une diode (bsv 3amp ou 1N4001 ou autre , elle doit supporter 3 Amp) juste avant la prise jack qui alimente le hub usb car lorsque l'on branche le câble qui vient du pc , celui-ci amène du 5v qui peut remonter dans le circuit !.
Je fourni le fichier SolidWorks du boitier d'alimentation pour que vous puissiez l'adapter a votre materiel ( toutes les cotes importantes sont fournies pour ceux qui ne dessine pas avec SolidWorks).
La place est réduite dans le boitier mais j'ai monté tout le circuit dans plus petit ! ( ma version étant légèrement différente de celle que je publie car je l'ai créer étape par étape et je publie une version sans les erreurs de conception ;) !)
Note 2:
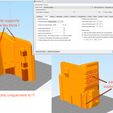
dans les fichier j'ai créer quelques copies d’écran pour les paramétrés d'impression. Vous verrez que je privilégie 4 périmètres et des dessus/dessous assez épais , ainsi qu'un remplissage assez conséquent. Mieux vaut que cela soit solide !.
J'indique également là ou il faut mettre des supports et ou il ne faut pas en mettre ( trous de vis par ex. car trop difficiles voir impossible a retirer)
Note 3: les fichiers des V2 et V3 sont inclus ( V2 Files.rar , V3 Files.rar)
Note 4:
Au besoin ( vraiment au besoin) je vous modifierai/creerai une piece sur votre demande , en m'expliquant précisément vos besoins
Le matériel ( Version 1):
LogiLink UA0149 Hub USB 3.0 4 Ports
https://www.amazon.fr/Logilink-UA0149-Hub-Ports-Noir/dp/B0096XW86Q/ref=sr_1_7?
adgrpid=56503192032&gclid=EAIaIQobChMInvHprKWB6AIVgoXVCh1wmw_3EAAYASAAEgI-
FvD_BwE&hvadid=275379121582&hvdev=c&hvlocphy=9055110&hvnetw=g&hvqmt=e&hvrand=14885001444023581958&hvtargid=kwd-
314038538371&hydadcr=7530_1753042&keywords=hub+usb+logilink&qid=1583341140&sr=8-7
borniers
https://www.amazon.fr/SODIAL-poles-distance-Bornier-250V/dp/B00I00OHHY/ref=pd_rhf_se_s_pd_crcd_0_1/260-9576082-3602644?
_encoding=UTF8&pd_rd_i=B00I00OHHY&pd_rd_r=74506adf-1e0b-41aa-bd10-eccf67dbbc58&pd_rd_w=kadEe&pd_rd_wg=MAXiT&pf_rd_p=8ca8d042-f0d8-
48df-9f97-9b353e14887b&pf_rd_r=RDDBCHMMZ4CX3EWKQ0R9&psc=1&refRID=RDDBCHMMZ4CX3EWKQ0R9
alimentation
https://www.amazon.fr/gp/product/B07WRR8N6V/ref=ppx_yo_dt_b_asin_title_o04_s00?ie=UTF8&psc=1
GX16 2pins
https://www.amazon.fr/gp/product/B07JMYCPSN/ref=ppx_yo_dt_b_asin_title_o04_s00?ie=UTF8&psc=1
regulateur DC 12v 24v à 5v Step Down
https://www.amazon.fr/gp/product/B07Q9PSFG1/ref=ppx_yo_dt_b_asin_title_o04_s00?ie=UTF8&psc=1
MutecPower Câble USB 3.0
https://www.amazon.fr/gp/product/B01BLPSUTA/ref=ppx_yo_dt_b_asin_title_o08_s00?ie=UTF8&psc=1
inter 28x10
https://www.amazon.fr/SODIAL-Interrupteur-bascule-Lumineux-Bipolaire/dp/B00WW1E466/ref=sxbs_sxwds-stvp?__mk_fr_FR=%C3%85M
%C3%85%C5%BD%C3%95%C3%91&cv_ct_cx=interrupteur+bascule&keywords=interrupteur+bascule&pd_rd_i=B00WW1E466&pd_rd_r=001f1759-00e0-46fd-
a25b-0e53dcb53416&pd_rd_w=9R35Q&pd_rd_wg=IKkRP&pf_rd_p=b5ee69d3-6381-4897-8a23-
e5b0b965bfb9&pf_rd_r=MQA9K48B0Y2PKERY0HV3&psc=1&qid=1583079767
support led
https://www.amazon.fr/50Pcs-Douilles-Lampe-Cun%C3%A9iforme-Plastique/dp/B07LD7W2PC/ref=pd_rhf_dp_s_xc_sdp_dp_1_8?
_encoding=UTF8&pd_rd_i=B07LD7W2PC&pd_rd_r=da65dcd1-919e-4a4b-b57b-e10bf080317c&pd_rd_w=GxWMs&pd_rd_wg=H5DpK&pf_rd_p=57ac5d37-6dea-
4ee2-8e9c-c5155be204d6&pf_rd_r=QNYH7F9K4QGY1V3FC33S&psc=1&refRID=QNYH7F9K4QGY1V3FC33S
jack femelle, 5,5 x 2,1 mm, avec bouchon étanche à la poussière
https://www.amazon.fr/HSeaMall-connecteur-adaptateur-bouchon-poussi%C3%A8re/dp/B076MPR75F/ref=sr_1_6?__mk_fr_FR=%C3%85M%C3%85%C5%BD
%C3%95%C3%91&crid=11LJX1PA0Q8CY&keywords=jack+5.5+2.1&qid=1583341212&sprefix=jack+5.%2Caps%2C154&sr=8-6
jack Mâle 5.5x2.1mm
https://www.amazon.fr/Durable-5-5x2-1mm-Femelle-Connecteur-Kaemma/dp/B07X9BFMJ6/ref=sr_1_18?__mk_fr_FR=%C3%85M%C3%85%C5%BD
%C3%95%C3%91&crid=11LJX1PA0Q8CY&keywords=jack+5.5+2.1&qid=1583341212&sprefix=jack+5.%2Caps%2C154&sr=8-18
GOOGLE TRANSLATE (sorry)
Shield / USB3 Hub support / power supply for remote control of Celestron NexStar Evolution 6/8/9 mounts for astrophotography.
I created this "Shield / support" because I wanted to equip my C9 Evolution for planetary astrophotography while being able to control it remotely (8 meters at home) and I wanted to centralize the equipment and simplify the wiring.
I first created a version adapted to my needs with the material I already had available, then I said to myself that my system could interest other people who may not have the same material then I have decided to decline my system in three versions:
Version 1: My version, which includes a Usb3 Logilink Hub (4 ports) to control an ASI224mc camera, a ZWO EAF focuser (support available here: https://www.thingiverse.com/thing:4191869) and in the future a second camera with a larger field. I made a small Power Hub which distributed the 12v on 4 outputs (1 for the mount, 1 for possible heating resistors, 1 for the focuser and 1 additional). In this hub I added a 12v> 5V regulator which powers the usb hub.
The main power comes from a 220v> 12v 10 amp block. fixed on the tripods of the frame. The 12v arrives at the power hub by a GX16 2pin screw socket.
the usb hub is connected to the PC by an active 7.5m extension cable.
Version 2: In this version, no hardware defines !! You can mount your own devices there via a "mounting plate". The shield is slightly larger than version 1. I provide the SolidWorks file of this plate so that you can adapt it to your needs. For those who do not draw with SolidWorks, dimensions are also provided.
Version 3: This version is minimalist, for those who are not interested in remote control and who simply wants to have their control racket on the mount rather than on a stand (not practical, pulls on the cable ...), with as a bonus a small support for 2 eyepieces in 31.75 mm (or any other accessories that you will draw using the 2 fixing holes of the support)
The 3 versions have in common:
1) attachment to the arm of the frame, it is done with 2 VELCRO straps 30 cm long and 20 mm wide (Amazon)
2) it will be necessary to glue a slightly thick "felt" type fabric to the inside of the shield to protect the frame and absorb small irregularities or possible small design flaws. Once the straps are tightened I assure you that nothing is moving!
3) To put down your control racket, you have the choice between a complete support or an adapter which can receive the original support of your racket. The 2 are fixed to the shield with a CHC M5 screw
4) Versions 1 and 2 receive M4 nuts on the inside (for fixing the hardware or the mounting plate) which must be glued before installing the protective fabric. I personally used 2-component epoxy glue.
Note 1:
For my version (V1) and the power hub I made it very simple. Use soldering terminals on a small piece of prototyping PCB. One row for distributed + 12v and a second for ground. Connect the female Jacks. Pass the + 12v through the switch before arriving at the terminal block! It may be necessary to insert a diode (bsv 3amp or 1N4001 or other, it must support 3 Amp) just before the jack that supplies the usb hub because when you connect the cable from the pc, it brings of the 5v which can go up in the circuit!.
I provided the SolidWorks file of the power supply unit so that you can adapt it to your equipment (all important dimensions are provided for those who do not draw with SolidWorks).
The space is reduced in the box but I mounted the whole circuit in a smaller one! (my version is slightly different from the one I publish because I created it step by step and I publish a version without design errors;)!)
Note 2:
in the files I created some screenshots for the print settings. You will see that I favor 4 perimeters and fairly thick top / bottom, as well as a fairly substantial filling. Better that it is solid!
I also indicate where it is necessary to put supports and where it should not be put (screw holes for example because too difficult see impossible to remove)
Note 3: files for V2 and V3 are included (V2 Files.rar, V3 Files.rar)

/https://fbi.cults3d.com/uploaders/16327872/illustration-file/99b0f411-1d37-490a-a069-d09c8ef90986/01.jpg)



![1B Porarnttves FFF nm duoc: Peet ese unprofi: [poRARS rede) YY itr rot Prantve nro Pourcentage de remokssage | in 20% (lndreleradeau [Extwdese | cout | Adatens | Renelsone | Stperi | Tenotanse | Refidssenent | cose | sees | Wi ‘aare_[_avencis Paondves de cecre Puanéves cel pence cute Sereese code [rear Bere = Haut detaorenize cute iS turer deo eae srt 0,200 fine lanes hase ees dela premérecoote 31 Coudessedesantines 6 z courier nfioewes 6 a Pons de dour comes eencpienive 4 er der pants pr stores pe tle pms eis rs deem meer aieine (© pte pants de doe pola ese deeesion ls » Goer in pant prt aks sd feroenent ce srereeles ow bes spaces sueneterent sans eptnsaton Mode imprest dun cna ung n teu ide vase) woo) v: (i600 [2] am USB3 / Power HUB shield for NexStar Evolution 6 / 8 / 9](https://images.cults3d.com/CNCjZ__d1ZlGhU7FF5onjSLaoAU=/113x113/top/https://fbi.cults3d.com/uploaders/16327872/illustration-file/3f1af54b-a4a7-4269-8061-09ac1c3879d9/settings_print_adaptateur_HC.JPG)
