Skip to content

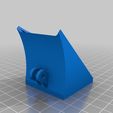
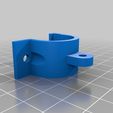
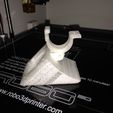
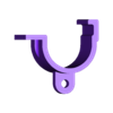
Robo3D X carriage bracket and fan duct

Advertising
Advertising
?
Creation quality: 0.0/5 (0 votes)
Evaluation of members on the printability, utility, level of detail, etc.

  • 376 views
  • 1 download
  • 1 make

License
3D design format
Folder details Close
  • Robo3D_X_Carriage_bracket_4d.stl
  • Robo3D_X_Carriage_bracket_4d_duct.stl

Learn more about the formats

Publication date 2022-09-11 at 03:46
?
Published to Thingiverse on: 2014-03-13 at 12:08
Design number 840503

3D printer file info

3D model description

EDIT: please see the newer revised edition here that is suitable for the Hexagon hotend. http://www.thingiverse.com/thing:431160

During my 3D printing learning curve I found the requirement for ducted fan to achieve better prints and to successfully bridge. Since the Robo3D there wasn't any suitable fan ducts available on Thingiverse so I decided to try my hand at 3D CAD and design one, needless to say yet another steep learning curve.

This is my first design and I wanted to share it as I feel the bracket is a great solid fit for the Robo3D and I want it to help spawn some great fan ducts for the Robo.

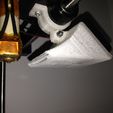
This duct fits with the E3D v5 nicely. To fit the standard hotend some tweaking is required (I had to file the duct bracket holes downwards a bit and some off the top of the duct brackets so the duct could mount to the X carriage bracket a bit higher, some users have heated the top of the duct and pushed the mounting point downwards).

I hope you find this useful and that it assists in producing other/better fan ducts for the Robo3D.

3D printing settings

Printed in PLA at 0.3 mm with 2 perimeters, 2 layers top/bottom, 25% infill.

My fan duct print had some issues before it finished so it's about 5mm shorter than the design.

Print the bracket on its side with support.

Print the duct on the fan attachment end with no support.

Drill the 4 duct fan mounting holes out with a 2.5mm drill bit.

Do some test fits if mounting with the stock hotend.

The X carriage bracket mounts on either side of the X carriage. Unbolt the stock fan and it's bracket then slide the bolt hole end of the new bracket on to the X carriage first then clip the bracket to the outside of the X carriage. The bracket will flex a little. Test fit the fan duct and make sure you have 2 or 3 mm clearance when the hot end is Z calibrated to the bed so you can slightly tilt it down towards the nozzle. Once fitted attach the fan with the stock bolts, you'll need to drill out the 4 fan mounting holes with a 2.5mm bit for the stock bolts to simply screw in. Then mount the duct to the bracket and check it's height and you're ready to do a test print.

Advertising


Issue with this design? Report a problem.

Would you like to support Cults?

You like Cults and you want to help us continue the adventure independently? Please note that we are a small team of 3 people, therefore it is very simple to support us to maintain the activity and create future developments. Here are 4 solutions accessible to all:

  • ADVERTISING: Disable your banner blocker (AdBlock, …) and click on our banner ads.

  • AFFILIATION: Make your purchases online by clicking on our affiliate links here Amazon.

  • DONATE: If you want, you can make a donation via Ko-Fi πŸ’œ.

  • WORD OF MOUTH: Invite your friends to come, discover the platform and the magnificent 3D files shared by the community!


Sharing and downloading on Cults3D guarantees that designs remain in makers community hands! And not in the hands of the 3D printing or software giants who own the competing platforms and exploit the designs for their own commercial interests.

Cults3D is an independent, self-financed site that is not accountable to any investor or brand. Almost all of the site's revenues are paid back to the platform's makers. The content published on the site serves only the interests of its authors and not those of 3D printer brands who also wish to control the 3D modeling market.

100% secure payment by credit card, PayPal, Apple Pay, Google Pay, etc.
View all payment options.