Skip to content

FabScanPi Cooling Duct

Advertising
Advertising
?
Creation quality: 0.0/5 (0 votes)
Evaluation of members on the printability, utility, level of detail, etc.

  • 336 views

License
3D design format
Folder details Close
  • FabScanPi_Cooling_Duct_01_1x.stl
  • FabScanPi_Cooling_Duct_02_1x.stl
  • FabScanPi_Cooling_Duct_03_2x_50.stl
  • FabScanPi_Cooling_Duct_04_2x_25.stl

Learn more about the formats

Publication date 2022-09-12 at 19:43
?
Published to Thingiverse on: 2018-12-28 at 17:54
Design number 843011

3D printer file info

3D model description

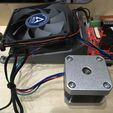
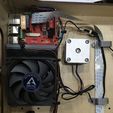
Nachdem ich Temperaturprobleme, wie z.B. stehenbleiben des Schrittmotors, bei meinem FabScanPi hatte, habe ich mir eine Aktive Kühlung entworfen.

Es kann sein, dass Ihr das Stromkabel der Kamera um ein paar Zentimeter verlängern müsst.

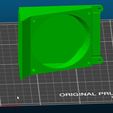
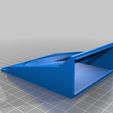
Die Lüfteraufnahme ist für einen 80 mm Lüfter designed.

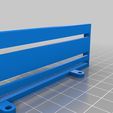
Die Blende muss mit Support gedruckt werden, der Rest geht ohne.

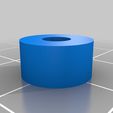
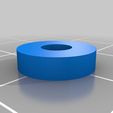
Die Unterlegscheiben sind für das Lüftergehäuse gedacht, entweder braucht Ihr die 5 mm oder die 2,5 mm. Das müsst Ihr ausprobieren. Im Regelfall passen die 2,5 mm.

Um die Wärmeabfuhr des Treibers zu verbessern solltet Ihr einen Kühlkörper verwenden.

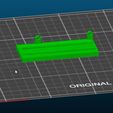
Die Blende wird mit an den Bohrungen des Raspi befestigt. Die vorhandenen Abstandhalter werden hierfür einfach entfernt und durch die Laschen der Blende ersetzt.

Zusätzlich werden 2 Schrauben mit Unterlegscheiben und Muttern zur Befestigung des Lüftergehäuses benötigt.


English translation:
After I had temperature problems with my FabScanPi, e.g. stopping of the stepper motor, I designed an active cooling system.

You may have to extend the power cable of the camera by a few centimeters.

The fan mount is designed for an 80 mm fan.

The aperture must be printed with support, the rest goes without.

The washers are for the fan housing, either you need the 5 mm or the 2.5 mm. You have to try that. Usually the 2.5 mm fit.

To improve the heat dissipation of the driver you should use a heat sink.

The cover is attached to the holes of the Raspi. The existing spacers are simply removed for this and replaced by the lugs of the bezel.

In addition, 2 screws with washers and nuts are required to fix the fan housing.

3D printing settings

-

Advertising


Issue with this design? Report a problem.

Would you like to support Cults?

You like Cults and you want to help us continue the adventure independently? Please note that we are a small team of 3 people, therefore it is very simple to support us to maintain the activity and create future developments. Here are 4 solutions accessible to all:

  • ADVERTISING: Disable your banner blocker (AdBlock, …) and click on our banner ads.

  • AFFILIATION: Make your purchases online by clicking on our affiliate links here Amazon.

  • DONATE: If you want, you can make a donation via Ko-Fi 💜.

  • WORD OF MOUTH: Invite your friends to come, discover the platform and the magnificent 3D files shared by the community!


Sharing and downloading on Cults3D guarantees that designs remain in makers community hands! And not in the hands of the 3D printing or software giants who own the competing platforms and exploit the designs for their own commercial interests.

Cults3D is an independent, self-financed site that is not accountable to any investor or brand. Almost all of the site's revenues are paid back to the platform's makers. The content published on the site serves only the interests of its authors and not those of 3D printer brands who also wish to control the 3D modeling market.

100% secure payment by credit card, PayPal, Apple Pay, Google Pay, etc.
View all payment options.