3D model description
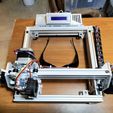
A few days ago a friend of mine asked me help with laser engravers for wood; it was not satisfied looking at that chinese engravers, too "light weight" and too big (his needs were for 150x150mm max). Wow, that's a new experience for me after printers and CNC carvers!
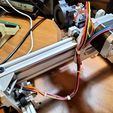
With the help of Tinkercad I realized this tiny engraver.
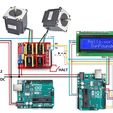
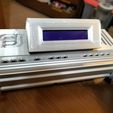
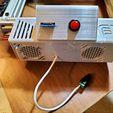
The most interesting part is that features an LCD1602 and an SD reader, so you don't need anymore PC and USB cable.
The second interesting part is that it uses two Arduino Uno, not the usual couple Arduino Uno/Arduino Mega; several bucks less.
I designed a blower too, having read this is the best solution to avoid black smears on wood.
It took some time to realize a simple and versatile software; I googled around but I found only few codes, working and not working, but no one satisfied my needs.
So, a function there, a function here, I realized my own code, simple and effective.
As you can see, after job done it resets and asks again for SD; this way you don't need to shut down and restart.
There's anyway a little limit: on SD card must reside just one file and no directories; no one is perfect, sorry!
To build a larger one you'll have only to buy 2040 profiles of desired length...
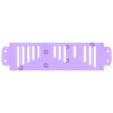
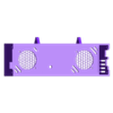
All items are shown in printing position.
Well, that's all, I hope you'll find it interesting!
You can see it in action at https://dai.ly/k3X64BG665tSfhySUrc
and
https://dai.ly/k3X64BG665tSfhySUrc
======== UPDATES ========
2023-07-11
Uploaded LASER_2020.ZIP with remixed items needed to build the engraver with 2020 profiles
2022-09-14
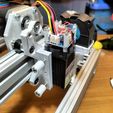
Uploaded brand new laser support with focusing much more easy with the aid of a screw.. See new images above.
2022-09-16
Uploaded brand new focusing_tool.stl; it helps very much to focusing the laser, the lenses block sometime is difficult to rotate with two fingers...
2022-09-21
Uploaded brand new X_carriage_laser_side_30mm/33mm/35mm I forgot to upload, sorry.
BOM
- n. 1 green lenses for lasers, MANDATORY!!! if you love your eyes...
- n. 2 Arduino Uno
- GRBL 1f (ZIP grbl-1.1f.20170801)
- n. 1 Arduino CNC shield
- n. 1 LCD1602 I2C
- n. 1 12VDC 10A power supply (the chinese ones are good and cheap)
- n. 3 nema17
- n. 1 laser (30, 33 or 35mm size), power at your choice
- n. 1 12V mini radial blower
- n. 1 12V 40mm fan
- n. 1 momentary button switch (emergency halt)
- n. 8 24mm wheels
- n. 4 mini wheels
- n. 6 eccentric nuts for wheels
- n. 14 M5x10mm spacers
- iron core 6mmx2 belt (white)
- plastic cable chain
- n. 1 DPDT mini switch ON-OFF
- n. 1 MGN12C rail slide
- n. 1 rail 65mm length
- n. 1 M3x60mm screw
- n. 2 m3 nuts nyloc
- n. 1 M3x5mm knurled nut
- n. 2 M3 washers
INSTRUCTIONS
- flash both GRBL and my code removing the RX/TX connection; Arduino Uno has only one serial port and leaving them in place leads to trouble otherwise. Connect them again after flashing
when powered up, GRBL takes the physical position of laser as its X0 and Y0 coordinates, so, once the object to be engraved is positioned on bed, before inserting the SD card manually move the laser to what is YOUR IMAGE X0 Y0 position
WEAR LENSES BEFORE ANY OPERATION, You've only two eyes!!!
before engraving you've to focus the laser, of course; You can do that sending the commands:
M4S0
S300
......
loose laser locking screws, focus the laser (moving up and down) to obtain the smallest possible spot (google for "focusing laser" for more info), lock in place the laser
.....
M5 S0
If you want to use PC to send G-Code, use the switch to cut-off RX/TX wiring.

/https://fbi.cults3d.com/uploaders/15451373/illustration-file/950851ad-6bce-49a1-b10f-a2cdb8e71c15/IMG20220913121532.jpg)
