Skip to content

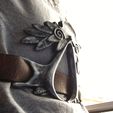
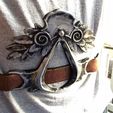
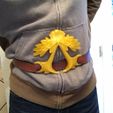
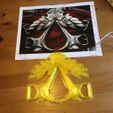
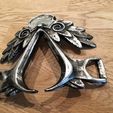
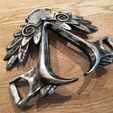
Assassin Creed Belt Buckle

Advertising
Advertising
?
Creation quality: 5.0/5 (1 vote)
Evaluation of members on the printability, utility, level of detail, etc.

  • 5.4k views
  • 14 likes
  • 203 downloads

License
3D design format
Folder details Close
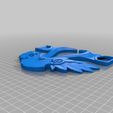
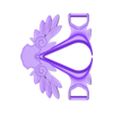
  • AssassinBeltBuckle.stl

Learn more about the formats

3D model size X 150 Γ— Y 180 Γ— Z 14 mm
Publication date 2022-09-16 at 23:52
?
Published to Thingiverse on: 2016-11-11 at 01:26
Design number 848905

3D printer file info

3D model description

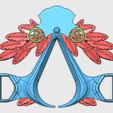
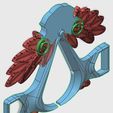
Designed this for a friend that is making a full costume. He is going to drill out the jewel and glue in a fake gem, but you can also paint it with red nail polish.

Printed in PETG. I used 0.2mm layer height but you can use lower if you are patient. Don't use larger.

Instructions:
-Print file and remove brim
-Clean up any "zits" or artifacts on the part
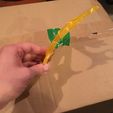
-Curve the flat belt buckle (optional):
-preheat the oven to 400F (205C)
-place buckle in a baking dish lined with Aluminum foil
-put part in oven to soften ~2-3 minutes
-watch constantly, if the thinnest areas get shiny take it out
-lift it by the aluminum foil and place it on a large curved surface (I used a propane tank)
-use oven gloves and press the buckle to shape
-pay attention to the lower A section to make sure the two points are still in alignment and aren't twisted. Mine were slightly off so I heated them with lighter and fixed them.
Painting (optional):
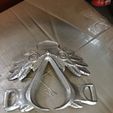
-paint with a metallic grey paint and primer spray
-spray at all angles and apply 3-4 coats, but not too much in one coat as it will hide features. Multiple coats are needed so you don't strip the paint down to the plastic in the following steps.
-allow to fully dry (1 day)
-spray 1 full coat of flat black spray paint on top of the grey
-wait 1 minute for the paint to get slightly tacky (time varies a lot based on the brand)
-dip a rag or "shop towel" in paint thinner and ring it out, then rub the black spray paint off all the raised surfaces. Rubber/latex gloves aren't a bad idea ;)
-use another rag with the same treatment to finish the job and for a brighter metal appearance redo key areas (the first rag will have a lot of black in it)
-let dry fully

3D printing settings

-

Advertising


Issue with this design? Report a problem.

Would you like to support Cults?

You like Cults and you want to help us continue the adventure independently? Please note that we are a small team of 3 people, therefore it is very simple to support us to maintain the activity and create future developments. Here are 4 solutions accessible to all:

  • ADVERTISING: Disable your banner blocker (AdBlock, …) and click on our banner ads.

  • AFFILIATION: Make your purchases online by clicking on our affiliate links here Amazon.

  • DONATE: If you want, you can make a donation via Ko-Fi πŸ’œ.

  • WORD OF MOUTH: Invite your friends to come, discover the platform and the magnificent 3D files shared by the community!


Sharing and downloading on Cults3D guarantees that designs remain in makers community hands! And not in the hands of the 3D printing or software giants who own the competing platforms and exploit the designs for their own commercial interests.

Cults3D is an independent, self-financed site that is not accountable to any investor or brand. Almost all of the site's revenues are paid back to the platform's makers. The content published on the site serves only the interests of its authors and not those of 3D printer brands who also wish to control the 3D modeling market.

100% secure payment by credit card, PayPal, Apple Pay, Google Pay, etc.
View all payment options.