Skip to content

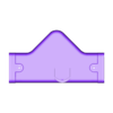
Rain Barrel Water Diverter for 2-5/8" square downspout

Advertising
Advertising
?
Creation quality: 5.0/5 (1 vote)
Evaluation of members on the printability, utility, level of detail, etc.

  • 2.1k views
  • 2 likes
  • 30 downloads

License
3D design format
Folder details Close
  • Rain_1_Piece.stl
  • Rain_1_Piece_Cut_View.stl
  • Rain_Diverter_Balance.stl
  • Rain_Diverter_Pipe.stl

Learn more about the formats

Publication date 2022-09-16 at 23:52
?
Published to Thingiverse on: 2014-06-03 at 07:00
Design number 848917

3D printer file info

3D model description

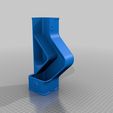
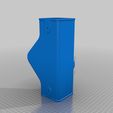
Rain diverter designed for 2-5/8" square downspout. Diverts rain to rain barrel then bypasses when full. Mount output pipe just below the top of your barrel and it won't overfill (see horizontal line on my siding). Grating filters out larger leaves and debris. Diversion chamber drain holes are in the model to prevent freeze up and drain small grit. Plug them if you don't need them or feel there is too many.

A shorter pipe to the rain barrel is preferred (as opposed to mine in the picture).

For future improvement:

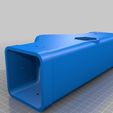
Bottom section should either be redesigned to fit inside the downspout or a 360 degree lip should be added to prevent water from running outside the downspout pipe. I used a ring of caulking which the lower pipe sealed against.

Update 03/2015: Survived the first winter!

3D printing settings

Print on a printer with a tall print bed! I have an extended OB1.4. Total object height is 22.6 cm. You also need to be able to print 45 degree overhangs without support, which most printers can do once they are tuned up and have the right accessories.

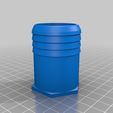
I have designed the nozzle for a 1-1/2" hose. The fit is a bit loose for the hose but putting the hose clamp on top of the printed barbs provided a tight seal for me. You can design your own to fit other hose sizes: start with a 22mm sided hexagon (fitting into a 44mm circle) extruded up 3.2mm and then work from there.

To fit the nozzle into the diverter first trim any 1st layer squish or brim off the bottom then flash heat the plastic with a lighter just slightly and press fit into the main body. Remove then glue it permanently in place once you have a tight but easy fit.

Advertising


Issue with this design? Report a problem.

Would you like to support Cults?

You like Cults and you want to help us continue the adventure independently? Please note that we are a small team of 3 people, therefore it is very simple to support us to maintain the activity and create future developments. Here are 4 solutions accessible to all:

  • ADVERTISING: Disable your banner blocker (AdBlock, …) and click on our banner ads.

  • AFFILIATION: Make your purchases online by clicking on our affiliate links here Amazon.

  • DONATE: If you want, you can make a donation via Ko-Fi πŸ’œ.

  • WORD OF MOUTH: Invite your friends to come, discover the platform and the magnificent 3D files shared by the community!


Sharing and downloading on Cults3D guarantees that designs remain in makers community hands! And not in the hands of the 3D printing or software giants who own the competing platforms and exploit the designs for their own commercial interests.

Cults3D is an independent, self-financed site that is not accountable to any investor or brand. Almost all of the site's revenues are paid back to the platform's makers. The content published on the site serves only the interests of its authors and not those of 3D printer brands who also wish to control the 3D modeling market.

100% secure payment by credit card, PayPal, Apple Pay, Google Pay, etc.
View all payment options.