Skip to content

Universal Respirator 3/4 Silicone

Advertising
Advertising
?
Creation quality: 5.0/5 (1 vote)
Evaluation of members on the printability, utility, level of detail, etc.

  • 538 views
  • 1 like
  • 8 downloads

License
3D design format
Folder details Close
  • Insert_Mold.stl
  • Outside_Mold_Left.stl
  • Outside_Mold_Right.stl
  • Silicone_Mask.stl

Learn more about the formats

Publication date 2022-09-18 at 14:56
?
Published to Thingiverse on: 2020-05-19 at 21:57
Design number 851155

3D printer file info

3D model description

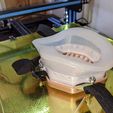
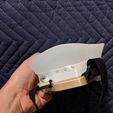
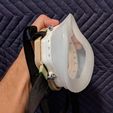
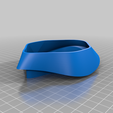
I absolutely love The3DHandyman's design, it is a very elegant design solution. I made one, and for my face shape and size, it was a little restrictive and I couldn't open my mouth much to talk. I could easily scale it up 5% as he suggests, and I am confident that it would work great. However, I love the idea of casting silicone with 3D printed molds, like the face seal is made. So I designed internal and external molds to work in conjunction with the face seal mold, and I chopped the respirator. Now there is more freedom of movement while maintaining a seal and it is almost as comfortable as my Miller LPR-100 respirator.

I made the internal mold from TPU, but a rigid one would probably work since the silicone is so flexible.

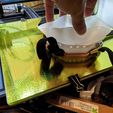
1 part dish soap (Dawn, is the best in my opinion) and 2 parts rubbing alcohol makes an excellent mold release. I liberally painted it on all the mold surfaces with a foam brush, but you don't want it to pool. Pour off any excess. Make sure to not get any on the inside of the printed mask part, as you want the silicone to stick to that.

I used a caulk gun and tube of silicone, though I am also very interested in using a pourable silicone, with a redesign of the molds...

Quick instructions for casting the food grade silicone:

  1. Fill the face seal mold (MaskV2silicone_Mold.stl) with a layer of silicone around 3/16" to 1/4" thick (4.5mm to 6.5mm)

  2. Press the Insert Mold down onto the face seal mold, it bottoms out on the base of the face seal mold. The excess silicone will squeeze into the next area we are working with.

  3. Lay a similar layer of silicone around the outside wall of the Insert Mold, it should be totally covered in silicone on the outside.

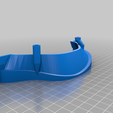
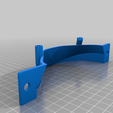
  4. Press the two Outside Molds together around the Insert Mold, and either clamp or screw the two halves together.

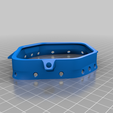
  5. Place the printed mask portion (Silicone_Mask.stl) down onto the top of the Outside Molds, using the bolt holes as aligners.

  6. Wet your finger in alcohol and press the silicone that was squeezed out of the top of the Outside Molds into the inside edge of the printed mask portion (Silicone_Mask.stl). Add more silicone if needed. The more surface area that the silicone is in contact with, the better adhesion and less chance for leaks. I spread it 3/8" to 1/2" (10mm to 13mm) up the inside wall of the mask. Make sure that silicone squeezes out of the chamfered holes around the mask, you can use the alcohol on finger trick to smooth it from the outside of the mask.

There is not a huge window of time, so have all of your parts/materials ready to go, and don't rush but move quickly.

P.S. You may notice a pleated filter in one of the pics. It uses Hepa filter sheet (vacuum bag), and makes it actually breathable with the increased surface area. I am working on refining the design, and if there is any interest, I will post when complete.

3D printing settings

-

Tags

Advertising


Page translated by automatic translation. See the original version.
Issue with this design? Report a problem.

Would you like to support Cults?

You like Cults and you want to help us continue the adventure independently? Please note that we are a small team of 3 people, therefore it is very simple to support us to maintain the activity and create future developments. Here are 4 solutions accessible to all:

  • ADVERTISING: Disable your banner blocker (AdBlock, …) and click on our banner ads.

  • AFFILIATION: Make your purchases online by clicking on our affiliate links here Amazon.

  • DONATE: If you want, you can make a donation via Ko-Fi πŸ’œ.

  • WORD OF MOUTH: Invite your friends to come, discover the platform and the magnificent 3D files shared by the community!


Sharing and downloading on Cults3D guarantees that designs remain in makers community hands! And not in the hands of the 3D printing or software giants who own the competing platforms and exploit the designs for their own commercial interests.

Cults3D is an independent, self-financed site that is not accountable to any investor or brand. Almost all of the site's revenues are paid back to the platform's makers. The content published on the site serves only the interests of its authors and not those of 3D printer brands who also wish to control the 3D modeling market.

100% secure payment by credit card, PayPal, Apple Pay, Google Pay, etc.
View all payment options.