Skip to content

FlashForge Creator Pro side blower fan bracket mount

Advertising
Advertising
?
Creation quality: 5.0/5 (1 vote)
Evaluation of members on the printability, utility, level of detail, etc.

  • 813 views
  • 2 likes
  • 17 downloads
  • 1 make

License
3D design format
Folder details Close
  • FFCP-blowerFanBracket-m3holes.stl
  • FFCP-blowerFanBracket-sockets.stl
  • FFCP-blowerFanBracket.blend

Learn more about the formats

Publication date 2022-09-23 at 13:32
?
Published to Thingiverse on: 2017-02-05 at 18:12
Design number 857803

3D printer file info

3D model description

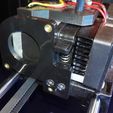
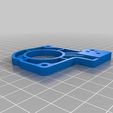
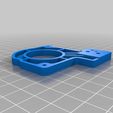
This is a replica of the bracket that is part of recent editions of the FlashForge Creator Pro and similar printers with a dual MK10 nozzle carriage. It is mounted on the left side of the extruder carriage, and supports both the blower fan and the fan duct. You need this if you want to install this type of fan and duct on an older printer that doesn't have this part, for instance if you want to install my dual duct (http://www.thingiverse.com/thing:1675208).

It comes in two versions: one with larger holes in which three 5 mm deep metal M3 threaded inserts can be installed (see photo of the original, this is the recommended method as it makes a stronger part that won't wear out by repeated disassembly); and one with smaller holes that can accept M3 bolts directly (this is good if you quickly want something that does the job). Due to the difficulty of printing small holes accurately, in either case you will probably first need to prepare the holes with a drill.

The Blender file is included to make it easier to adapt the model to specific needs.

For mounting, ideally you need:
* two 6 mm countersunk M3 screws for the bracket itself,
* two 20 mm socket, pan, or cheesehead M3 screws for the fan,
* one 6 mm socket, pan, or cheesehead M3 screw for the fan duct.

However, you could probably modify the part to use similar screws you have lying around. Only the screws for the bracket itself must have an M3 thread.

For a perfect replica of the original part, find some cylindrical piece of whatever with a diameter of 2 mm and a length of less than 7 mm, and shove it in the tiny square-shaped hole in the model such that it sticks out 2 mm at the side where you mount the fan. This is optional, but provides a more secure mount for the fan duct.

If you need to buy the fan, this is what is mentioned on the one that came with my FFCP:

Ruiapple DC brushless blower
Model: DB5015HB24
DC 24V 0.10A

3D printing settings

-

Advertising


Issue with this design? Report a problem.

Would you like to support Cults?

You like Cults and you want to help us continue the adventure independently? Please note that we are a small team of 3 people, therefore it is very simple to support us to maintain the activity and create future developments. Here are 4 solutions accessible to all:

  • ADVERTISING: Disable your banner blocker (AdBlock, …) and click on our banner ads.

  • AFFILIATION: Make your purchases online by clicking on our affiliate links here Amazon.

  • DONATE: If you want, you can make a donation via Ko-Fi 💜.

  • WORD OF MOUTH: Invite your friends to come, discover the platform and the magnificent 3D files shared by the community!


Sharing and downloading on Cults3D guarantees that designs remain in makers community hands! And not in the hands of the 3D printing or software giants who own the competing platforms and exploit the designs for their own commercial interests.

Cults3D is an independent, self-financed site that is not accountable to any investor or brand. Almost all of the site's revenues are paid back to the platform's makers. The content published on the site serves only the interests of its authors and not those of 3D printer brands who also wish to control the 3D modeling market.

100% secure payment by credit card, PayPal, Apple Pay, Google Pay, etc.
View all payment options.