There will be no more updates to this page. Go to the new GitHub page for the latest updates.
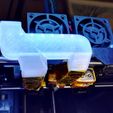
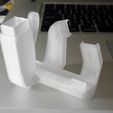
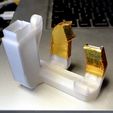
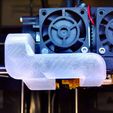
This is the single-extrusion alternative to my dual duct. I only do a dual extrusion about once every 100 prints, and I figured it is a bit pointless to have the dual duct blow air at the inactive (and usually unscrewed) nozzle all the time. It makes more sense to also direct this air at the active nozzle. By blowing air from two directions, this design reduces the ‘shadow’ problem of both the stock duct and my dual duct and cools all sides more or less equally. If you're only going to print with one extruder, this duct will give you the best quality.
Of course this does not make the dual duct obsolete: you still need it to get proper cooling on dual extrusions.
Mind that the shadow problem is not completely eliminated. Overhangs at the rear and right will still be cooled less effectively because the air cannot reach their undersides. One way to work around this is to print extra walls behind such overhangs to reflect the airflow back towards them. In most cases this will be unnecessary however, but keep it in mind for those prints that need to be really perfect.
(Someday I might try to update the design to have opposite exhausts for symmetrical cooling but this will obviously require big changes.)
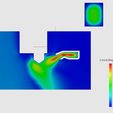
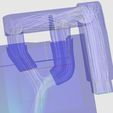
This duct has not been merely designed in a wet-finger guessing way. It has been run through several dozens of iterations, the last of which were validated with computer simulations. See the ‘How I Designed This’ section for more details.
This duct unfortunately is not plug-and-play. You must read the ‘Using’ section. If you don't, your prints will likely fail, you have been warned.
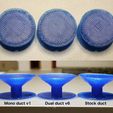
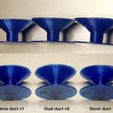
The photos show a comparison of my 55° mushroom test (https://www.thingiverse.com/thing:2005832) on a PLA print between this duct, the v6 dual duct, and the stock duct. The result from the stock duct looks more decent than what I expected while I saw it being printed: it was curling up so badly at times that I feared I would need to abort the print. Somehow the upper layers managed to push down the curls again, but it still looks ugly. Even despite the fact that I did this test with the first version of the new duct which was not anywhere as good as the latest version, the result shows almost no deformations and it has a near-flat top surface. (Note: you won't be able to get this kind of result on the 55° test with the stock nozzles, especially not if they have been worn out. This was printed with a more pointy Micro Swiss hardened steel nozzle which allows to print steeper overhangs than a nozzle with a flat underside.)
Printing
There are two models. The ‘x1’ model has the exhausts 1 mm lower than the regular model. If you aligned your nozzles with this tool (https://www.thingiverse.com/thing:1582720), you need the regular version. If you installed Micro Swiss all-metal hotends and followed their installation instructions to the letter, then your nozzles will be 1 mm lower and you need the ‘x1’ model. See the section ‘Checking the height of your nozzle’ below for more details. Of course you can just print both models and see which one works best for you.
See the Print Settings section for detailed instructions on printing.
Installing
Be sure to read the Post-Printing section first.
A thin strip of rubber (like a piece of bicycle tire) under the little mounting tab can help to avoid that the duct vibrates and rattles.
If you have an older printer and yet have to install the blower fan, you may need to print the fan mounting bracket (https://www.thingiverse.com/thing:2086927) first.
Using
First of all if you're going to do a long print with the fan disabled entirely, remove the duct to avoid that it will deform, especially if you're printing at very high temperatures, e.g. polycarbonate. Even if you applied thermal insulation, you should still remove the duct if unused during long prints.
Next, something very important: don't just print and try to use this duct, it unfortunately is not that simple. This duct is almost unusable if you cannot control fan speed. You risk getting very poor layer adhesion in the lower part of your print, and fast-printed parts like infill may detach already during printing. In other words, your print will fall apart. To avoid this, you must reduce fan speed in a specific manner. Unfortunately fan speed cannot be controlled on an unmodified FFCP, which I find the largest shortcoming of this printer by far. Modifications are required, below I explain how you can get variable fan speed after all.
Due to effects described below (see ‘Background info’ if you're interested), you must:
* only enable the fan after the second or third layer,
* start out with the fan running at no more than 20% speed,
* gradually increase fan speed over the course of the first few millimeters of the print until the desired maximum (in my case 50% is usually more than enough).
Being able to control fan speed is the only practical way to get optimal cooling with this duct (actually with any duct for that matter). Variable speed is also essential for getting good results with filaments like PETG, which require a tiny bit of cooling for best results. You may also be surprised to hear that I always enable the fan on ABS prints albeit at very low speed, which does improve quality without ruining layer adhesion. Also, after installing an all-metal hot-end with hardened steel nozzle, I noticed I need much less cooling which made it essential to be able to throttle the fan.
How to obtain variable fan speed
Your software might make it seem as if you can vary the speed of the fan, but this is a lie. None of the printers that use the MightyBoard design like the FFCP and clones, can control fan speed without modifications. The MightyBoard can only toggle its EXTRA output between off and on, hence ramping up the fan won't be possible.
It is possible to install a custom build of the Sailfish firmware that has a software PWM implementation. Speed cannot be changed however during a print and it does not respond to speed arguments in the G-code, making it mostly useless. You can try an even more custom build that is able to respond to fan speed commands in G-code, but this can only work if you also compile a custom build of the GPX converter and somehow manage to squeeze Sailfish-compatible G-code with variable fan speeds out of your slicing software. In other words, the only practical solutions for the average user are hardware-based.
The simplest way to obtain (manual) fan speed control is to install a hardware PWM controller (https://www.thingiverse.com/thing:2095862) in between the printer motherboard and the cooling fan. This isn't complicated and the only (optional) permanent modification you need to make to your printer is to drill two tiny holes. You can use an analog controller like the one shown there, or a microcontroller like an Arduino with PWM capable output and a 24V MOSFET to drive the fan. This solution is still cumbersome because you will need to babysit every print at least during its first few layers to adjust the PWM knob.
A much more advanced way to obtain fully automatic fan speed control is to have the printer send fan speed commands to a Raspberry Pi (https://www.thingiverse.com/thing:2852499), which does PWM through a MOSFET connected to one of its GPIO pins. I spent quite a bit of effort on this solution and it works very reliably, the only drawback is a bit of extra blip sounds during prints. Installing it is more work than mounting a single circuit board, but once you've got it running you will never want to go back.
Possible workarounds that do not require a PWM controller
I haven't really tested any of these but they are most certainly inferior compared to a PWM-based solution. Try at your own risk!
Simplest one is to just stick with the dual duct if you find it too much hassle to get the best out of this single-extruder duct. You will of course be stuck with the shadow problem too.
If you print much hotter, slowly, and in thin layers, you might get good results even if you cannot throttle the fan.
To counteract the typical extruder temperature undershoot when the fan activates at lower layers, you could boost extruder temperature by 10°C, about 10 seconds before the fan will engage. I haven't tested whether this is effective, but in theory it should ensure the extruder is in its heating regime when the blast of cold air hits it, and the undershoot should be reduced or eliminated. You may then gradually reduce extruder temperature again until the print is about 12 mm tall, but you should keep the temperature higher than when printing without fan. This is obviously cumbersome because you will either have to manually fiddle with the LCD menu to do this, or write a post-processing script to insert extra M104 commands in your G-code at the right places.
You may also try to make a hole in the side of the duct to lower the exhaust pressure. You could use tape to vary the size of this hole hence vary airflow in a clumsy manner. Of course this doesn't avoid the undershoot problem and trying to vary the airflow during a print will be challenging to say the least.
Final Notes
If you want to be notified of possible updates on this design, use the ‘Watch’ button.
Quite a bit of work went into designing this duct. If you appreciate it, remember that there is a ‘tip designer’ button :)

/https://fbi.cults3d.com/uploaders/19896799/illustration-file/7cd40116-d4d4-4a5b-a9dd-01f293d4f505/monoduct0.jpg)
