Skip to content

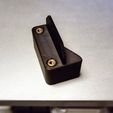
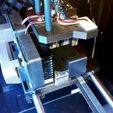
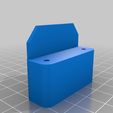
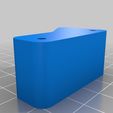
X endstop trigger for FFCP when printing without right extruder

🔫 3D models of guns or weapons are dummy objects or prop toys and have no real functionality as weapons. They are intended for entertainment or decorative purposes only. For any design violating our T&Cs, please report them.

Advertising
Advertising
?
Creation quality: 0.0/5 (0 votes)
Evaluation of members on the printability, utility, level of detail, etc.

  • 376 views
  • 4 downloads

License
3D design format
Folder details Close
  • FauxStepper-direct-noTab.stl
  • FauxStepper-direct.stl
  • FauxStepper-inserts-noTab.stl
  • FauxStepper-inserts.stl

Learn more about the formats

Publication date 2022-09-23 at 13:32
?
Published to Thingiverse on: 2017-08-08 at 23:48
Design number 857787

3D printer file info

3D model description

There will be no more updates to this page. Go to the new GitHub page for the latest updates.

When only printing with one nozzle on the Flashforge Creator Pro or similar printers with two extruders on the same carriage (e.g. the Dreamer or QIDI Tech 1), you can improve print quality considerably by removing the unused heavy extruder stepper motor. Doing so will reduce the weight of the carriage and help to reduce ringing and ripple artifacts on your print. I also recommend to unscrew the unused nozzle to avoid the risk of it bumping into parts of the print.

It is much easier to remove the right stepper, so usually you would do single extrusion prints with your left extruder. However, the right stepper motor is also used to trigger the X endstop so if you remove it, you must put something in place. I like the dummy stepper (https://www.thingiverse.com/thing:2251192) by race12001 but still found it too large, therefore I made this more minimal but still sturdy version that is just large enough to trigger the switch. It is easily mounted with the same screws as the stepper.

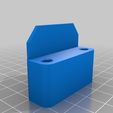
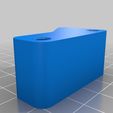
I provide two versions, one that accepts 5x5 mm M3 brass inserts and one with direct holes. The brass inserts are recommended but simply threading the screws into the direct holes should also work, although you risk stripping the holes if you regularly mount and unmount this part.
Another variation omits the extra tab that covers the hot-end hole. This tab may help to avoid that dust or dirt ends up in the hole, although this wouldn't be a problem if you also unscrew the right nozzle when not using it.

3D printing settings

-

Advertising


Issue with this design? Report a problem.

Would you like to support Cults?

You like Cults and you want to help us continue the adventure independently? Please note that we are a small team of 3 people, therefore it is very simple to support us to maintain the activity and create future developments. Here are 4 solutions accessible to all:

  • ADVERTISING: Disable your banner blocker (AdBlock, …) and click on our banner ads.

  • AFFILIATION: Make your purchases online by clicking on our affiliate links here Amazon.

  • DONATE: If you want, you can make a donation via Ko-Fi 💜.

  • WORD OF MOUTH: Invite your friends to come, discover the platform and the magnificent 3D files shared by the community!


Sharing and downloading on Cults3D guarantees that designs remain in makers community hands! And not in the hands of the 3D printing or software giants who own the competing platforms and exploit the designs for their own commercial interests.

Cults3D is an independent, self-financed site that is not accountable to any investor or brand. Almost all of the site's revenues are paid back to the platform's makers. The content published on the site serves only the interests of its authors and not those of 3D printer brands who also wish to control the 3D modeling market.

100% secure payment by credit card, PayPal, Apple Pay, Google Pay, etc.
View all payment options.