Skip to content

16mm Negative Carrier for Enlarger with Reel Holders

Advertising
Advertising
?
Creation quality: 0.0/5 (0 votes)
Evaluation of members on the printability, utility, level of detail, etc.

  • 444 views
  • 3 downloads

License
3D design format
Folder details Close
  • baseplate.dxf
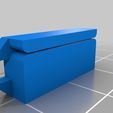
  • focal-clip.stl
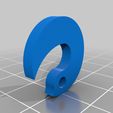
  • retainer-clip.stl
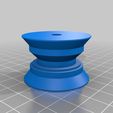
  • roller.stl
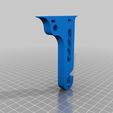
  • rollerbracket-3.stl

Learn more about the formats

Publication date 2022-10-02 at 23:31
?
Published to Thingiverse on: 2018-10-01 at 14:03
Design number 869369

3D printer file info

3D model description

Tool for mounting 16mm motion picture film in a photographic enlarger. Designed with flipbooks and zoetropes in mind.

Involves both 3D printed and laser cut parts.

You'll also need:

10 M3x10mm screws
8 M3 nuts
2 1/4"-20 x 2" screws (yes I have a bad habit of mixing metric and 'murican units)
2 1/4" x 3" round steel rods (really any metal will do)

Printing/cutting:

1 x Base plate
4 x Roller bracket
4 x Retainer Clip
4 x Focal Clip
2 x Roller

Assembly:

  • Fasten the four roller brackets to the base plate as pictured, using 8 of the M3 screws and nuts.

  • Insert and align the rollers in the brackets, then insert the 1/4" screws through the roller brackets and rollers. The screw should pass easily through the bracket but bite into the plastic of the rollers. This will hold the rollers+axles in place without the need for another fastener.

  • Fasten the four retainer clips to the outsides of the brackets as pictured. They should be loose enough that you can rotate the retainer clips by hand but tight enough that they stay in place.

-Finally, insert the focal clips into the square hole in the base plate. They should be inserted diagonally and then rotated to lock in place. The film slots should be on top, facing inward.

Usage:

When mounting film reels, use the 1/4" rods as axles. Swivel the retainer clips so that the side slots of the brackets are open. Insert your reels and axles into the slot then close the retainer clips so they don't jump out and roll away. The film edges should slide into the focal clips, which will hold your film flat and at a consistent height without touching the image-bearing portion of the film.

3D printing settings

-

Advertising


Issue with this design? Report a problem.

Would you like to support Cults?

You like Cults and you want to help us continue the adventure independently? Please note that we are a small team of 3 people, therefore it is very simple to support us to maintain the activity and create future developments. Here are 4 solutions accessible to all:

  • ADVERTISING: Disable your banner blocker (AdBlock, …) and click on our banner ads.

  • AFFILIATION: Make your purchases online by clicking on our affiliate links here Amazon.

  • DONATE: If you want, you can make a donation via Ko-Fi πŸ’œ.

  • WORD OF MOUTH: Invite your friends to come, discover the platform and the magnificent 3D files shared by the community!


Sharing and downloading on Cults3D guarantees that designs remain in makers community hands! And not in the hands of the 3D printing or software giants who own the competing platforms and exploit the designs for their own commercial interests.

Cults3D is an independent, self-financed site that is not accountable to any investor or brand. Almost all of the site's revenues are paid back to the platform's makers. The content published on the site serves only the interests of its authors and not those of 3D printer brands who also wish to control the 3D modeling market.

100% secure payment by credit card, PayPal, Apple Pay, Google Pay, etc.
View all payment options.