Skip to content

Root Canal Teeth for Practice 10 models

Advertising
Advertising
?
Creation quality: 5.0/5 (1 vote)
Evaluation of members on the printability, utility, level of detail, etc.

  • 4.8k views
  • 6 likes
  • 41 downloads

License
3D design format
STL and ZIP Folder details Close
  • 16_open access_4 canal_ 0.75mm apex.stl
  • 36_open access.stl
  • 36_openaccess_3 canal_apex 0.75mm.stl
  • Lower Incisor Accessed_ Apex 0.25_Orifice 1mm.stl
  • Lower Incisor Accessed_ Apex 0.5_Orifice 1mm.stl
  • Lower Incisor Apex 0.25_Orifice 1mm.stl
  • Lower Incisor Apex 0.5_Orifice 1mm.stl
  • Lower1stMolar36_0.5orifice_0.2apex.stl
  • RCT Practice.zip
    • Central apex 0.25_orifice 0.5.stl
    • Central apex 0.25_orifice 0.6.stl
    • Central apex 0.35_orifice 0.8.stl
    • Central with Access apex 0.25_orifice 0.6.stl
    • Molar apex 0.35_orifice 0.6.stl
    • Molar Type II MB canal.stl
    • Molar with Access apex 0.35_orifice 0.6.stl
    • Premolar apex 0.35_orifice 0.6.stl
    • Premolar with Acess apex 0.35_orifice 0.6.stl

Learn more about the formats

Last update 2024-01-14 at 18:10
Publication date 2022-10-04 at 03:11
Design number 871090

drmarkmov

3D printer file info

3D model description

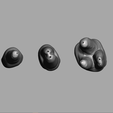
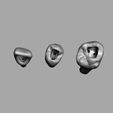
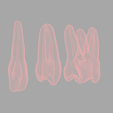
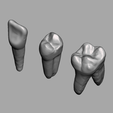
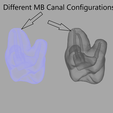
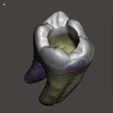
Central Incisor, 1st Upper Premolar, 1st Upper Molar, 1st Lower Molar, lower central incisor. Apices range from 0.25-1.5mm.

Includes several models with an access already made or you can practice making access preps yourself.

Added teeth 36 and 16 with very large apical diameters (1.5mm) if having difficulty printing canals or for practicing obturation with MTA. Increasing exposure time 0.1-0.2s can narrow canals for increased difficulty.

Tips:
1) I recommend not light curing models with no access. Any residual resin in the canals will obliterate the canals and make shaping the canals impossible. For models with an access, make sure to irrigate access with alcohol thoroughly to remove remaining resin before curing.
2) If using uncured models, minimize light exposure (eg. overhead lamp, loupe light) until canals have a clear glide path to avoid curing residual resin and debris.
3) Irrigate canals with alcohol to dissolve and remove residual resin
4) You can increase the difficulty by increasing the print exposure time, making the canals narrower.
5) In your printer slicer you can add additional draining or irrigation holes for models without an access.

3D printing settings

Resin Printing

Recommend NextDent SG (Surgical Guide) - models are semi clear and lets you assess your progress.

Advertising


Issue with this design? Report a problem.

Would you like to support Cults?

You like Cults and you want to help us continue the adventure independently? Please note that we are a small team of 3 people, therefore it is very simple to support us to maintain the activity and create future developments. Here are 4 solutions accessible to all:

  • ADVERTISING: Disable your banner blocker (AdBlock, …) and click on our banner ads.

  • AFFILIATION: Make your purchases online by clicking on our affiliate links here Amazon.

  • DONATE: If you want, you can make a donation via Ko-Fi πŸ’œ.

  • WORD OF MOUTH: Invite your friends to come, discover the platform and the magnificent 3D files shared by the community!


Sharing and downloading on Cults3D guarantees that designs remain in makers community hands! And not in the hands of the 3D printing or software giants who own the competing platforms and exploit the designs for their own commercial interests.

Cults3D is an independent, self-financed site that is not accountable to any investor or brand. Almost all of the site's revenues are paid back to the platform's makers. The content published on the site serves only the interests of its authors and not those of 3D printer brands who also wish to control the 3D modeling market.

100% secure payment by credit card, PayPal, Apple Pay, Google Pay, etc.
View all payment options.