Skip to content

Auxbeam 8 gang overhead mount for Nissan Frontier / Xterra / Pathfinder

Advertising
Advertising
?
Creation quality: 5.0/5 (1 vote)
Evaluation of members on the printability, utility, level of detail, etc.

  • 10.3k views
  • 18 likes
  • 47 downloads
  • 1 collection

License
3D design format
STEP and STL Folder details Close
  • Auxbeam Overhead Mount Bracket.stl
  • Auxbeam Overhead Mount Main.stl
  • Auxbeam Overhead Mount Ring.stl
  • Auxbeam Overhead mount.step

Learn more about the formats

Publication date 2022-10-05 at 00:01
Design number 872306

3D printer file info

3D model description

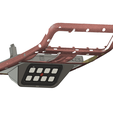
This is a custom panel that completely replaces your overhead sunglass drop down and gives you a perfect fitting trim to mount your Auxbeam 8 gang switch panel. Check photos to make sure your sunglass holder drop down looks the same, this might fit other models and years such as a titan or armada but has not been tested. (Includes .stl and .step files)

I sanded the finished part, primed it with a rattle can automotive primer, textured it with SEM texture spray and then painted it to match with SEM LT Titanium, its a pretty close match for the Frontier/ Xterra and Pathfinder. (Links to paints and parts below)

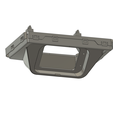
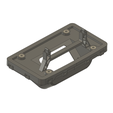
The assembly prints as 3 pieces. the main body will need 4 brass threaded inserts and 4 flat head screws to match those threads to secure the "mount ring" to the main body. The bracket can be super glued or acetone glued in place and then reuse the factory steel spring clips on the top to protrusions of the bracket. The install is fairly straight forward, just be careful when removing the factory sunglass holder to avoid breaking the mounting tabs.

Auxbeam switch panel > https://amzn.to/3fBhJ17
SEM paint > https://amzn.to/3SBFXHl
SEM texture > https://amzn.to/3SXdWtC
Brass inserts > https://amzn.to/3EpDOdk
Screws > https://amzn.to/3RGYWid

3D printing settings

I have been printing the entire assembly out of ABS with a .4mm nozzle. Make sure your support material is dialed in when printing the "mount ring"

3 wall min and 4 layers for top and bottom, I prefer around 25% infill. I printed at .18mm layer heights and got great results

Advertising


Issue with this design? Report a problem.

Would you like to support Cults?

You like Cults and you want to help us continue the adventure independently? Please note that we are a small team of 3 people, therefore it is very simple to support us to maintain the activity and create future developments. Here are 4 solutions accessible to all:

  • ADVERTISING: Disable your banner blocker (AdBlock, …) and click on our banner ads.

  • AFFILIATION: Make your purchases online by clicking on our affiliate links here Amazon.

  • DONATE: If you want, you can make a donation via Ko-Fi πŸ’œ.

  • WORD OF MOUTH: Invite your friends to come, discover the platform and the magnificent 3D files shared by the community!


Sharing and downloading on Cults3D guarantees that designs remain in makers community hands! And not in the hands of the 3D printing or software giants who own the competing platforms and exploit the designs for their own commercial interests.

Cults3D is an independent, self-financed site that is not accountable to any investor or brand. Almost all of the site's revenues are paid back to the platform's makers. The content published on the site serves only the interests of its authors and not those of 3D printer brands who also wish to control the 3D modeling market.

100% secure payment by credit card, PayPal, Apple Pay, Google Pay, etc.
View all payment options.