Skip to content

Myrtenaster - Weiss' Sword (Rapier) from RWBY

Advertising
Advertising
?
Creation quality: 5.0/5 (2 votes)
Evaluation of members on the printability, utility, level of detail, etc.

  • 2.6k views
  • 16 likes
  • 13 downloads

License
3D design format
STL and ZIP Folder details Close
  • Myrtenaster Files.zip
    • 6.5x2x13mm Washer.stl
    • Barrel Options/Barrel_Empty_W_Bearings.stl
    • Barrel Options/Barrel_Solid_No_Bearings.stl
    • Barrel_Solid_W_Bearings.stl
    • BladeBase.stl
    • BladeMidL.stl
    • BladeMidR.stl
    • BladeShorterParts/BladeL1.stl
    • BladeShorterParts/BladeL2.stl
    • BladeShorterParts/BladeL3.stl
    • BladeShorterParts/BladeL4.stl
    • BladeShorterParts/BladeR1.stl
    • BladeShorterParts/BladeR2.stl
    • BladeShorterParts/BladeR3.stl
    • BladeShorterParts/BladeR4.stl
    • BladeTipL.stl
    • BladeTipR.stl
    • Guard x4.stl
    • GuardBase.stl
    • GuardHalves/Guard Half Bottom.stl
    • GuardHalves/Guard Half Top.stl
    • Hilt.stl
    • Myrtenaster_Full.stl
    • Pommel.stl
    • Shell.stl
  • Myrtenaster_Full.stl

Learn more about the formats

Publication date 2022-10-06 at 09:40
Design number 874033

3D printer file info

3D model description

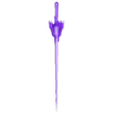
Myrtenaster, Weiss Schnee's signature Rapier from RWBY. Yes, the barrel spins!
"I'm Not Perfect. Not Yet, But I'm Still Leagues Better Than You."

This was probably one of the more ambitious props I have modelled and assembled, it certainly took a bit more time that my previous models to get the final result.

Printed at full size, the total length is 963mm with the longest printable section 280mm (see dimensional drawing). This is the blade tip, which if printed diagonally should fit fine on a 200x200mm print bed (Prints in halves rather than vertically). I have also included a version of the blade which is split into smaller parts with the longest section being 160mm if needed

It's designed with a 6.5mm hole through the center allowing for a 6mm threaded rod to be inserted along the length to give it strength (glue in place). Most of the mating surfaces also have 2mm registration holes to align each part correctly, I use small offcuts of 1.75mm filament in these holes.

There are 3 options for printing the barrel. 1 variant has the shells in place already as part of the barrel (Barrel_Solid_No_Bearings). The second variant is that same as this but has slots to add bearings to the barrel (Barrel_Solid_W_Bearings). The final variant has the bearing slots, but also has the barrels empty, with the shells included as a separate part (Barrel_Empty_W_Bearings).
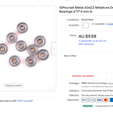
I used 606ZZ Ball Bearings 6*17*6 mm (see photo), not sure if they really helped the barrel spine much or not.
I also added 2x M6 flat steel washers on either side of the barrel to help it spin, this is optional, but if you dont have washers, there is a printable spacer that will fit as well.

The 4x guards that go around the barrel were a bit of a pain to print. They fell over on my print, so I added a halves version where you print 8x of the half guard and glue them together.

In terms of overall assembly, I started by gluing the halves of the sword tip onto the metal rod, and then worked my way down section by section. For the Barrel, I assembled the Barrel on the threaded rod with the bearings and washers etc, and then glued 2 of the guards and the 'Guard base' part on at the same time to get the spacing correct (see photos). This was definitely the most finnicky part of the assembly, but the registration holes help.

In terms of Glue, I used a 5 minute, 2 part epoxy (often called Araldite here in Aus). It gave me good strength but an easy enough working time to assembly things.

If you have any questions, dont hesitate to reach out, I'd be happy to share how I assembled it all.

The model with the sword in the photos is @Armada.Cosplay on IG, follow her to see more of my props in action

If you make one of my designs, I'd love to see it! Please DM or Tag me on Instagram (@asgardian_armoury) or Reddit (u/Asgardian_Armoury)

3D printing settings

I printed entirely using PLA (Pantech) on my Tevo Tornado

Particularly when printing the blade flat, I would recommend using a small layer height. I printed the blade and many of the components in 0.1mm heights. It took a while longer, but saved me considerable time in the post processing to remove the layer steps

The handle I printed at 0.2mm since it was quite tall, the rest I used adaptive layer heights (0.1-0.2mm) to preserve detail but also boost speed in the flat sections.

Advertising


Issue with this design? Report a problem.

Would you like to support Cults?

You like Cults and you want to help us continue the adventure independently? Please note that we are a small team of 3 people, therefore it is very simple to support us to maintain the activity and create future developments. Here are 4 solutions accessible to all:

  • ADVERTISING: Disable your banner blocker (AdBlock, …) and click on our banner ads.

  • AFFILIATION: Make your purchases online by clicking on our affiliate links here Amazon.

  • DONATE: If you want, you can make a donation via Ko-Fi πŸ’œ.

  • WORD OF MOUTH: Invite your friends to come, discover the platform and the magnificent 3D files shared by the community!


Sharing and downloading on Cults3D guarantees that designs remain in makers community hands! And not in the hands of the 3D printing or software giants who own the competing platforms and exploit the designs for their own commercial interests.

Cults3D is an independent, self-financed site that is not accountable to any investor or brand. Almost all of the site's revenues are paid back to the platform's makers. The content published on the site serves only the interests of its authors and not those of 3D printer brands who also wish to control the 3D modeling market.

100% secure payment by credit card, PayPal, Apple Pay, Google Pay, etc.
View all payment options.