Skip to content

Ender 3 / Pro Filament Runout Sensor using Limit Switch

Advertising
Advertising
?
Creation quality: 5.0/5 (1 vote)
Evaluation of members on the printability, utility, level of detail, etc.

  • 2.3k views
  • 4 likes
  • 6 downloads

License
3D design format
STL Folder details Close
  • filamentsensor-body.stl
  • filamentsensor-ptfeholder.stl

Learn more about the formats

Publication date 2022-10-10 at 06:13
?
Published to Thingiverse on: 2021-03-13 at 22:23
Design number 878747

3D printer file info

3D model description

As I put BLToutch, the Limit Switch of the Z axis was unusable, so I made a use of it by making this sensor, and it works perfectly.

The design uses a 608 bearing and a custom PTFE holder to allow filament to glide through with minimal friction. I wanted to use commonly available parts and more than likely, you probably have the necessary items laying around.

.STL files:

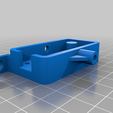
Main body
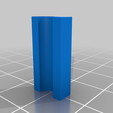
PTFE holder

Parts you need:

Limit switch (taken off the stock mount)
2x 5mm M3 screws (taken off the stock mount)
20mm PTFE tubing
Standard 608 bearing aka skateboard bearing (you could probably even print one)
Wires (you can use the original cable that was plugged into the limit switch, but you would have to fish it out of the enclosure.)
Optional: Using connectors such as JST XH and/or dupont is super helpful for making good connections with your hardware. Otherwise, you'll have to figure out a way to make the connections.

Making the PTFE guide:

Rough up the outside of the PTFE tube using medium grit sandpaper.

Adhere PTFE tube to the holder and allow to dry. Original Super Glue worked best for me.

Using a sharp blade and while using the holder as a guide, carefully trim off the excess PTFE like shown in the pictures.

Attaching ONLY to the metal lever of the limit switch, adhere the PTFE guide with a small drop of glue. Be careful not to get glue on the switch itself!

Note: Depending on the tolerances of your limit switch, you may or may not have to file down the PTFE guide. Just make sure the switch has enough room to click and unclick.

Wiring guide:

Using the limit switch PCB as a reference, you will notice the three pins are labelled as S, G, and V. Depending on how you want to wire the switch, you can have it normally open or normally closed.

Using pins S and G will make the switch normally open.

Using Pins S and V will make the switch normally closed.

If you are using the wires that originally plugged into the switch, it is set up for normally closed.

Connecting it to your Raspberry Pi (Octopi):

Refer to my photos and https://www.raspberrypi.org/documentation/usage/gpio/

You will need to connect one wire of the switch to any GPIO labelled pin and the other wire to ground on the Raspberry Pi.

you need to install some filament sensor plugin with GPIO support

In Plugin settings, choose the board pin you are using, the switch type, and make sure "Pause print when out of filament" is check marked. You may leave debounce time unchanged and Out of filament GCODE blank if you wish.

For my setup, I connected the switch to GPIO 23 (board pin 16) and ground on pin 14. Using "Board Mode" I entered a value of 16. My switch is normally closed.

Modify your GCODE to whatever works best for you. I only use print/resume GCODE scripts regardless of any interruption to my prints.

Note: I recommend that you print in ABS.

3D printing settings

-

Advertising


Issue with this design? Report a problem.

Would you like to support Cults?

You like Cults and you want to help us continue the adventure independently? Please note that we are a small team of 3 people, therefore it is very simple to support us to maintain the activity and create future developments. Here are 4 solutions accessible to all:

  • ADVERTISING: Disable your banner blocker (AdBlock, …) and click on our banner ads.

  • AFFILIATION: Make your purchases online by clicking on our affiliate links here Amazon.

  • DONATE: If you want, you can make a donation via Ko-Fi πŸ’œ.

  • WORD OF MOUTH: Invite your friends to come, discover the platform and the magnificent 3D files shared by the community!


Sharing and downloading on Cults3D guarantees that designs remain in makers community hands! And not in the hands of the 3D printing or software giants who own the competing platforms and exploit the designs for their own commercial interests.

Cults3D is an independent, self-financed site that is not accountable to any investor or brand. Almost all of the site's revenues are paid back to the platform's makers. The content published on the site serves only the interests of its authors and not those of 3D printer brands who also wish to control the 3D modeling market.

100% secure payment by credit card, PayPal, Apple Pay, Google Pay, etc.
View all payment options.