Skip to content

MPCNC Primo Cable Chain Mounts + Zmax Mount

Advertising
Advertising
?
Creation quality: 5.0/5 (1 vote)
Evaluation of members on the printability, utility, level of detail, etc.

  • 530 views
  • 5 downloads

License
3D design format
Folder details Close
  • Feet_Mount.stl
  • Inside_Tube_Bracket.stl
  • Lower_Rail_Mount.stl
  • Upper_Rail_Mount.stl
  • XY_Track_Attachment.stl
  • Z-Max_Limit_Switch_Mount.stl
  • Z_Gantry_Attachment.stl

Learn more about the formats

Publication date 2022-10-11 at 02:07
?
Published to Thingiverse on: 2020-08-01 at 18:02
Design number 880005

3D printer file info

3D model description

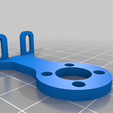
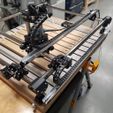
My designs for cable management for V1 Engineering's MPCNC Primo edition.

I chose to use two aluminum angles instead of one C channel so that dust can fall through. Also the feet mount allow for the cable chain to be elevated off of the surface of the spoilboard to allow dust and chips to be vacuumed/air blasted.

The rail mounts can be affixed on either the upper or the lower rail. I recommend the lower rail so that the cable chain goes right to left, instead of front to back. Depending on your particular setup, you may want to mount it on the upper rail. I have included mounts for the upper rail as well.

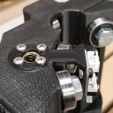
As a bonus, I've included my solution for a Z-max limit switch mount that sandwiches the leadscrew nut and the core. Please note, this was designed for my particular limit switch. I don't know the brand. It came from my ender 3 z-limit switch after I installed a BL touch.

Also word of caution. You'll have to tweak your firmware to make it work full time and you'd be wise to know that when the limit switch is hit, the location is not recorded (this only happens during homing). So if you tell the Z to move to 200 mm and it hits at 100 mm, your board will not think the Z is at 100mm. It will think it is at 200mm. If anyone knows how to make it register the location of the limit please let me know. So far, it is great for preventing the z-rail from popping out but you do have to be mindful of what your post processor is doing if you're doing tool change fanciness.

Materials required are:

Tracks & Support

4pcs 3/4" x 1/2" Aluminum angle found at the orange store (2 for X, 2 for Y)
2pcs 10mm x 20mm cable chain (I got mine on Ebay)
2-4 M3 x 10 mm screws for clamping the cable chain to the angle iron (washers as necessary)
2 M3 x 5mm screws for mounting the track attachment to the inside tube bracket

Inside Tube Mount

2 M3 x 10mm screws to apply clamping pressure to the inside tube bracket
2 M3 nuts for inside tube bracket
(don't over tighten, this is just to provide a little clamping pressure to resist torque force)

Upper/Lower Rail Mounts

2 M5 x 30 bolts and nuts for clamping

3D printing settings

-

Advertising


Issue with this design? Report a problem.

Would you like to support Cults?

You like Cults and you want to help us continue the adventure independently? Please note that we are a small team of 3 people, therefore it is very simple to support us to maintain the activity and create future developments. Here are 4 solutions accessible to all:

  • ADVERTISING: Disable your banner blocker (AdBlock, …) and click on our banner ads.

  • AFFILIATION: Make your purchases online by clicking on our affiliate links here Amazon.

  • DONATE: If you want, you can make a donation via Ko-Fi πŸ’œ.

  • WORD OF MOUTH: Invite your friends to come, discover the platform and the magnificent 3D files shared by the community!


Sharing and downloading on Cults3D guarantees that designs remain in makers community hands! And not in the hands of the 3D printing or software giants who own the competing platforms and exploit the designs for their own commercial interests.

Cults3D is an independent, self-financed site that is not accountable to any investor or brand. Almost all of the site's revenues are paid back to the platform's makers. The content published on the site serves only the interests of its authors and not those of 3D printer brands who also wish to control the 3D modeling market.

100% secure payment by credit card, PayPal, Apple Pay, Google Pay, etc.
View all payment options.