Skip to content

2020 Carriages for Zero-Backlash Magnetic Arms

Advertising
Advertising
?
Creation quality: 0.0/5 (0 votes)
Evaluation of members on the printability, utility, level of detail, etc.

  • 550 views
  • 4 downloads

License
3D design format
Folder details Close
  • 2020-large-wheels.scad
  • 2020-large-wheels.stl

Learn more about the formats

Publication date 2022-10-14 at 16:50
?
Published to Thingiverse on: 2017-03-17 at 09:23
Design number 885494

3D printer file info

3D model description

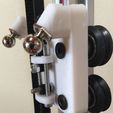
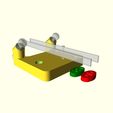
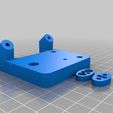
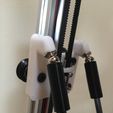
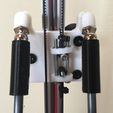
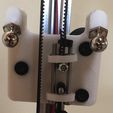
These carriages work for 2020 aluminum extrusions and 24mm diameter wheels, such as the ones from OpenBuilds or RobotDigg.com.
Eccentric spacers are used for preloading the tension on the wheels.
You can get the ball studs from me for $1 each, and I also precisely build the carbon fiber, zero-backlash, magnetic arms. My website is http://www.MagBallArms.com

This design works nicely with my effector which sports an LED light ring and 3 PLA cooling fans: http://www.thingiverse.com/thing:1546124

Here are links to the wheels, eccentric spacers and 1/4" round spacers from RobotDigg:
http://www.robotdigg.com/product/521/Delrin-or-SUS-Via-S-Bearing
http://www.robotdigg.com/product/626/Openbuilds-decentration-post
http://www.robotdigg.com/product/670/Spacer-for-Delrin-Slide-Kit

Here are links to the wheels, eccentric spacers and 1/4" round spacers from OpenBuilds:
http://openbuildspartstore.com/delrin-v-wheel-kit/
http://openbuildspartstore.com/aluminum-spacers/ (choose 1/4")
http://openbuildspartstore.com/eccentric-spacer/ (choose 1/4")

Per carriage, you will need:
3 of the above V- or W-wheels.
2 of the above 1/4" spacers (or you could use 6mm).
1 of the above 1/4" eccentric spacers (or you could use 6mm).
3 M5x35 bolts.
1 large M5 washer for the top side of the eccentric spacer (optional).
3 M5 nylock nuts to secure the three axles.
2 3/8" ball studs.
2 M3 nylock nuts to secure the ball studs.
2 M3x35 SHCS for the tightener.
2 M3 nuts for the tightener.
1 M3x20 SHCS for the vertical post for the upper G2 belt attachment.
1 M3 nut to secure the vertical post.

Note: You should be able to easily alter the OpenSCAD source to work with 2040 or 2060 extrusions, by changing extrusionWidth from 20.0mm to 40.0 or 60.0mm.

If your belts are farther above your carriages, you can easily adapt by using a longer M3 vertical screw.

The belt tightener this uses is very simple and easy to adjust with two M3x35 screws.
I found that this delivered better results than using zip ties. My prints got more accurate by about 50 microns.

I also have a version for 15mm diameter "mini" V-wheels: http://www.thingiverse.com/thing:2183355

3D printing settings

-

Advertising


Issue with this design? Report a problem.

Would you like to support Cults?

You like Cults and you want to help us continue the adventure independently? Please note that we are a small team of 3 people, therefore it is very simple to support us to maintain the activity and create future developments. Here are 4 solutions accessible to all:

  • ADVERTISING: Disable your banner blocker (AdBlock, …) and click on our banner ads.

  • AFFILIATION: Make your purchases online by clicking on our affiliate links here Amazon.

  • DONATE: If you want, you can make a donation via Ko-Fi πŸ’œ.

  • WORD OF MOUTH: Invite your friends to come, discover the platform and the magnificent 3D files shared by the community!


Sharing and downloading on Cults3D guarantees that designs remain in makers community hands! And not in the hands of the 3D printing or software giants who own the competing platforms and exploit the designs for their own commercial interests.

Cults3D is an independent, self-financed site that is not accountable to any investor or brand. Almost all of the site's revenues are paid back to the platform's makers. The content published on the site serves only the interests of its authors and not those of 3D printer brands who also wish to control the 3D modeling market.

100% secure payment by credit card, PayPal, Apple Pay, Google Pay, etc.
View all payment options.