Skip to content

flowing pads for EUC, power pads, electric unicycle pads

Advertising
Advertising
?
Creation quality: 5.0/5 (2 votes)
Evaluation of members on the printability, utility, level of detail, etc.

  • 4.9k views
  • 7 likes
  • 37 downloads

License
3D design format
3MF and STL Folder details Close
  • B flowing pads.stl
  • F flowing pads.stl
  • flowingpadsproject.3mf

Learn more about the formats

Publication date 2022-10-16 at 23:07
Design number 888548

3D printer file info

3D model description

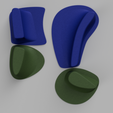
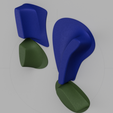
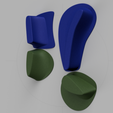
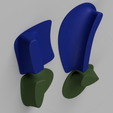
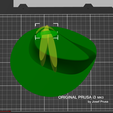
these pads allow you all the customization you want. custom infill allows for custom stiffness. The default project is a good medium between comfort, stiffness, and ability to jump. If you wanted maximum comfort, you could remove all the custom infill and just have squishy pads. if you want to be able to remember where they stay on your wheel, simply cutout a small triangle from the flat base of each pad, and leave it on your wheel when you remove them.

uploaded are the stl's and project for prusa slicer which has all the custom infill geometry that is recommended for the correct rigidity.

3D printing settings

YOU MUST USE CUSTOM INFILL FOR THE BEST RESULTS.
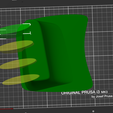
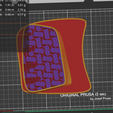
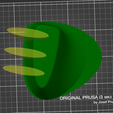
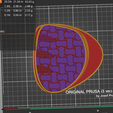
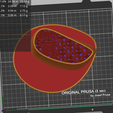
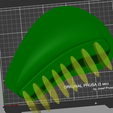
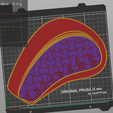
see pictures. I use internal ribs in the form of denser support structures inside the part. You can tweak and customize this however you want to get the pads as stiff or squishy in the areas you'd like. What I have is just recommended.

they are very large as is, i would recommend decreasing scale to 50-90% on x and y axis depending on wheel size. As is, they're really only suitable for the larger wheels (and printers)

Printer setup:
85a tpu
60c heated bed, warm enclosure also helps
250c nozzle
0.8mm nozzle
0.3mm layer height
3 perimeters
3-4 top layers
7-12 bottom layers
more perimeters or top/bottom layers will make it stiffer. I've found 3 perimeters is minimum for good strength and longevity
default 10% gyroid infill
custom infill geometry 25% gyroid infill or more for more stiffness. On the foot peg, some geometry has 35% infill. see project file for more details.
set volumetric flow rate to 4.5mm^3/s (or whatever your printer is capable of) to limit speed
custom infill geometry (see pictures)

make sure filament is dry

I print them at 80% scale only on x and y, leaving z axis at 100%
files are for Front and Back, should probably print each pad piece individually if your bed isn't large enough

Advertising


Issue with this design? Report a problem.

Would you like to support Cults?

You like Cults and you want to help us continue the adventure independently? Please note that we are a small team of 3 people, therefore it is very simple to support us to maintain the activity and create future developments. Here are 4 solutions accessible to all:

  • ADVERTISING: Disable your banner blocker (AdBlock, …) and click on our banner ads.

  • AFFILIATION: Make your purchases online by clicking on our affiliate links here Amazon.

  • DONATE: If you want, you can make a donation via Ko-Fi 💜.

  • WORD OF MOUTH: Invite your friends to come, discover the platform and the magnificent 3D files shared by the community!


Sharing and downloading on Cults3D guarantees that designs remain in makers community hands! And not in the hands of the 3D printing or software giants who own the competing platforms and exploit the designs for their own commercial interests.

Cults3D is an independent, self-financed site that is not accountable to any investor or brand. Almost all of the site's revenues are paid back to the platform's makers. The content published on the site serves only the interests of its authors and not those of 3D printer brands who also wish to control the 3D modeling market.

100% secure payment by credit card, PayPal, Apple Pay, Google Pay, etc.
View all payment options.