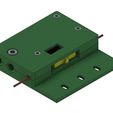
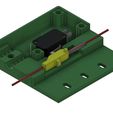
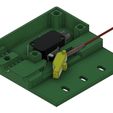
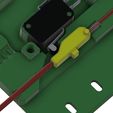
Again and again there are problems with filament that is too thick.
From a thickness of 1.95mm, an extruder can block.
To circumvent this situation, the "FILAMENT GUARD" was developed by me.
FUNCTION:
When there is a threat of blockage due to excessively thick filament, a slider is pulled and cuts off the power to the printer.
This protects both the extruder and the nozzle (by overheating the material).
At the same time, the "FILAMENT GUARDIAN" also serves as a filament OFF guard, since when the filament ends, the slide disengages and the shutdown is activated.
However, this also interrupts printing, so it is recommended to use the "FILAMENT GUARDIAN" only on printers with POWER_LOSS_RECOVERY.
However, this setting can often be enabled in the firmware.
But you can also install the guard directly as a filament sensor !!!
To do this, then attach the appropriate cables (actually only 2 wires) to the board.
Once the errors have been eliminated, printing can thus continue without having to fret over unfinished and defective prints....
ASSEMBLY:
Mounts the guard vertically under the filament extruder.
Spacing may need to be adjusted with washers or brackets.
ELECTOINSTALLATION:
A MICRO SWITCH switch of the CMV104D series or similar is required, as well as the printer's cable and 2 terminal lugs, suitable for the connections of the SWITCH switch.
The power cable of the printer at half of the length CAREFULLY free from the outer insulation (about 8cm), insert into the terminal sockets and now only cut the brown cable at the level of the COM port, crimp with suitable cable lug and plug on....
Connect the other end in the same way to the NO contact.
!!! ELECTRICAL WORK TO BE CARRIED OUT BY A SPECIALIST ONLY !!!
TRANSLATION:
There are always problems with filament that is too thick.
From a thickness of 1.95mm, an extruder can block.
To avoid this situation, I developed the 'FILAMENT GUARDIAN'.
FUNCTION:
If a blockage is imminent due to the filament being too thick, a slider is pulled and interrupts the power supply to the printer.
This protects both the extruder and the nozzle (by overheating the material).
At the same time, the 'FILAMENT GUARDIAN' also serves as a filament OFF guard, since the slider releases at the end of the filament and the shutdown is activated.
However, this also interrupts the print, which is why it is recommended to use the 'FILAMENT GUARDIAN' only on printers with POWER_LOSS_RECOVERY.
However, this setting can often be activated in the firmware.
But you can also install the guard directly as a filament sensor !!!!
Then attach the appropriate cables (actually only 2 wires) to the board.
After eliminating the error, the print can be continued without getting annoyed about unfinished and defective prints...
ASSEMBLY:
The guard is attached vertically under the filament extruder.
Under certain circumstances, the distances must be adjusted with washers or brackets.
ELECTRICAL INSTALLATION:
You need a MICRO SWITCH switch from the CMV104D series or similar, as well as the cable from the printer and 2 clamping shoes that fit the connections on the SWITCH switch.
CAREFULLY free half of the length of the printer's power cable from the outer insulation (approx. 8 cm), insert it into the terminal sockets and only now cut through the brown cable at the height of the COM connection, press in with a suitable cable lug and plug it in.
Do the same and connect the other end to the NO contact.
!!! ALLOW ELECTRICAL WORK TO BE CARRIED OUT BY A SPECIALIST !!!

/https://fbi.cults3d.com/uploaders/18669826/illustration-file/79fe428a-620b-4ffe-8290-530de213889f/Filament%20W%C3%A4chter.jpg)


