Skip to content

10" Unifi Network Rack Project

Advertising
Advertising
?
Creation quality: 5.0/5 (1 vote)
Evaluation of members on the printability, utility, level of detail, etc.

  • 4k views
  • 3 likes
  • 54 downloads

License
3D design format
STL Folder details Close
  • 10inch_7490.stl
  • 10inch_7490_FRONTPLATTE.stl
  • 10inch_NUC.stl
  • 10inch_NUC_FRONTPLATTE.stl
  • 10inch_NUC_OHNESCHRIFT.stl
  • 10inch_USG.stl
  • 10inch_USG_FRONTPLATTE.stl

Learn more about the formats

Publication date 2022-10-24 at 07:50
?
Published to Thingiverse on: 2020-12-10 at 22:23
Design number 897650

3D printer file info

3D model description

[check this project out also on prusaprinters.org where everything should be much faster :-)
https://www.prusaprinters.org/prints/48622-10-unifi-fritzbox-7490-intel-nuc-network-rack-proj ]

Hey guys

i'd like to share my recent bigger project with you, my 10 inch Network Rack.
I was always disappointed when i saw all the mess and not really organized cabling and setup of my network devices at home.
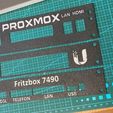
Inspired by another 10inch Network Rack Project here on Thingiverse (link below) i decided to develop all from scratch myself, with one execption, the mount for the 8 Port Switch ;-) this one was printed from the other project. I just designed a little front plate for it.

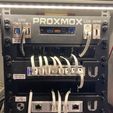
My Rack contains (bottom to top):
- 4 plug 10" Power supply
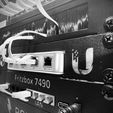
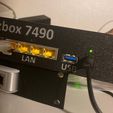
- Fritzbox 7490 (acting as modem and phone system for DECT phones, Frame self developed)
- Unifi USG 3
- Unifi 8 Port PoE Switch 60 Watt
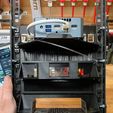
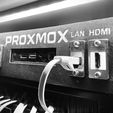
- Intel NUC (Proxmox which is driving my smart home system, pihole, influxDB, Grafana, video suveillance ect ect )

Not visible on the pictures is the QNAP NAS which is located left side of the rack.

Since the Fritzbox 7490 with it's own case wouldnt fit into a 10" generic shelf, i decided to remove the platine and design my own 10" Frame for it. Wil little 2mm fber light "cables" you can move the leds to the front panel.

The mounts are setup in a cabinet with 10" Network rails. Cooled by 2 Noctua Fans (one in, one out) and controlled by a nodemcu with Tasmota on it. One relay is managing the fan, a DHT11 is taking care of measuring temperature and humidity.

Maybe later on i will share more details here, meanwhile if you have questions, please raise them in the comments.

happy printing, guys!

link to 10" Project of mariusbach
https://www.thingiverse.com/thing:3337383

3D printing settings

-

Advertising


Issue with this design? Report a problem.

Would you like to support Cults?

You like Cults and you want to help us continue the adventure independently? Please note that we are a small team of 3 people, therefore it is very simple to support us to maintain the activity and create future developments. Here are 4 solutions accessible to all:

  • ADVERTISING: Disable your banner blocker (AdBlock, …) and click on our banner ads.

  • AFFILIATION: Make your purchases online by clicking on our affiliate links here Amazon.

  • DONATE: If you want, you can make a donation via Ko-Fi πŸ’œ.

  • WORD OF MOUTH: Invite your friends to come, discover the platform and the magnificent 3D files shared by the community!


Sharing and downloading on Cults3D guarantees that designs remain in makers community hands! And not in the hands of the 3D printing or software giants who own the competing platforms and exploit the designs for their own commercial interests.

Cults3D is an independent, self-financed site that is not accountable to any investor or brand. Almost all of the site's revenues are paid back to the platform's makers. The content published on the site serves only the interests of its authors and not those of 3D printer brands who also wish to control the 3D modeling market.

100% secure payment by credit card, PayPal, Apple Pay, Google Pay, etc.
View all payment options.