Skip to content

Kitchenaid Coffee grinder - Burr upgrade

Advertising
Advertising
?
Creation quality: 0.0/5 (0 votes)
Evaluation of members on the printability, utility, level of detail, etc.

  • 465 views
  • 2 downloads

License
3D design format
Folder details Close
  • Drill_template.STL
  • KA-Mazza_Adapter.STL
  • Spacer.STL

Learn more about the formats

Publication date 2022-10-22 at 18:43
?
Published to Thingiverse on: 2019-05-10 at 17:30
Design number 895806

3D printer file info

3D model description

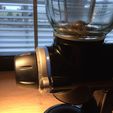
Mazza burr upgrade kit for the Kitchenaid Coffee grinder.

3d printed parts
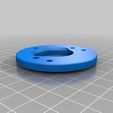
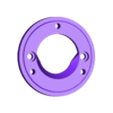
- 1-off Drill template
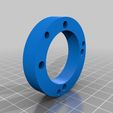
- 1-off KA-Mazza Adapter
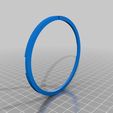
- 1-off Spacer

Hardware
- 2-off Mazza Mini Burrs 58x33.5x8.5mm (Part no. FMA00182D)
- 6-off M4 x 8 pan-head screws
- 4-off M4 x 15 pan-head screws
- 6-off M4 spring washers

Tools
- 1-off Electric hand drill
- 1-off 3.3mm HSS drill bit
- 1-off M4 Tap

Instructions
1. Print the parts listed above.
2. Remove existing Kitchenaid burrs from the grinding chamber and auger, putting aside the screws & washers.
3. Clean grinding chamber internals.
4. Use M4 tap to thread the three outer holes on the KA Mazza Adapter.
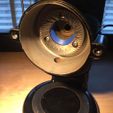
5. Referring to fig 1, secure KA Mazza Adapter to the grinder using the two M4 screws & washers retained from step 1.
6. Secure Mazza burr to the KA Mazza Adapter using 3-off M4 x 8 pan-head screws with spring washers. Ensure burr is concentric with the bronze bush prior to tightening the screws.
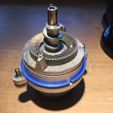
7. Referring to fig 2, secure drill template to auger with M4 x 15 pan-head screws.
8. Separate auger from dial mechanism.
8. Using the 3 outer holes of the drill template, drill 3-off holes through the auger with a 3.3mm dia. HSS drill bit.
9. Remove drill template.
10. Use M4 tap to thread the three new holes.
11. Secure Mazza burr to the auger using 3-off M4 x 8 pan-head screws with spring washers. Ensure burr is concentric with auger prior to tightening the screws.
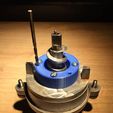
12. Referring to fig 3, re-assemble auger and dial mechanism.
13. Place spacer over dial mechanism with split section facing downwards.
14. Turn dial fully anti-clockwise.
15. Re-assemble, ensuring the auger shaft is fully engaged and the spacer is located correctly prior to tightening the two thumb screws.

3D printing settings

-

Advertising


Issue with this design? Report a problem.

Would you like to support Cults?

You like Cults and you want to help us continue the adventure independently? Please note that we are a small team of 3 people, therefore it is very simple to support us to maintain the activity and create future developments. Here are 4 solutions accessible to all:

  • ADVERTISING: Disable your banner blocker (AdBlock, …) and click on our banner ads.

  • AFFILIATION: Make your purchases online by clicking on our affiliate links here Amazon.

  • DONATE: If you want, you can make a donation via Ko-Fi 💜.

  • WORD OF MOUTH: Invite your friends to come, discover the platform and the magnificent 3D files shared by the community!


Sharing and downloading on Cults3D guarantees that designs remain in makers community hands! And not in the hands of the 3D printing or software giants who own the competing platforms and exploit the designs for their own commercial interests.

Cults3D is an independent, self-financed site that is not accountable to any investor or brand. Almost all of the site's revenues are paid back to the platform's makers. The content published on the site serves only the interests of its authors and not those of 3D printer brands who also wish to control the 3D modeling market.

100% secure payment by credit card, PayPal, Apple Pay, Google Pay, etc.
View all payment options.