Skip to content

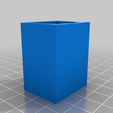
Slice Mosquito Assembly Jig

Advertising
Advertising
?
Creation quality: 0.0/5 (0 votes)
Evaluation of members on the printability, utility, level of detail, etc.

  • 545 views

License
3D design format
Folder details Close
  • Mosquito_Assembly_Jig.scad
  • Mosquito_Assembly_Jig_v1.1.stl

Learn more about the formats

Publication date 2022-10-23 at 00:06
?
Published to Thingiverse on: 2021-01-24 at 20:11
Design number 896146

3D printer file info

3D model description

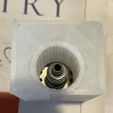
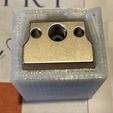
Assembly and disassembly jig for the Slice Engineering Mosquito and Mosquito Magnum hotends.

This keeps everything aligned when you're torqueing the heat break bushing onto (and off of) the hot block. It fits both regular Mosquito and Mosquito Magnum, with the thermistor, heater cartridge, and retaining screws removed.

The STL is designed for a socket with a 13mm outer diameter, give or take; if yours is much larger (or smaller), use the OpenSCAD and the .scad file to generate a new STL. If you need to work on a Mosquito with the thermistor, heater, and/or retaining screws in place, you'll need to modify the STL (or do a lot of scad redesign).

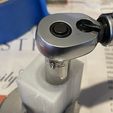
An added benefit is that you can grab the jig with pliers to hold it in place as you torque, instead of having to grab the hotend itself and risk scratching it up. I do recommend pliers as I found it difficult to keep it from turning as I applied the 4 Nm of torque, which is actually a fair amount of force.

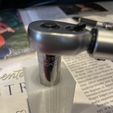
Tip: when tightening to a specific torque, be careful not to allow the socket to rub against the jig too hard or it might affect the torque measurement. I think the steel should slide easily against most rigid plastics but better safe than sorry.

Use Instructions:

  1. Print the model
  2. Remove the heat sink, tubes, retaining screws, and any heater or thermistor -- only the hot block and heat break should remain
  3. If assembling, thread heat break onto hot block and finger tighten
  4. Turn hotend and jig upside down and insert, then turn back over and set on a table
  5. Hold jig with hotend down against table with pliers
  6. Insert socket of properly adjusted torque wrench into top and engage with bushing
  7. Tighten or loosen accordingly

History:

When I first assembled my first Mosquito, I followed the directions to fully take it apart and apply boron nitride paste. Unfortunately, as I was tightening the bushing to 4 Nm with my torque wrench and 9mm deep socket, the socket tilted off the bushing and bent the very thin filament tube. I cursed myself for carelessly destroying my shiny new hotend and costing myself a $35 replacement part and shipping time before I could proceed. (Slice was sympathetic and offered me a discount. Their support is great.)

Luckily I was somehow able to bend the tube back to normal without breaking it, and it even seemed to pop back into round. I haven't seen any issues in the months or year that I've been printing with it.

However, not wanting to experience this stress again, I designed this jig to hold the mosquito in place and constrict the movement of the socket so it couldn't bend the tube of my new Mosquito Magnum.

Disclaimer: I am not responsible for any damage you cause to your hotend, printer, self, house, cat, or anything else.

3D printing settings

-

Advertising


Issue with this design? Report a problem.

Would you like to support Cults?

You like Cults and you want to help us continue the adventure independently? Please note that we are a small team of 3 people, therefore it is very simple to support us to maintain the activity and create future developments. Here are 4 solutions accessible to all:

  • ADVERTISING: Disable your banner blocker (AdBlock, …) and click on our banner ads.

  • AFFILIATION: Make your purchases online by clicking on our affiliate links here Amazon.

  • DONATE: If you want, you can make a donation via Ko-Fi πŸ’œ.

  • WORD OF MOUTH: Invite your friends to come, discover the platform and the magnificent 3D files shared by the community!


Sharing and downloading on Cults3D guarantees that designs remain in makers community hands! And not in the hands of the 3D printing or software giants who own the competing platforms and exploit the designs for their own commercial interests.

Cults3D is an independent, self-financed site that is not accountable to any investor or brand. Almost all of the site's revenues are paid back to the platform's makers. The content published on the site serves only the interests of its authors and not those of 3D printer brands who also wish to control the 3D modeling market.

100% secure payment by credit card, PayPal, Apple Pay, Google Pay, etc.
View all payment options.