Skip to content

Zesty Nimble v1 Palette Tube Clip

Advertising
Advertising
?
Creation quality: 0.0/5 (0 votes)
Evaluation of members on the printability, utility, level of detail, etc.

  • 378 views

License
3D design format
Folder details Close
  • Nimble_Palette_Clip_v1.scad
  • Nimble_Palette_Clip_v1_full_v3_hookier.stl
  • Nimble_Palette_Clip_v1_funnel.stl

Learn more about the formats

Publication date 2022-10-23 at 00:06
?
Published to Thingiverse on: 2019-08-12 at 02:27
Design number 896150

3D printer file info

3D model description

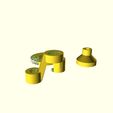
*** Print the funnel WITHOUT support, and the main clip WITH support. ***

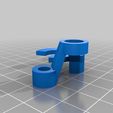
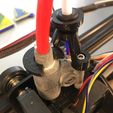
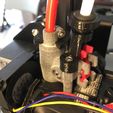
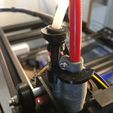
Inspired by klosterkim (https://www.thingiverse.com/klosterkim)'s Nimble-Palette-bowden-connector (https://www.thingiverse.com/thing:3105028) but built from scratch, this is a Mosaic Palette 2 outgoing tube clip for the Zesty Nimble.

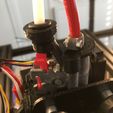
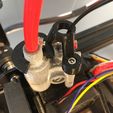
I believe I have a later version of the Nimble because on mine, the bolt on the sleeve clamp points at the nearby mounting bolt. Because of that, the thickish hook arm on her design didn't fit under that. The hook on mine fits perfectly in the gap, which also stabilizes it horizontally.

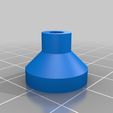
I also implemented the grommet funnel recommended in the official design guide although the funnel prints separately so it doesn't require support, which could end up filling the chamber where the grommet is supposed to go. The funnel slips into a ring on the main clip, and has been solid in what little testing I've been able to do so far.

You can also remove the funnel easily when printing without the Palette, and the ring can be used as a filament guide and bend radius enforcer.

Of course, the clip can be removed easily and without tools.

To mount it, open the Nimbe breech and unload any filament. Place the one bolt anchor (the one with the hole in the top, that doesn't have the hook attached) over the Nimble mounting bolt that is away from the sleeve clamp. Then swing the hook toward the sleeve clamp, and press the sleeve clamp into the hook until it clicks. This may take a little force.

I made this a Customizer because I included the OpenSCAD file, but it probably won't work on Thingiverse. If you want to tweak something just download the .scad and use it in OpenSCAD. Apologies for the sloppiness of the code; I started out pretty diligent with modules but ended up doing a lot of magic in enchilada(). Feel free to ask me for help with any tweaks.

3D printing settings

-

Advertising


Issue with this design? Report a problem.

Would you like to support Cults?

You like Cults and you want to help us continue the adventure independently? Please note that we are a small team of 3 people, therefore it is very simple to support us to maintain the activity and create future developments. Here are 4 solutions accessible to all:

  • ADVERTISING: Disable your banner blocker (AdBlock, …) and click on our banner ads.

  • AFFILIATION: Make your purchases online by clicking on our affiliate links here Amazon.

  • DONATE: If you want, you can make a donation via Ko-Fi πŸ’œ.

  • WORD OF MOUTH: Invite your friends to come, discover the platform and the magnificent 3D files shared by the community!


Sharing and downloading on Cults3D guarantees that designs remain in makers community hands! And not in the hands of the 3D printing or software giants who own the competing platforms and exploit the designs for their own commercial interests.

Cults3D is an independent, self-financed site that is not accountable to any investor or brand. Almost all of the site's revenues are paid back to the platform's makers. The content published on the site serves only the interests of its authors and not those of 3D printer brands who also wish to control the 3D modeling market.

100% secure payment by credit card, PayPal, Apple Pay, Google Pay, etc.
View all payment options.