Skip to content

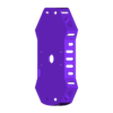
Remix: Syma X5c Race Body

Advertising
Advertising
?
Creation quality: 5.0/5 (1 vote)
Evaluation of members on the printability, utility, level of detail, etc.

  • 898 views
  • 34 downloads

License
3D design format
Folder details Close
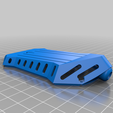
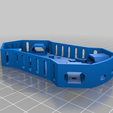
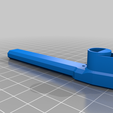
  • Drone-Arm.stl
  • Drone-Base.stl
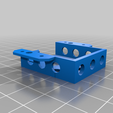
  • Drone-Battery-Holder.stl
  • Drone-Cover.stl
  • Drone-Prop-Protector.stl

Learn more about the formats

Publication date 2022-10-25 at 12:13
?
Published to Thingiverse on: 2020-04-26 at 15:43
Design number 899142

3D printer file info

3D model description

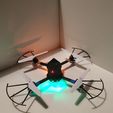
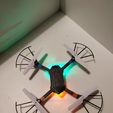
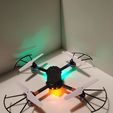
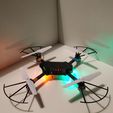
I came across this great race drone design for the Syma X5C https://www.thingiverse.com/thing:1531770 but wasn´t satisfied after mounting all parts together so I decided to do a bit redesign. My design is much lighter and also have a camera integration!

All parts must be printed with ABS! Don´t try to print your drone with PLA (like me). It is too stiff and your drone will break apart after the first "hard landing". ABS is lighter and more durable making it the better material to print drone bodies.
To save weight I glued everything together with ABS glue which you can easily do yourself (https://www.matterhackers.com/news/how*to*make*abs*juice*glue*and*slurry). Parts stick together as printed in one part!

Here the improvements I did so far:
* Added a camera mount to the cover
(I personally like that cause you can film easier yourself while flying the drone. Disadvantage is that you need to open the body to remove the SD card.)
* Removed unnecessary parts to save weight form the body
(i.e. for the arm mounts)
* Reoriented LED holes and made small frames for easier LED mounting.
(Press the LED in the frame and fix with a bit ABS glue. Front LED´s might need to be cutt a bit which is no problem.)
* Added a frame for the on/off switch for better handling
(for even better fix use a drop of ABS glue on top)
* Added optional holes for M2 screws and nuts
(I used to glue the mount to save weight.)
* Removed filling from the arms
(not necessary for this form and when printing ABS)
* Improved mounts for the gear
(They don´t look so "attached" to the body anymore and get more stability as sitting deeper in the arms)
* Added propeller protectors
* Added screw holes to connect base and cover

Assemble:
1. After printing all the parts you should first add the main board into the base. Glue the LED´s and the power switch and place the battery cable.
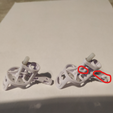
2. Prepare your gears and insert them into the arms (sand if necessary). You need to cut two parts of your gear to make it fit perfectly into the arm. The picture shows you where exactly.
https://cdn.thingiverse.com/assets/88/14/a4/45/c0/featured_preview_Anmerkung_2020-04-26_153751.png
The gear should sit that strong that you don´t need to fix them, still I used a bit electrical tape in different colors also to see easily where is the front of the done.
3. Now you can glue the arms to the base. Push them into the holes until they are in the same level as the frame connected to the base.
4. Solder you motors back to the main board.
5. Insert the camera lense into the respective mount in the cover. I used a bit Uhu Pattafix which is great to mount it but be able to remove it. Also its great to avoid Jello!
6. Glue the battery cover. In case you want to screw it you have to do that before the main board.
7. Screw the cover to the base, I used M2 screws to do that.
8. Mount your propellers and slide on the protectors for the propeller. They should hold nicely but in case you want them to hold stronger you can add a piece of 1.75 mm filament to the hole at the protector. The arm have a hole and the same position to keep it optimal in place.
9. Optional. Add some gear protectors as well: https://www.thingiverse.com/thing:1919029

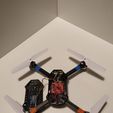
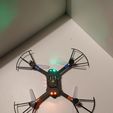
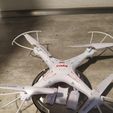
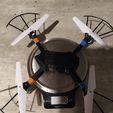
If you print everything using my settings your drone should be slightly lighter than the original Syma! With camera and gear and propeller protectors!!!
https://cdn.thingiverse.com/assets/ba/1d/4b/d8/7d/featured_preview_IMG_20200413_182145.jpg
https://cdn.thingiverse.com/assets/01/d6/5e/04/dc/featured_preview_IMG_20200425_001210.jpg

Enjoy printing and flying and don´t forget to share in case you made this! Also let me know your experience in the comments.

3D printing settings

-

Advertising


Issue with this design? Report a problem.

Would you like to support Cults?

You like Cults and you want to help us continue the adventure independently? Please note that we are a small team of 3 people, therefore it is very simple to support us to maintain the activity and create future developments. Here are 4 solutions accessible to all:

  • ADVERTISING: Disable your banner blocker (AdBlock, …) and click on our banner ads.

  • AFFILIATION: Make your purchases online by clicking on our affiliate links here Amazon.

  • DONATE: If you want, you can make a donation via Ko-Fi 💜.

  • WORD OF MOUTH: Invite your friends to come, discover the platform and the magnificent 3D files shared by the community!


Sharing and downloading on Cults3D guarantees that designs remain in makers community hands! And not in the hands of the 3D printing or software giants who own the competing platforms and exploit the designs for their own commercial interests.

Cults3D is an independent, self-financed site that is not accountable to any investor or brand. Almost all of the site's revenues are paid back to the platform's makers. The content published on the site serves only the interests of its authors and not those of 3D printer brands who also wish to control the 3D modeling market.

100% secure payment by credit card, PayPal, Apple Pay, Google Pay, etc.
View all payment options.