Skip to content

Ai3M E3D Hemera Direct Drive Conversion

Advertising
Advertising
?
Creation quality: 0.0/5 (0 votes)
Evaluation of members on the printability, utility, level of detail, etc.

  • 445 views
  • 2 downloads

License
3D design format
Folder details Close
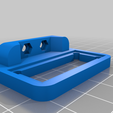
  • Ai3M_HemeraMountPCBV2.stl
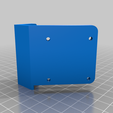
  • Ai3M_HemeraMountWingV2.stl
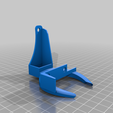
  • Ai3M_HemeraPartCoolerV3.stl
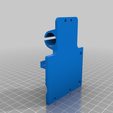
  • Ai3M_HemeraXCarriageV3.stl

Learn more about the formats

Publication date 2022-10-25 at 19:29
?
Published to Thingiverse on: 2021-01-25 at 18:14
Design number 899597

3D printer file info

3D model description

UPDATE
Replace the X Carriage and Part Cooler parts with V3. Minor tweaks to both. Adjusted the belt attachment on the X Carriage by moving to the back slightly to improve alignment with belt path. Increased the size of the end stop plat on the Part Cooler.

UPDATE
All new V2 versions of all 4 parts. I squeezed the extruder a little closer to the X rails resulting in only a little more than 6mm offset in the negative Y direction. The X direction has not suffered any loss due to rotating the extruder -45Β°. New versions are still untested since I have run out of zip ties to tie the belt. When I get more I will install all the new parts and test thoroughly. I think the V2 part cooling duct will be way more effective than V1.

UPDATE
After installation I have noticed that some parts need a little rework so I have replaced some parts with V2 versions of each. The home park position is off the print bed by about 10mm. I am going to re-center the bed and see what happens. I think the X direction is still the default build dimension though. I also haven't done anything with the wires yet. I will tidy those up a little eventually.

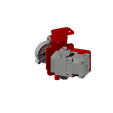
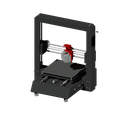
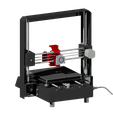
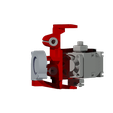
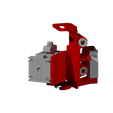
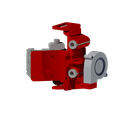
Here's a new approach to attaching the E3D Hemera to the Anycubic i3 Mega. I decided to rotate the Hemera extruder 45Β° towards the display in order to not lose so much build volume in the X direction. Also the nozzle gets pushed to the front on the Y axis about 10mm. But I think with re-homing the nozzle there won't be too much lost in the build volume.

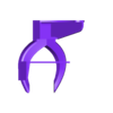
The oridinal X rail linear motion bearings are used. They slide into the X plate very snuggly. The belt attaches the same way as the original belt attachment. Supports are only needed for the part cooling duct. I'm not sure about the part cooling duct. I don't know if it is very effective yet.

Instructions:
1. Print all 3 parts.

  1. Assemble the "Wing" to the "X Carriage" with (2) M5x12mm screws and M5 nuts.

  2. Attach the PCB part to the top of the "X Carriage" with (2) M3x8mm screws and M3 nuts.

  3. Attach the part cooler into the notch at the bottom of the carriage and fasten with (2) M3x8mm screws and M3 nuts.

  4. Attach the Hemera extruder to the "Wing" plate with (4) M3 screws. More mounting instructions provided by E3D here https://e3d-online.dozuki.com/Guide/04+-+General+E3D+Hemera+Mounting+Guide./142?lang=en.

  5. Remove original X Carriage Plate and take the linear motion bearings out of the mounts.

  6. Disconnect the belt.

  7. Insert the bearings into the new X Carriage and insert the X rods into each.

  8. Attach the belt with zip ties on each side.

  9. Attach the PCB to the carriage with (3) M3 screws.

I have not tested this yet but as soon as I do I will post results here. Once everything has been tested and has been given the "Okay", I will post STEP files here as well.

3D printing settings

-

Advertising


Issue with this design? Report a problem.

Would you like to support Cults?

You like Cults and you want to help us continue the adventure independently? Please note that we are a small team of 3 people, therefore it is very simple to support us to maintain the activity and create future developments. Here are 4 solutions accessible to all:

  • ADVERTISING: Disable your banner blocker (AdBlock, …) and click on our banner ads.

  • AFFILIATION: Make your purchases online by clicking on our affiliate links here Amazon.

  • DONATE: If you want, you can make a donation via Ko-Fi πŸ’œ.

  • WORD OF MOUTH: Invite your friends to come, discover the platform and the magnificent 3D files shared by the community!


Sharing and downloading on Cults3D guarantees that designs remain in makers community hands! And not in the hands of the 3D printing or software giants who own the competing platforms and exploit the designs for their own commercial interests.

Cults3D is an independent, self-financed site that is not accountable to any investor or brand. Almost all of the site's revenues are paid back to the platform's makers. The content published on the site serves only the interests of its authors and not those of 3D printer brands who also wish to control the 3D modeling market.

100% secure payment by credit card, PayPal, Apple Pay, Google Pay, etc.
View all payment options.