A while back, there seemed to be a "rush" on external 120MM fan shrouds for the Maker Select V2.
That little stock 40mm was NOT getting it done, and it was sucking air IN, instead of pulling air OUT.
I liked the 120mm design, but I didn't like how, to me, it grossly oversized the end of the control box.
I wanted something that maintained the stock control box profile.
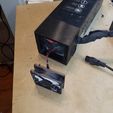
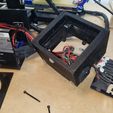
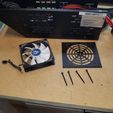
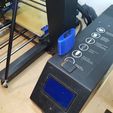
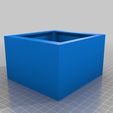
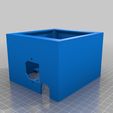
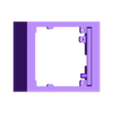
So, I designed a shroud that accommodated an internal 92MM Arctic F9 fan.
It attaches using the same 4 screw mounts that retain the stock cover.
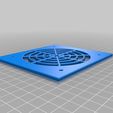
Then the fan fits in, and a fan grille is attached over it with 4 longer M3 screws.
In the process, I did a couple of additional things:
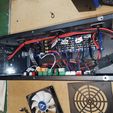
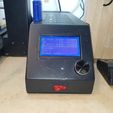
I eliminated the rear Power Switch in favor of a lighted rocker in the bottom front of the control box. I got sick and tired of reaching to the back of the control box just to turn it on/off. THIS REQUIRED metal cutting.
I replaced the switched/fused Power Cord feed with just a fused Power Cord feed.
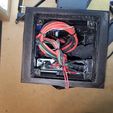
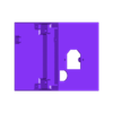
I re-positioned the Melzi board to one interior side of the control box, which allowed me to gain easier access to the SD card port, which allowed me to design a shroud to firmly hold a full-size SD adapter. This AGAIN REQUIRED metal cutting AND tapping.
I lengthened the cable harness by about 6 inches, giving me some more slack out of the control box.
I added a MOSfet for the Hot Bed. The mount incorporates both the MOSfet and the smoothers, but my design needs some work as it's warping in the box.
I added smoothers for the axis and extruder motors. Honestly, I don't believe they've done ANYTHING by way of improvement, so I'm not going into detail about that.
I have not detailed the process I went through to modify the metal control box/reposition the Melzi board, as I'm just not sure that it is a mod that many folk would want to make. You'd be hacking metal.
If you ARE interested, add a Comment requesting it, or PM me, and I'll try to detail it as best as possible: it was a really subjective mod.
The Fan Shroud is configured in a couple different options:
- Power and Data out the same side: Power low and Data high.
- Power out one side and Data out the other.
Depending on which configuration you'd like, simply mirror the appropriate piece in your slicer.
Be forewarned: when I printed this many months ago, I was printing at 60mm/s, and it took over 24 hours to complete. I was nervous then, as I only had the printer for maybe a month.
Nowadays, to me, a 24+ hr print is nothing more than a walk in the park. :-)
And it helps that I print everything at 80mm/s or faster.
With the SD card shroud positioned on the TOP of the control box, I don't ever "bump" the card accidentally and inadvertently halt a print.
Now, I HAVE, ONE TIME ONLY, accidentally hit the front mounted power switch and lost a print that way, but only once. :-) Be warned! :-)
I use 2 little squares of 3M automotive dbl-stick to hold the SD shroud in place, and it stays there quite well. When I want to physically connect via USB, I just pry it off and plug in.
I hope to go at it again one day, re-config the cutout, and re-design a shroud that simply snaps in, making USB control that much easier to achieve and eliminating the dbl-stick tape. Details about that can be requested as before: it''s another purely subjective mod.
All in all, it was not a difficult project, but there's drilling and cutting and tapping of metal involved, and that just may not be everyone's cup-o-tea.
I've included the STL and SLDPRT for the Fan Shroud and Fan Grille.
The other components can be made available on request.

/https://fbi.cults3d.com/uploaders/16680056/illustration-file/afeb7bbd-0f96-49ee-8f2e-b900b9d39de6/20190206_171219.jpg)
