Skip to content

Reliable ABP for PLA

Advertising
Advertising
?
Creation quality: 0.0/5 (0 votes)
Evaluation of members on the printability, utility, level of detail, etc.

  • 254 views

License
3D design format
Folder details Close
  • ABPbeltMould.scad
  • ABPbeltMould.stl
  • ABPtensioner.scad
  • ABPtensioner.stl

Learn more about the formats

Publication date 2022-10-29 at 04:03
?
Published to Thingiverse on: 2013-06-14 at 01:42
Design number 903806

3D printer file info

3D model description

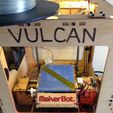
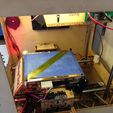
Make your good old Thing-O-Matic truly automatic! Here is mine at the Seattle Mini Makerfaire last weekend churning out bracelets: http://www.youtube.com/watch?v=nmmUECyz-ek

Both of my machines printed continuously both days without any major breakdowns, my TOM giving away ~70 bracelets and my Rep1 ~60 bearings.

Since switching to PLA, I hadn't been using my Automated Build Platform, since it doesn't stick so well to the old kapton belt. However, I finally went through and fixed up the design, and it now works better than ever.

3D printing settings

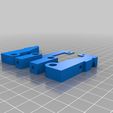
First, take a look at the ancestor, Truly Automatic Thing-O-Matic. Those instructions still apply. I've included a sturdier version of gaerisl's belt tensioner because my old one was warping pretty badly under the strain of keeping the belt taught. It requires a couple of M3x20 screws and nuts, but it goes on the same way.

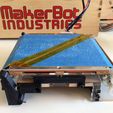
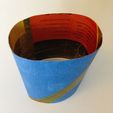
To make the belt, cover a piece of paper (I use the cover of a magazine, because it's thin, strong and long enough for the belt) with kapton tape on both sides (to make it tough). Then cover one side with blue tape (blue tape sticks better to kapton than anything else). Then cut the belt out of this tape-paper, using the original belt shape as a template.

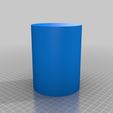
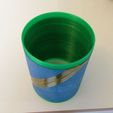
Print out the belt mould (I use zero infill with 4 perimeters for strength). Then wrap the belt around the mould and tape the seam with 3/4" kapton tape. Make sure the belt is uniformly tight so that it's a true cylinder. There will be a small gap you tape over (~3mm). Slide the belt off the mould and tape the inside of the gap as well. Fold the tape over the sides to make sure it won't peel.

Assemble everything as with the previous version's instructions and tighten up the belt until it rides flat. I find that even though PLA doesn't stick as well to kapton, it will usually still work even if the seam is under the print, since it's narrow.

I set the heated bed to 35C, mostly because it does something to the blue tape glue that makes it adhere to the kapton really well. This belt won't resist parts warping, so I recommend switching out to the heated build platform for more precise prints (hence the swappable build plate mod is extremely useful).

Advertising


Issue with this design? Report a problem.

Would you like to support Cults?

You like Cults and you want to help us continue the adventure independently? Please note that we are a small team of 3 people, therefore it is very simple to support us to maintain the activity and create future developments. Here are 4 solutions accessible to all:

  • ADVERTISING: Disable your banner blocker (AdBlock, …) and click on our banner ads.

  • AFFILIATION: Make your purchases online by clicking on our affiliate links here Amazon.

  • DONATE: If you want, you can make a donation via Ko-Fi πŸ’œ.

  • WORD OF MOUTH: Invite your friends to come, discover the platform and the magnificent 3D files shared by the community!


Sharing and downloading on Cults3D guarantees that designs remain in makers community hands! And not in the hands of the 3D printing or software giants who own the competing platforms and exploit the designs for their own commercial interests.

Cults3D is an independent, self-financed site that is not accountable to any investor or brand. Almost all of the site's revenues are paid back to the platform's makers. The content published on the site serves only the interests of its authors and not those of 3D printer brands who also wish to control the 3D modeling market.

100% secure payment by credit card, PayPal, Apple Pay, Google Pay, etc.
View all payment options.