Skip to content

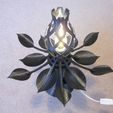
Blossoming Lamp

Advertising
Advertising
?
Creation quality: 5.0/5 (1 vote)
Evaluation of members on the printability, utility, level of detail, etc.

  • 1k views
  • 6 likes
  • 31 downloads
  • 5 makes

License
3D design format
Folder details Close
  • Lamp.scad
  • Lamp_Opaque.stl
  • Lamp_Stand.stl
  • Lamp_Translucent.stl

Learn more about the formats

Publication date 2022-10-29 at 04:03
?
Published to Thingiverse on: 2012-12-15 at 19:20
Design number 903836

3D printer file info

3D model description

For me, what makes 3D printing so awesome is not just that you can make things yourself that you would have otherwise bought, but that you can make things that couldn't be made any other way. For this reason, I've been captivated by captured joints, where moving parts are printed together such that no assembly is required.

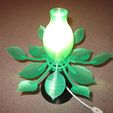
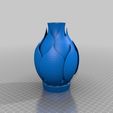
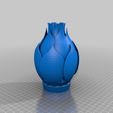
This lampshade consists of 14 interlocking pieces printed at once. When you pull up on the top, the blossom opens, allowing more light out. See the video here: http://youtu.be/blEgWG9V9sA

This lamp is my entry into ProtoParadigm's Winter Wonderland Contest, since when I'm struggling through a long, dark, Northwest winter, what I need is light and a reminder that the blossoms of spring will eventually arrive. I was inspired by http://www.mgxbymaterialise.com/limited-editions/mgxmodel/detail/detail/71, but I wanted to make a simpler, more organic model that wouldn't require a powder printer.

3D printing settings

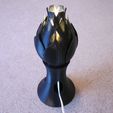
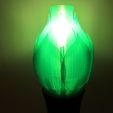
Choose one of the lampshades; the black one is Lamp_Opaque and the green one is Lamp_Translucent, which has a thin, solid inner surface instead of the grillwork, to act as a light diffuser when using translucent plastic.

Print the lampshade and the stand. I sliced them with Slic3r, which worked great. Make sure you have good retraction. I printed everything you see on my Replicator 1 in PLA at 120 mm/s using the Sailfish firmware. I print on unheated blue painters tape, which kept everything well adhered to the build platform.

When the lampshade is finished printing, remove it from the platform and carefully push up on the bottom center parts while pulling down on the outer ring. You may need to slice a few strings between the petals to allow them to separate. Once you get it open all the way, exercise it a few times and cut out any remaining strings. It should move quite freely.

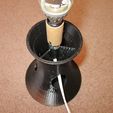
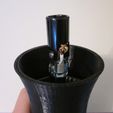
The stand is made to accept a standard hollow, threaded rod that lamps are often mounted with (at least in the US). You just need to find a small lamp socket and cord to attach. I used a standard candelabra socket and an LED bulb. You can use anything, so long as it's less than 34mm in diameter. I recommend LEDs, since they are low power and so won't soften the plastic. However, small LED bulbs are strangely hard to find. Of course, you could always make your own.

Once you install the bulb, slip the shade down over it and press it into the stand (it's just a conical press-fit). This way you can pry the shade back off to change the bulb.

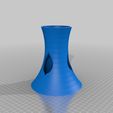
The bottom of the stand is solid so that you can pour sand in if you're worried about it tipping over. The holes in the stand are designed to encourage cooling airflow past the bulb. I'm also trying something new: I signed my name to the bottom of the stand. When my dad was a potter, he always stamped his name on the bottom of his pots, so I thought I would try the same thing. I'm interested to hear if any of you have comments on this method of attribution.

Advertising


Issue with this design? Report a problem.

Would you like to support Cults?

You like Cults and you want to help us continue the adventure independently? Please note that we are a small team of 3 people, therefore it is very simple to support us to maintain the activity and create future developments. Here are 4 solutions accessible to all:

  • ADVERTISING: Disable your banner blocker (AdBlock, …) and click on our banner ads.

  • AFFILIATION: Make your purchases online by clicking on our affiliate links here Amazon.

  • DONATE: If you want, you can make a donation via Ko-Fi πŸ’œ.

  • WORD OF MOUTH: Invite your friends to come, discover the platform and the magnificent 3D files shared by the community!


Sharing and downloading on Cults3D guarantees that designs remain in makers community hands! And not in the hands of the 3D printing or software giants who own the competing platforms and exploit the designs for their own commercial interests.

Cults3D is an independent, self-financed site that is not accountable to any investor or brand. Almost all of the site's revenues are paid back to the platform's makers. The content published on the site serves only the interests of its authors and not those of 3D printer brands who also wish to control the 3D modeling market.

100% secure payment by credit card, PayPal, Apple Pay, Google Pay, etc.
View all payment options.