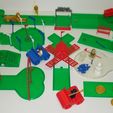
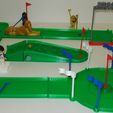
PLEASE NOTE: NOW ALL pieces and parts (everything) for the first 9 Holes is Placed in 3 ZIPPED FILES! DOWNLOAD THOSE 3 FILES, and you have Everything you need to set yourself up with your very own 9 Hole Golf Course. Thingiverse had a problem with the number of files I was uploadeding, so it would randomly delete files (without telling me).
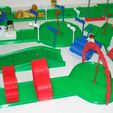
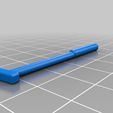
Print the course, print some clubs, a couple of balls, and all accessories, and your set! Print the 8mm diamter golf ball if you have an amatur status. Print the 5mm golf balls if your going pro! If you can print it full scale, then it is "Golf-In-Miniature", if you have to scale downward, it is "Golf-In-Microture". If there is enough demand, I will slice the large pieces with Netfabb into under 100mm chunks.
If you need an "18 Hole Golf Course Printing Machine" you can find one here: http://www.kickstarter.com/projects/vision3dprinter/the-vision-not-just-a-3d-printer-a-dream?ref=live It's how I am printing them.
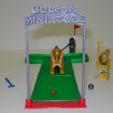
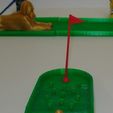
Hole #1: "T-Off: Putt Like Tut"
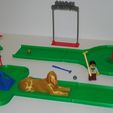
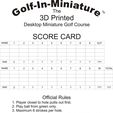
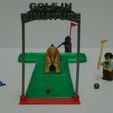
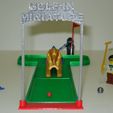
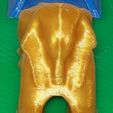
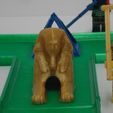
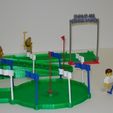
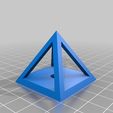
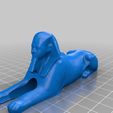
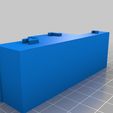
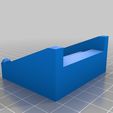
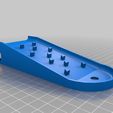
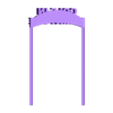
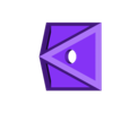
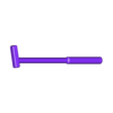
You need: 1. Hole #1.stl, 2. 8mm or 8mm Golf Ball, 3. A Putter, 4. Entrance Sign, 5. Entrance Sign Stand, 6. Sphinx with Tunnel, 7. Hollow Pyramid with Hole #1, 8. Golf Flags, 9. Golf Flag Divot, 10. Golf-In-Miniature Score Card, 11. Extra Fairway Lentgh or X-Link if desired, and you should be ready to go! Print the Calibration Pyramid first, it it works, you are good to go. The Sphinx as an 10mm wide x 12mm long elipse tunnel cut through him (done in the 3D model). You will be far more successful printing this Sphinx than the original, since it is split into 2 parts until it is about 10.5mm up. Basically, you as well as the Sphinx will be "golden". I might edit Hole #1 to put an inclined ramp between the kitty and the pyramid. Let me know if you would like some changes. Also, you don't have to print the Golf Balls, you can get a ball bearing, or bb (bb's are 4.5mm diameter).
Hole #2: "The Winner's Circle"
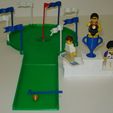
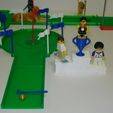
With the right 3D Printer, you don't need to wait until the end of the game to be declared a winner. With a well calibrated 3D Printer, you are already there. For Hole #2, you need: 1. The Winner's Circle Green, 2. Optional Fairway, 3. Seej Flag and Flag Pole (not the stand) Find Them Here: http://www.thingiverse.com/thing:24720, or if you really want even more flags and need stands - find them also here: http://www.thingiverse.com/thing:23624. In addition, you will need 4. One to three - Trophies scaled and printed at 47% you can find the Trophy Cups at http://www.thingiverse.com/thing:8477 . 5. The Winner's Podium 6. Another Golf-In-Miniature Flag, 7. Another Flag Divot, 8. A Putter, and of course your choice of an 8mm or 5mm Golf Ball Thanks to Thingiverse users tc_fea, and zheng3! The Trophy Cups printed at 47% are tricky, they are thin walled, have a very narrow stem, and have a couple of spots that are over the 45 degree rule for overhangs. Slow the print down, and increase cooling and your good to go.
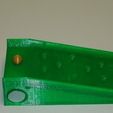
Hole #3: "The Pachinko Machine: Gambling with Extreme Bridging"
To Bridge, or Not to Bridge - that is the question. It is one of the most important processes in 3D Printing. Spanning free space in between 2 pillars is both magical and gut wrenching. The farther the span, the greater the intensity. When Bridging is done right, it saves a lot of time, materials, and money. I drew up this part to have a TOTAL void underneath the incline. As such, it had the worst kind of bridging, inclined unsupported edges Where the thickness is under 2mm. Because the incline is so gradual, the edge that bridges has no support structure other than the two sides. This part is so extreme, I couldn't watch it when I printed it. As I thought the prototype part would fail without reworking the model, I didn't even take any pictures or video record it. That Hindsight thing really gets me sometimes. Hole #3: "The Pachinko Machine" consists of ONLY 2 New Pieces - easy peasy. Calibrate your machine for bridging, or you are sure to waste some green. This model has 116mm of 56mm wide bridging. It should be fun to watch, if you have the stomach for it. You need 1. Hole #3 - The Pachinko Machine and 2) The Brownstone Steps derived from http://www.thingiverse.com/thing:6287. I Scaled the X Axis 12x, the Y Axis = 10x and the Z axis 8.5x, cleaned up the strange STL File, and you would thing the model was designed for this hole. And so it was.
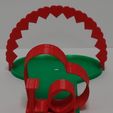
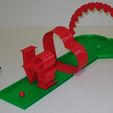
Hole#4: "Fore the Love of MiniGolf and 3D" By now you are getting the hang of your machine. The more you use it, the more you will love it, it's natural. This hole takes 2 "off the shelf" Thingiverse parts and incorporates them without any scaling. Both look like they were made for a good minigolf course. Printing them in red really makes them POP. The "Heart Cookie Cutter" from RobertHunt is a good print to show high speed thin wall prints of double wall (with .35 nozzle or single wall for 0.5mm nozzle. Here is a link to the YouTube video showing me printing it: http://www.youtube.com/watch?v=aSJ7PLQSsiM . For Hole #4, you will need 1. A G-I-M Fairway, 2. a "Love Sculture" by phineasjw (found at http://www.thingiverse.com/thing:22952" ,3. a Heart Shaped Cookie Cutter Printed full Scale (found at http://www.thingiverse.com/thing:1271 and printed on YouTube http://www.youtube.com/watch?v=zNGB5HPAk6U&feature=channel&list=UL), 4. the Golf-In-Miniature Hole#4 - Heart, 5. Golf-In-Miniature Heart Banner, and of course the GIM Clubs, Balls, etc... from previous holes.
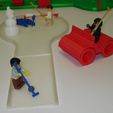
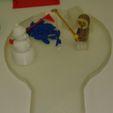
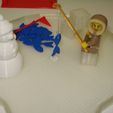
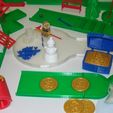
Hole #5: "Snow Golf" To make snow or ice, you will need Natural PLA, when printed it looks like frosted glass, or ice. You will need 1. GIM Hole #5 - Snow Golf Hole, 2. a Snow Fairway, 3. Fish scaled at 8% of normal size http://www.thingiverse.com/thing:13001 , 4. a Snowman http://www.thingiverse.com/thing:16772, 5. a Golf Cart - because your feet are getting tired - http://www.thingiverse.com/thing:25050 , 6. Clubs, golf balls, etc... from before.
***Sorry for the delay, IT APPEARS I REACHED THINGIVERSE'S LIMIT ON THE NUMBER OF FILES THAT I CAN UPLOAD TO ONE SINGLE THINGIVERSE PROJECT I have now zipped each set of 3 holes at a time up into a single download. I will load Holes 10 thru 12 on Thursday June 21st!
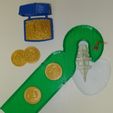
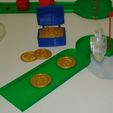
Hole #6: "Ghost Pirates' Cove" - Remember "X" marks the spot for the hole and the Gold! You will need 1. Hole#6 - Pirate Cove Hole, 2. Sweet Treasure Chest http://www.thingiverse.com/thing:15283 , 3, Pirate Ship http://www.thingiverse.com/thing:12856# , 4. Gold Pirate Booty http://www.thingiverse.com/thing:23374 , 5. Ducky pond http://www.thingiverse.com/thing:23375 , 6. all accessories from before.
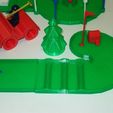
Hole #7: "Over the Hills and Thru the Woods to Robbie's House????" Yes, that's right, a 7 Year old from Canada drew up the house in Sketchup. I couldn't resist making it a derivative since teaching 3D Modeling is part of my goal. Anyway, for Hole #7, you need 1. Hole #7 - Greens, 2. Trees http://www.thingiverse.com/thing:16778 , 3. Robbies House http://www.thingiverse.com/thing:18960 , 4. Another Green G-I-M Fairway.
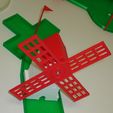
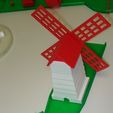
Hole #8: "Alternative Energy WINDMILL" Yes, as promised, this is The Windmill Hole. No Miniature Golf Course should ever be without one. This one is SPECIAL - IT IS MOTORIZED! Give me a couple of days and I will upload a video to YouTube showing how to hack a Servo to make for a cheap DC Gear Motor to power the Blades with only 1 AAA or AA battery (yes even nearly dead ones that your electronics reject)! I will post a video of the Windmill rotating, just because I can. For Hole #8, you will need 1. Hole#8 Windmill Greens, 2. Windmill Body, 3. Windmill Roof (you can make it a different color for variety, 4. Windmill Blades, 5. 1 - AAA or AA battery (I made it to fit either), and 6. 1-Micro Servo (hacked to make it a under $2 DC Gear Motor free rotating) Like a HobbyKing HXT900 or equivalent (I used their cheaper servo myself - works fine). If you really insist on a NON-Powered, only 3D printed windmill, let me know and I will post a modified "alternative energy" windmill next week.
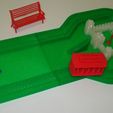
Hole #9:"The Neighborhood of Makebelieve" For Father's Day: This was my tribute to my favorite TV "Dad" - Mr. Rogers. He was the only one that took time to listen, without jumping to conclusions. For Hole #9, you will need: 1. Hole #9 Greens, 2. Hole #9 Fairway (it's special for the Trolley), 3. A Neighborhood Trolley http://www.thingiverse.com/thing:20802 , 4. A Mini Castle http://www.thingiverse.com/thing:7013 , 5. A Park Bench http://www.thingiverse.com/thing:21157 , and accessories like Hole Divot, Hole Flag, Putters, Balls, Etc...
I wil post the next 3 Holes at the SAME TIME in a Zip File (with pictures) so Thingiverse doesn't restart eating my files.
Each Day for the Next 18 Days, I will upload a whole new Hole, accessories, etc.. ONLY 9 HOLES LEFT!
Each Hole, Links to 1 or more other Thingiverse.com parts (with the exception of Hole #8), either as a direct print, derivitive, or mashup. In it's entirety, it should be the largest 3D project ever loaded on Thingiverse, in terms of the number of unique models, referenced 3d models, print time, mash-ups, 3D derivatives, etc..
YOUR MISSION: 1 Hole a day for 18 days!
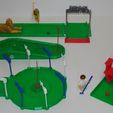
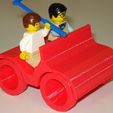
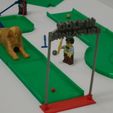
Please note: I didn't print the minifigs in the picture of the Hole#1 or #2 Pics - Just everything else! We WILL be printing minifigs, but that's left for another day.
HAVE FUN! But don't get seduced by the coolness.
(Legal Disclaimer: Pictures Copyrighted by Matt Underwood aka Beekeeper. You can copy them freely, so long as you credit them to me. "Golf-In-Miniature" is the trademark used by me in reference to the World's First 3D Printable Golf Course and Tutorials based on it.)

/https://fbi.cults3d.com/uploaders/25558357/illustration-file/454c91c6-8160-4f49-84da-8a70315dbc88/Golf-In-Miniature_Holes_1_to_9_Pic_8_display_large.jpg)
