Skip to content

ReliaBuild 3D - 16 tooth Pulley Option

Advertising
Advertising
?
Creation quality: 5.0/5 (1 vote)
Evaluation of members on the printability, utility, level of detail, etc.

  • 849 views
  • 13 downloads

License
3D design format
Folder details Close
  • 16_Tooth_Carriage_Template_CS.stl
  • 16_Tooth_Dual_Extruder_Profile.dxf
  • 16_Tooth_Single_Extruder_Profile.dxf
  • Bed_Carriage_RB3_16_tooth.dxf
  • Bed_Carriage_RBB3_16_tooth.dxf
  • Belt_Tension_Tool_CS.stl
  • Spacer_CS.stl
  • X_Bracket_Bottom_2_-_16_CS.stl
  • X_Bracket_Top_2_-_16_CS.stl
  • Y_Bracket_Bottom_2_-_16_CS.stl
  • Y_Bracket_Top_2_-_16_CS.stl

Learn more about the formats

Publication date 2022-11-04 at 02:46
?
Published to Thingiverse on: 2020-11-06 at 07:12
Design number 910753

3D printer file info

3D model description

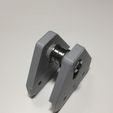
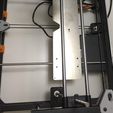
These brackets are the official ReliaBuild 3D printer brackets for using 16 tooth pulleys. They will work with the RB3 and RBB3. They will also work with the Rigidbot Standard and Big printers if they are using the upgraded bed carriage. In general these will work on a 0.75" or 19 mm square rail with rounded edges.

Assembly hardware needed for a pair of brackets:
* 4 x MF115ZZ flanged bearings
* 4 x 9.5mm x 5mm x 3mm Nylon spacers
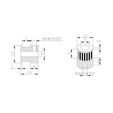
* 2 x GT2 5mm bore 14mm tall 16 tooth pulley for a 6mm belt (3 or 4 mm set screws)
* 2 x 5x25 mm 4mm socket head bolts and nuts
Use the same M4x8 bolts (qty 8) used to mount the original brackets

These are designed for using two MF115ZZ flanged bearings in each X and Y bracket set with a 5x11x4mm size and opposite of a GT2 5mm bore 14mm tall 16 tooth pulley for a 6mm belt. Since the idler bearing with the belt wrapped around it has a larger diameter than the 16 tooth pulley with a belt around it the idler bearing is offset to one side. This offset creates a straight linear track for pulling the bed carriage or the extruder carriage and eliminates sideways pull as the carriages approach the bearings. Hence the brackets are marked with an X or a Y and a top and a bottom to make sure you get the offset in the right direction.

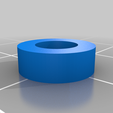
A 9.5mm x 5mm x 3mm spacer goes on either side of the bearing set between the brackets. A printable version is included here.

Two 5x25 mm 4mm socket head bolts and nuts are needed for assembly of the two bracket sets. The assembled brackets mount to the rails with M4x8 bolts.

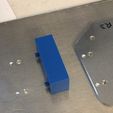
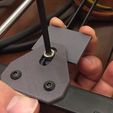
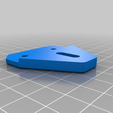
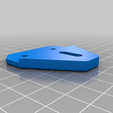
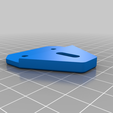
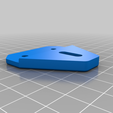
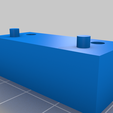
The belt clips on the bed carriage and the extruder carriage need to be moved over towards the new belt location. A drill guide to mark the holes is included. The small pegs go in the original holes and the through holes mark the new location to align the belt clip.

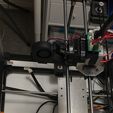
Note that the holes will come right to the edge of the extruder carriage and break through so you need to drill them very carefully. I mark the position with a 1/8" drill bit using the drill guide and first use a smaller bit to drill through the extruder carriage to help eliminate any wobble when drilling through with the final 1/8" size.

DXFs of a modified carriage for a Single and a Dual extruder are included for those that want to have one cut from 1/8" thick flat aluminum plate.

UPDATE: Sept 11, 2022. DXF files for the upgraded RB3 and RBB3 bed carriages with the hole placement for the belt clip position to be used with 16 tooth pulleys have been uploaded for those that want to cut their own bed carriages.

Adjust the height of the pulleys such that the belt clip barely clears under the carriage.

If you have an RB2 or ReliaBuild 3D board in your machine change the number of steps in the firmware for the X and Y directions to 100.41372675
If you are using an original Rigidbot board the Y value will be half of this.

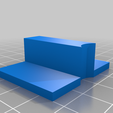
There is a belt tightening key to help push the bearings in and tighten the belts.

Use thermally calibrated filament for best fit results. I use this clip method.
https://www.thingiverse.com/thing:1037301

3D printing settings

-

Advertising


Issue with this design? Report a problem.

Would you like to support Cults?

You like Cults and you want to help us continue the adventure independently? Please note that we are a small team of 3 people, therefore it is very simple to support us to maintain the activity and create future developments. Here are 4 solutions accessible to all:

  • ADVERTISING: Disable your banner blocker (AdBlock, …) and click on our banner ads.

  • AFFILIATION: Make your purchases online by clicking on our affiliate links here Amazon.

  • DONATE: If you want, you can make a donation via Ko-Fi πŸ’œ.

  • WORD OF MOUTH: Invite your friends to come, discover the platform and the magnificent 3D files shared by the community!


Sharing and downloading on Cults3D guarantees that designs remain in makers community hands! And not in the hands of the 3D printing or software giants who own the competing platforms and exploit the designs for their own commercial interests.

Cults3D is an independent, self-financed site that is not accountable to any investor or brand. Almost all of the site's revenues are paid back to the platform's makers. The content published on the site serves only the interests of its authors and not those of 3D printer brands who also wish to control the 3D modeling market.

100% secure payment by credit card, PayPal, Apple Pay, Google Pay, etc.
View all payment options.