Skip to content

Stiff and progressive Begode shock insert, air chamber volume reducer Master ,T4

Advertising
Advertising
?
Creation quality: 5.0/5 (1 vote)
Evaluation of members on the printability, utility, level of detail, etc.

  • 3.2k views
  • 5 likes
  • 2 downloads

License
3D design format
STL Folder details Close
  • 20ml Begode shock insert, air chamber volume reducer.stl
  • 23ml Begode shock insert, air chamber volume reducer.stl

Learn more about the formats

Publication date 2022-11-21 at 01:59
Design number 930871

3D printer file info

3D model description

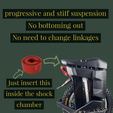
By reducing the internal air chamber volume in the stock Begode shock you can achieve almost the same result as installing custom linkages and expensive shock (budget for which can go over 1k USD).

I found this idea from the Instagram user @euczero and modelled this simple insert for the Stock Shock.

Runs very good. At this point I don't see any need to upgrade with new linkages and shocks. Impressive how big is the difference.

So far tested on master and T4.
let me know if you can install it for ex30 master pro. Shock should be the same.

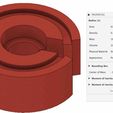
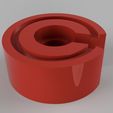
The main model is 23 ml volume insert.
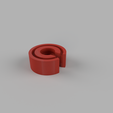
if you are a lightweight rider and 23ml is too much for you (you want it just slightly stiffer and progressive) you can use

3D printing settings

TPU A98 recommended 100% infill
Use highest possible temperature for your filament (follow the manufacturer recommended max) - to make sure no delamination will occure during the use.
Post printing: very important to Cut out all oozes on the print, take a turbo lighter and melt any small strings. Make sure the print is absolutely clean and nothing will fall off it inside the shock.

Installation:
1. Remove stock shock
2. Unscrew large top head (will need two wrenches or wrench and bench vise). Make sure you don't touch internals of the shock much to avoid removing lubricant.
3. lower the piston to get enough room for the insert
4. Position the insert in the way so air channel is pointed towards the shock valve.
5. Click in the insert
6. Assemble everything back.
7. If you have any shock oil, remove the valve and some oil (optional)
8. Enjoy strong and progressive suspension!

Refer to the gif animation for visuals

If you worried that insert will be touching and hitting inside the shock - don't worry. Stock Linkages don't utilize full travel of the shock. There is a lot of room and with this insert its not even close to touch anything.

Advertising


Issue with this design? Report a problem.

Would you like to support Cults?

You like Cults and you want to help us continue the adventure independently? Please note that we are a small team of 3 people, therefore it is very simple to support us to maintain the activity and create future developments. Here are 4 solutions accessible to all:

  • ADVERTISING: Disable your banner blocker (AdBlock, …) and click on our banner ads.

  • AFFILIATION: Make your purchases online by clicking on our affiliate links here Amazon.

  • DONATE: If you want, you can make a donation via Ko-Fi πŸ’œ.

  • WORD OF MOUTH: Invite your friends to come, discover the platform and the magnificent 3D files shared by the community!


Sharing and downloading on Cults3D guarantees that designs remain in makers community hands! And not in the hands of the 3D printing or software giants who own the competing platforms and exploit the designs for their own commercial interests.

Cults3D is an independent, self-financed site that is not accountable to any investor or brand. Almost all of the site's revenues are paid back to the platform's makers. The content published on the site serves only the interests of its authors and not those of 3D printer brands who also wish to control the 3D modeling market.

100% secure payment by credit card, PayPal, Apple Pay, Google Pay, etc.
View all payment options.