Skip to content

Everything Presence One - Recessed Ceiling or Wall Mount

Advertising
Advertising
?
Creation quality: 5.0/5 (2 votes)
Evaluation of members on the printability, utility, level of detail, etc.

  • 6.6k views
  • 9 likes
  • 66 downloads
  • 2 collections
  • 1 make

License
3D design format
STL Folder details Close
  • EP1_Front.stl
  • EP1_FrontV2.stl
  • EP1_Front_Tool.stl
  • EP1_Rear_Base.stl
  • EP1_Rear_Flange.stl
  • EP1_Sliders.stl
  • EP1_Surface_Spacer.stl

Learn more about the formats

Last update 2023-11-11 at 11:58
Publication date 2022-11-19 at 11:55
Design number 928818

3D printer file info

3D model description

WARNING - this mount currently doesn't fit the latest version of the EP1 board. I'm working on it!
The latest board has different mounting hole positions and only one orientation for the MMWave sensor - the position of the sensor has moved slightly to the right, which is enough to prevent it fitting within the case.
If possible, I will update the design to accommodate this change.

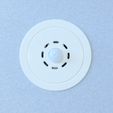
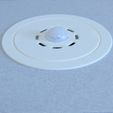
A custom, recessed in ceiling or wall mount for the most excellent Everything Presence One sensor designed by Everything Smart Home: https://shop.everythingsmart.io

As designer of the official case, I received a number of requests for more permanent mounting solution that could be recessed into ceilings or walls.

The design I have come up with will fit into an aperture created with an 86mm hole saw (this size is pretty standard for a larger spotlights and contained within most down-lighter hole-saw kits).

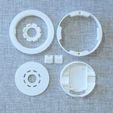
The mount is held into the aperture with slide out 'ears' that will cater for plasterboard/drywall between approx. 9.5 and 12mm in thickness (standard board thicknesses in the UK).

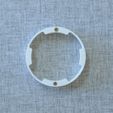
There is also a surface mount ring in case you don't want to cut an 86mm hole in your ceiling/walls. This is held in place using standard 3.5mm countersunk plasterboard screws, with the mount held into the ring with the same ears used for recessed mounting.

Power when using recessed mounting can either be USB-C or direct 5 volts. For surface mounting, direct 5 volts only.

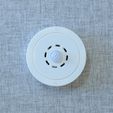
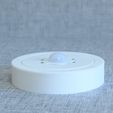
The front face has openings for the PIR, and to expose the ambient light/temp/humidity sensors. This part of the mount twists into place and there is an STL for a tool to make this easier. You will only need this if the supports detailed below have left a particularly rough surface.

PERSONAL USE ONLY
These files are provided for personal use only. Sharing of the files or selling of printed products produced from the files is strictly prohibited.

The EP1 board used for photography is an unpopulated (final) development board.

Sizes:
Recessed mount requires an 86mm hole with at least 21mm depth.
Visible surface diameter: 106mm
Thickness of front flange: 1.2mm

Surface mount spacer thickness: 22mm

Updates:
11th Nov 2023
V2 front - Tightened fit of the flanges that attach to the main mount - added tapers to the flanges so they tighten as twisted.

3D printing settings

All STL files are oriented in their intended print position with visible surfaces flat on the print bed.

Print everything with 0.2mm layer height, 3 walls/perimeters and 4 top/bottom layers. Infill percentage is not critical - I used 15% gyroid but there are no real areas of stress.

The EP1_Rear_Flange.stl requires supports from build-plate, just to support the recess for the front. No other supports are required. A screen shot (from below) of the area requiring supports is included.

The EP1_Rear_Flange.stl and EP1_Rear_Base.stl are designed to clip together but I would suggest using a light application of CA (SuperGlue) in order to permanently join the parts.

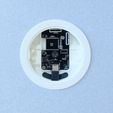
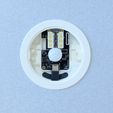
The EP1 board is held in with two M3 screws (up to 5mm in length) which will cut their own threads.

Advertising


Issue with this design? Report a problem.

Would you like to support Cults?

You like Cults and you want to help us continue the adventure independently? Please note that we are a small team of 3 people, therefore it is very simple to support us to maintain the activity and create future developments. Here are 4 solutions accessible to all:

  • ADVERTISING: Disable your banner blocker (AdBlock, …) and click on our banner ads.

  • AFFILIATION: Make your purchases online by clicking on our affiliate links here Amazon.

  • DONATE: If you want, you can make a donation via Ko-Fi πŸ’œ.

  • WORD OF MOUTH: Invite your friends to come, discover the platform and the magnificent 3D files shared by the community!


Sharing and downloading on Cults3D guarantees that designs remain in makers community hands! And not in the hands of the 3D printing or software giants who own the competing platforms and exploit the designs for their own commercial interests.

Cults3D is an independent, self-financed site that is not accountable to any investor or brand. Almost all of the site's revenues are paid back to the platform's makers. The content published on the site serves only the interests of its authors and not those of 3D printer brands who also wish to control the 3D modeling market.

100% secure payment by credit card, PayPal, Apple Pay, Google Pay, etc.
View all payment options.