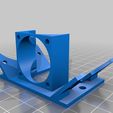
3D model description
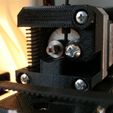
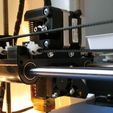
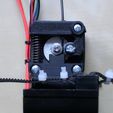
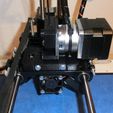
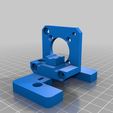
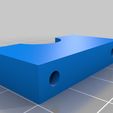
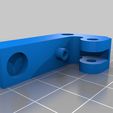
Direct drive upgrade for the Robo3D or any printer, using a E3D hotend and a MK8 drivegear using a Nema17 stepper motor with or without planetary gearbox. The extruder could be mounted on the standard Robo3D X-carriage, this was the main reason why I created another direct drive extruder. A change in the firmware is required to adapt the new steps per mm value.
Two variants are possible, usage of the standard Nema17 motor or a geared Nema17 with gear ratio ~ 5:1 (http://www.omc-stepperonline.com/gear-ratio-51-planetary-gearbox-with-nema-17-stepper-motor-17hs130404spg5-p-140.html). The geared version offers more torque and a better step resolution, current must be limited to not overheat the motor.
Good performance at printing of flexible filament, the printing speed needs to be reduced, but this is normal for the flexible materials.
Advantages over the stock extruder:
- Less filament jams (at my printer)
- Compact setup
- Less noise
- More constant flowrate (again, at my printer)
- Low cost due to reuse of some stock components
Disadvantages:
- Surface a little bit more rough due to less steps per mm from the stepper
Additional parts:
1 x E3D hotend
1 x MK8 drivegear (7mm effective diameter)
1 x 694 bearing (4x11x4mm)
1 x 30 x 7 mm spring quite strong
1 x M3 x 6 screw (for non geared stepper)
4 x M3 x 10 flathead screw (for geared stepper)
6 x M3 x 12 screws
1 x M3 x 20 screw
2 x M3 x 20 screws (for non geared stepper)
2 x M3 x 30 screws
6 x M3 washers
2 x M3 nuts
1 x M3 nut (for geared stepper)
1 x M4 x 10 screw
1 x 30 x 30 mm fan
(1 x 40 x 40 mm stock fan)
(2 x M4 stock extruder mount screws)
(1 x Nema 17 stock stepper motor)
3D printing settings
All parts to be printed in PLA or ABS. This one was printed in black PLA at 0.3 layerheight.
Read the instructions carefully before istalling the direct drive extruder.
Disassembly of stock extruder:
1. Remove fan (4 screws)
2. Remove hotend (2 screws from side)
3. Remove wade extruder (2 M4 screws)
4. Remove the Nema17 motor (4 M3 screws), and the small gear
Keep the Nema17 motor, the cooling fan and the M4 screws for the assembly of the new extruder.
Assembly of the direct drive extruder:
1. Print all parts once
2. Mount the extruder base AND the extruder fan mount with the stock M4 screws to the x carriage. The motor fixing should point towards the front of the printer, otherwise the motor will colide with the GT2 belt.
3. Mount the 40mm stock fan with two M3 x 12 screws at one of the two brackets (an additional fan could be added for extra cooling)
4. Mount the 30mm fan with four M3 x 12 screws to the fan shroud
5. Slide the M3 nuts into the pockets at the extruder base. Insert the E3D hotend from the bottom and hold it in place with the E3D mount, add the M3 x 30 screws to lock it. Wires from the hotend and the fans should point to the x carriage motor.
6a. (Non geared motor) Add the Nema17 motor and use two M3 x 20 screws + washers at the lower holes and the M3 x 6 screw + washer at the upper left hole (looking at the axis of the motor)
6b. (Geared motor) Add the geared Nema17 motor an mount with the four M3 x 10 flathead screws.
7. Add the drive pulley to the motor and align the gap to the filament guide below
8. Insert the bearing at the extruder lever and lock it with the M4 x 10 screw, without tighten it to hard that it gets stuck
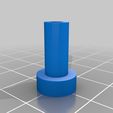
9a. (Non geared motor) Insert the extruder axis to the lever, put the spring and lever into place and lock it with a M3 x 20 screw + washer. Check if the lever could be moved without force, except from the spring.
9b. (Geared motor) Insert the extruder axis to the lever, put the spring and lever into place and lock it with a M3 x 20 screw + washer and nut. Check if the lever could be moved without force, except from the spring.
(10. Fix the wires with wire straps pointing upwards to avoid broken wires due to mechanical load)
Download the latest Robo3D marlin firmware and load it with the Arduino IDE. Go to the tab "Configuration.h" an search for the line:
define DEFAULT_AXIS_STEPS_PER_UNIT {80,80,2267.72,723.38}
For the non geared motor, edit the last variable (723.38). Using the 7mm pulley, the new calculated value is 145.51 (formula could be found at http://reprap.org/wiki/Volumetric_Dimension_settings ). The geared motor steps value is 753.76. Flash the changed firmware to the Robo3D RAMPS board. You may have to fine adjust this value, in my case, the calculated value fits quite well.
Have fun with your new direct drive extruder.

/https://fbi.cults3d.com/uploaders/25775067/illustration-file/578d0e01-26d1-465d-a49f-445e5be51a38/CIMG2454.JPG)
