mk23 Airsoft Holster - Кобура для страйкбольного mk23
Русская версия
English
Description
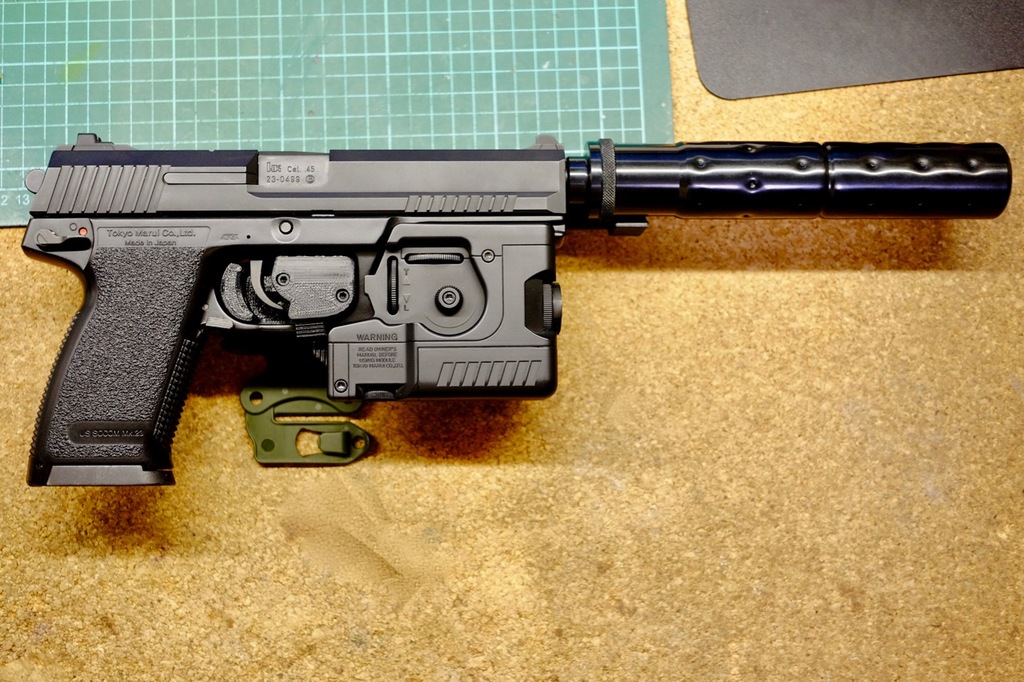
Holster for airsoft gun mk23 SOCOM by Tokyo Marui or STTI.
Holster was ispired by youtube video:
https://www.youtube.com/watch?v=67tAWwU9fT0
and this holster: https://www.thingiverse.com/thing:3934215
I started remixing the above holster, but ended drawing my own from the scratch.
Parts are unified for TM/STTI versions, the only different parts is main part and lock.
Holster has no attachments, it uses Blackhawk Serpa adapters.
Video (russian): https://youtu.be/oXulr7C7kEo
###Parts list
- Main part - Main TM.stl or Main STTI.stl
- Lock part - Lock TM.stl or Lock STTI.stl
- Top cover part - Top.stl
- Base part - Base.stl
- Pusher part - Pusher.stl
- Spring insert part - Spring insert.stl
- Spacers (print 3 pcs desired sufe) - Spacer 6.5 mm.stl or Spacer 6.5 mm.stl
###Printer settings
- material PETG;
- nozzle 0.4 мм;
- layer 0.2 мм;
- infill 40% (use hexagonal if available);
- top/bottom - 5;
- wall width - 4.
###BOM
- Printed parts;
- Lock spring, 5 mm diameter, 25-30 mm length, steel. 0.5 mm;
- Pusher spring, 5 mm diameter, 35-45 mm length, steel. 0.5 mm;
- М3 threaded stud, 30-35 mm (lock axle);
- DIN912 screws (hexagonal socket, cylinder head) М3:
- 10 mm - 3 pcs;
- 12 мmmм - 4 pcs;
- ISO7380 screws (hexagonal socket, hemispheric head, for attaching to BlackHawk Serpa adapter) M5 16-20 mm (depending on spacer used) - 3 шт;
- Adapter from Blackhawk Serpa holster or chinese knockoffs.
###Assembly guide
- Remove burrings;
- Polish rubbing surfaces of pusher and base (see pictures p1, p2)
- Polish rubbing surfaces of main block and lock (pictures p3, p4)
- Clean all orifices. You can clean М3 threaded holes first drilling with 2mm drill, then after removing debris tap them with M3 tap (first manual tap), but on on all depth, a 3-4mm is enough.
- Main assembly:
- drill lock hole with 3 - 3.1 mm drill;
- Insert lock into main block, adding a spring (#2 BOM) into corresponding holes of both block and lock;
- Screw stud (#4 BOM) so it enter the threaded hole on the other side (picture p5);
- Check if lock moves smoothly and returns with the spring;
- Base assembly;
- Check if pusher inserts into base part slot perfectly and moves smoothly, polish if needed;
- Thoroughly polish rubbing surfaces of the pusher and lock (pictures p7, p8 )
- Put insert into base part (doesn't matter with end, it's symmetrical);
- Insert spring (#3 BOM) into pusher's hole;
- Insert pusher with spring into base part slot, aligning the spring so it enter hole in the insert part;
- Check if pusher moves freely and smoothly and returns back (use your finger to ensure the spring doesn't jump out).
- Put main assembly to base assembly, making sure insert parts got all the way into corresponding hole in the main assembly.;
- Check if lock moves all the way into the main part when you push the pusher. Press main assembly to base while checking it;
- Screw М3 screws (#5 BOM, see picture p6), into base, check it pusher still unlocks lock and retracts afterwards.
- Put top cover on the main part and screw with М3х10 screws (#5.1 BOM).
- Press Serpa adapter to holster base, align adapter so its mounting holes match with three M5 holes on base.
- Put screws (#6 BOM) through Serpa adapter holes, and put desired spacers on screw end.
- Screw Serpa adapter to holster bottom. Screw all three screws together by turning each 1-2 turns.
- Polish sides of the main part where it contacts the gun if you find it hard to attach/detach gun .
###Troubleshooting
After assembly (Assembly #9) unlocking failed. Solution: disassemble, grind and polush pusher top/bottom surpaces, assemble. Reteat if necessary.
Pusher moves unevenly, you can feel it stuck. Solution: polish rubbing surfaces.
The surfaces is not smooth enough after polishing. Solution: you can try thermal polishing (I haven't tried chemical polishing with PETG):
- after mechanical polishing clean the parts, prepare wet cloth;
- heat the surface with the heat gun or small torch until surface gleams (you can see bubbles if overheated);
- gently run the wet cloth over the surface to smooth and cool it (move along the layers for side surfaces).
- repeat steps 2-3 if necessary.
- WARNING: use extreme caution, cause you can damage parts easily.
Russian
###Описание
Кобура для страйкбольного пистолета mk23 SOCOM производства Tokyo Marui или STTI.
На разработку меня подвигло данное видео на youtube:
https://www.youtube.com/watch?v=67tAWwU9fT0
и вот эта кобура: https://www.thingiverse.com/thing:3934215
Попытался сделать ремикс из упомянутой кобуры, но сразу понял, что мне проще сделать с нуля, поэтому разработка полностью собственная.
Детали максимально унифицированы, отличаются только 2 шт - основная деталь, на которую надевается пистолет и крючок-фиксатор.
У кобуры отсутствуют крепления, вместо них прикручивается адаптер от кобуры Blackhawk Serpa.
Видео (на русском): https://youtu.be/oXulr7C7kEo
###Детали
- Основная часть - Main TM.stl или Main STTI.stl
- Фиксатор - Lock TM.stl или Lock STTI.stl
- Крышка основной части - Top.stl
- Основа - Base.stl
- Толкатель - Pusher.stl
- Вкладыш пружины - Spring insert.stl
- Проставки (печатать 3 шт) - Spacer 6.5 mm.stl или Spacer 6.5 mm.stl
Настройки Печати
- материал PETG;
- сопло 0.4 мм;
- слой 0.2 мм;
- заполнение 40% (использую сотовое);
- верх/низ - 5 сплошных слоев;
- стенки - 4 слоя.
###Список материалов
- Распечатанные детали;
- Пружина фиксатора - диаметр 5 мм, длина 25-30 мм, сталь 0.5 мм;
- Пружина толкателя - диаметр 5 мм, длина 35-45 мм, сталь 0.5 мм;
- Шпилька М3, длина 30-35 мм (ось фиксатора);
- Винты DIN912 (шестигранник, цилиндрическая головка) М3:
- 10 мм - 3 шт;
- 12 мм - 4 шт;
- Винт ISO7380 (шестигранник, полукруглая головка, для крепления к основе BlackHawk Serpa) M5 16-20 мм (в зависимости от проставочных колец) - 3 шт;
- Адаптер кобуры Blackhawk Serpa или китайская его реплика.
Последовательность сборки:
- Тщательно убрать заусенцы;
- Отполировать трущиеся поверхности основы и толкателя (рисунки p1, p2)
- Отполировать трущиеся поверхности основной части и фиксатора (рисунки p3, p4)
- Прочистить отверстия. Резьбовые отверстия М3 можно аккуратно пройти сверлом 2мм, удалить из них остатки поддержек, затем пройти метчиком (метчик №1, не на всю глубину).
- Собрать основной механизм:
- Пройти отверстие в фиксаторе сверлом 3 - 3.1 мм;
- Установить фиксатор на положеное место, вложив в отверстия фиксатора и основной части пружину (№2 в списке деталей);
- Вкрутить в отверстие основной части шпильку (№4 в списке деталей) так, чтобы она вошла в резьбу за фиксатором (рисунок p5);
- Убедиться, что фиксатор свободно, без закусывания двигается и возаращается на место под действием пружины;
- Собрать основу;
- Убедиться, что толкатель легко ходит в основе, при необходимости отполировать;
- Особенно тщательно отполировать поверхности соприкосновения толкателя и фикстатора (рисунки p7, p8)
- Установить вкладыш в отверстие основы (все равно какой стороной, он симметричен);
- Вложить пружину (№3 в списке деталей) в отверстие толкателя;
- Вложить толкатель в паз основы, направив конец пружины в отверстие вкладыша;
- Страхуя пружину от вылетания пальцем, проверить что толкатель движется без закусов и возвращается под действием пружины
- Установить основной механизм на собранную основу, убедиться, что вкладыш полностью входит в отверстие в основе;
- Убедиться, что при нажатии на толкатель фиксатор отводится. При проверке руками прижимать основной механизм к основе;
- Вкрутить в основу винты М3 (№5 в списке деталей, см. рисунок p6), закрутить, убедиться что механзм работает.
- Наложить крышку на отверстие основного механизма и прикрутить двумя винтами М3х10 (№5.1 в списке деталей).
- Примерить крепление Serpa к нижней части основы, определиться через какие отвертия крепления пройдут винты.
- Пропустить винты крепления (№6 в списке деталей) через крепление Serpa, надеть на них проставки необходимой длины.
- Прикрутить полученную на шаге 10 конструкцию к основе. Закручивать все три винта по очереди на один-два оборота.
- Отполировать соприкасающиеся с пистолетом детали до необходимого усилия посадки и снятия пистолета.
###Проблемы и их решения
После сборки (п. 9) механизм перестает нормально работать. Решение: разобрать, сточить поверхности толкателя, собрать. При необходимости повторить.
Движение частей неравномерное, ощущается неравномерность хода. Решение: повторить шлифовку.
После шлифовки поверхность все равно недостаточно гладкая. Решение: можно попробовать термическую полировку (химическую с PETG не пробовал):
- после шлифовки очищаем поверхность, готовим влажную тряпку;
- нагреваем поверхность строительным феном или горелкой до стеклования поверхности (возможно появление пузырьков при перегреве);
- с очень слабым нажимом проводим влажной тряпкой (для боковых поверхностей - вдоль слоев) чтобы сгладить и остудить поверхность.
- при необходимости повторяем пункты 2-3.
- ВНИМАНИЕ: выполнять с осторожностью, т.к. детали при этом легко повредить.
:format(webp)/https://fbi.cults3d.com/uploaders/25779955/illustration-file/c5ac0069-b1f9-41de-a70d-a3b58ece0735/cover.jpg)


/https://preview3d-images.cults3d.com/1l6zwp3yuffcom8p1rgg7q3cpmnd)
/https://preview3d-images.cults3d.com/881sg6nkktqhl8y7zip3ibkj3wve)
/https://preview3d-images.cults3d.com/hnn696o1wrlreq33gibed7ps0j5o)
/https://preview3d-images.cults3d.com/21tp1eqdvltcr411s7xdcro03z3t)
/https://preview3d-images.cults3d.com/gt8xrbjxt1siul137da8ez8kxkd0)
/https://preview3d-images.cults3d.com/yetzbz5eej3pvgw4mlfn56ilnj32)
/https://preview3d-images.cults3d.com/wjktqzkq0iqkbrjp2q6dxea0m2em)
/https://preview3d-images.cults3d.com/btr6o2oaj5kl9l80p4cip1sej1cz)
/https://preview3d-images.cults3d.com/9mnx4iz3grrhhkvj3dlui0ddzpr3)
/https://preview3d-images.cults3d.com/zlx0p1bxpl887dv1kqb5hmqlp8uu)
/https://preview3d-images.cults3d.com/yzponf4pvvn1a0y662a7iw0srqy4)


