Skip to content

Mendelmax 3.0 X-axis Tensioner

Advertising
Advertising
?
Creation quality: 0.0/5 (0 votes)
Evaluation of members on the printability, utility, level of detail, etc.

  • 201 views

License
3D design format
Folder details Close
  • MM3_X-Tensioner-Mirror.STL
  • MM3_X-Tensioner.STL
  • MM3_X_Idler-Mirror.STL
  • MM3_X_Idler.STL

Learn more about the formats

Publication date 2022-11-26 at 00:49
?
Published to Thingiverse on: 2016-10-31 at 07:12
Design number 936796

3D printer file info

3D model description

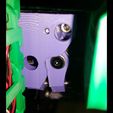
I found the standard X-axis tensioner plate on the Mendelmax 3 was a pain to adjust and it was too easy to compress the bearings so they wouldn't spin well.

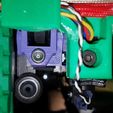
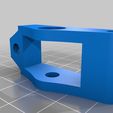
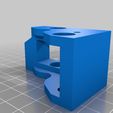
This is a screw-adjustable X-axis tensioner for the Mendelmax 3. It separates the fixing to the X-bar and the belt idler bearings to different screws. It squeezes into the gap at the end of the X-axis bar between the Z carriage angle fixings and the cable chain holder. At the moment you have to remove the cable chain holder to access the adjustment screw - I may make a longer version to avoid this but at the moment it seems to work OK.

I added a smooth idler pulley for my X belt so this tensioner will accept that but the standard bearings would also suffice (with appropriate washers to guide the belt).

Required hardware:

M3x30 screw and M3 nut to connect the tension arm to the idler. A washer at the screw end may be good.

2x M5x8 screws and 2x M5 T-nuts to connect the idler assembly to the X-axis bar.

1x M5x16 screw (or however long you want the adjustment distance to be) and 1x M5 nut this is for the adjustment.

1x M5x25 screw and nut, 2x 605XX bearings (or idler pulley kit) for the belt idler.

EDIT 1 Nov 2016: In the pic it shows that I didn't have a M3x30 to use as the axle between the two parts. So I just used a M3x25 and it is captive held in by the x bar.

EDIT 4 Nov 2016: The problem with the original parts were that the cable chain holder needed to be removed to adjust the X belt tension. Pretty soon after I installed the parts I realized that if they were reversed/mirrored then they could be installed upside-down and the cable chain holder would not need to be removed to make adjustments. facepalm

I have now had some time to mirror the parts and install and test that - yes - it works better now. I have updated the parts and the pictures with the mirrored versions.

3D printing settings

-

Advertising


Page translated by automatic translation. See the original version.
Issue with this design? Report a problem.

Would you like to support Cults?

You like Cults and you want to help us continue the adventure independently? Please note that we are a small team of 3 people, therefore it is very simple to support us to maintain the activity and create future developments. Here are 4 solutions accessible to all:

  • ADVERTISING: Disable your banner blocker (AdBlock, …) and click on our banner ads.

  • AFFILIATION: Make your purchases online by clicking on our affiliate links here Amazon.

  • DONATE: If you want, you can make a donation via Ko-Fi πŸ’œ.

  • WORD OF MOUTH: Invite your friends to come, discover the platform and the magnificent 3D files shared by the community!


Sharing and downloading on Cults3D guarantees that designs remain in makers community hands! And not in the hands of the 3D printing or software giants who own the competing platforms and exploit the designs for their own commercial interests.

Cults3D is an independent, self-financed site that is not accountable to any investor or brand. Almost all of the site's revenues are paid back to the platform's makers. The content published on the site serves only the interests of its authors and not those of 3D printer brands who also wish to control the 3D modeling market.

100% secure payment by credit card, PayPal, Apple Pay, Google Pay, etc.
View all payment options.