Skip to content

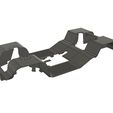
Inner fenders, hinge and magnet supports for Mitsubishi Pajero / Montero hardbody for Axial SCX10-II

Advertising
Advertising
?
Creation quality: 5.0/5 (1 vote)
Evaluation of members on the printability, utility, level of detail, etc.

  • 4.5k views
  • 12 likes
  • 17 downloads
  • 2 collections

License
3D design format
ZIP Folder details Close
  • Chassis mount.zip

Learn more about the formats

Publication date 2022-11-26 at 11:33
Design number 937183

3D printer file info

3D model description

For my 1/10 Pajero / Montero (Aliexpress version) I have used an Axial SCX10-II chassis and I wanted it to be as scale as possible.
To do that I designed an printed different parts, all included here:
- Inner fenders from the front to the back (all interior covered)
- A hinge for the back, easy to remove with 2 screws
- Front magnet supports
- New servo mount with space for electronics
- A receiver box

All the files are grouped in different folders:

Electronics-servo support

This is a custom support to have enough room for the magnet supports and the electronics. Just replace the original one with this one.

Hinge

You will need:
- x2 8mm M3 screws
- x2 12mm M3 screws
- x2 nuts
- 72mm rod with 2mm diameter

Steps:

  1. Put the "2x Pin Hinge body.stl" printed parts to the "Hinge body.stl" printed part. Use the hole that has a carved part to keep the Pin in place (the one that is almost at the side of the body). Fix them with the 8mm M3 screws.

  2. Put the 12mm M3 screws into the internal holes of the "Hinge body.stl" until you can see 1mm on the other side.

  3. Insert the "Hinge body.stl" printed part in the chassis.

  4. Use the rod to join both parts. The carved semicircle should be above the body pins.

  5. Fix the body using the 12mm M3 screws and the M3 nuts to secure the body. If you have the bumper on the body you will need to remove it to secure the hinge.

Front magnet supports

You will need:
- x4 Neodymium magnets 20x4mm (You can find them here: https://www.aliexpress.com/item/1005001610172466.html)
- x2 16mm M3 screws
- x4 6mm M3 screws
- Glue (I used a 2-component epoxy resin adhesive)

Steps:

  1. Unscrew the M3 screws that hold the front shocks to the towers.

  2. Put the "Hood bottom.stl" printed part between the shock towers and secure them with the screws you removed in the previous step.

  3. Use the 16mm screws to secure the printed part.

  4. We will be using the magnets now. Put 1 magnet into the magnet position of the "Hood bottom.stl" printed part and fix it with a 6mm M3 screw. Do the same with the other magnet.

  5. Put a magnet on each the magnets that are on the "Hood bottom.stl" printed part.

  6. Put the "Hood top.stl" printed part on the top of those magnets. When you have the hinge and body in place, this should be the position where the "Hood top.stl" printed part should be glued to the body.

  7. Once you have checked that everything is right, glue the "Hood top.stl" printed part to the body.

  8. Use two 6mm M3 screws to fix the magnets to the "Hood top.stl" printed part that is glued to the body.

  9. Put all the "3x Mitsubishi logo part.stl" parts into the "Hood bottom.stl".

Receiver box

There are 3 different receiver boxes each with a different size. Depending on what you want to put inside you may want to use one or another.

Inner fenders

There are 13 different parts to cover the chassis. All the parts have been named to be easy to know where they go.

IMPORTANT:
The models have been placed in the right position for an easier print.
You will need an original Axial SCX10-II chassis to complete the build.
There are many parts and sometimes it could be confusing. If you have any doubt. I will be happy to help. You can contact me by message here on cults3d or you can send me a message through Instagram.

I hope you like it!

  • 3.5k views
  • 8 likes
  • 7 downloads
  • 1 collection

3D printing settings

Print at 0.15 on PETG/PLA

Advertising


Issue with this design? Report a problem.

Would you like to support Cults?

You like Cults and you want to help us continue the adventure independently? Please note that we are a small team of 3 people, therefore it is very simple to support us to maintain the activity and create future developments. Here are 4 solutions accessible to all:

  • ADVERTISING: Disable your banner blocker (AdBlock, …) and click on our banner ads.

  • AFFILIATION: Make your purchases online by clicking on our affiliate links here Amazon.

  • DONATE: If you want, you can make a donation via Ko-Fi πŸ’œ.

  • WORD OF MOUTH: Invite your friends to come, discover the platform and the magnificent 3D files shared by the community!


Sharing and downloading on Cults3D guarantees that designs remain in makers community hands! And not in the hands of the 3D printing or software giants who own the competing platforms and exploit the designs for their own commercial interests.

Cults3D is an independent, self-financed site that is not accountable to any investor or brand. Almost all of the site's revenues are paid back to the platform's makers. The content published on the site serves only the interests of its authors and not those of 3D printer brands who also wish to control the 3D modeling market.

100% secure payment by credit card, PayPal, Apple Pay, Google Pay, etc.
View all payment options.