Skip to content

Ender 3 Sprite Pro noctua fan mounts

Advertising
Advertising
?
Creation quality: 3.2/5 (6 votes)
Evaluation of members on the printability, utility, level of detail, etc.

  • 13.6k views
  • 40 likes
  • 120 downloads
  • 2 comments

License
3D design format
STEP and STL Folder details Close
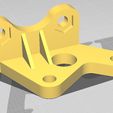
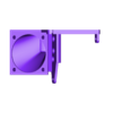
  • Back Plate and Hot End Fan Mount.stl
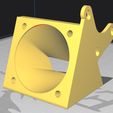
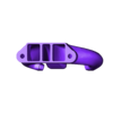
  • Fan Duct - 2.0.stl
  • Fan Duct Base.step
  • Fan Duct.stl
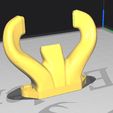
  • Part Cooling Fan Mount.stl
  • Part Cooling Mount - 2.0 .stl
  • Probe Mount.stl

Learn more about the formats

Last update 2022-12-26 at 15:55
Publication date 2022-11-30 at 21:20
Design number 943027

3D printer file info

3D model description

~~~~~~~~~~~~~~~~~~~~~~~~~~~~~~~~~~~~~~~~~~~~~~~~~~~~
12-26-22 Update:
I've remodeled the part cooling mount to increase the size of the airflow channel. This has reduced noise further, and improved part cooling performance. The new fan duct bolts on easier as well, however it has less clearance to allow for the larger fan ducts.
~~~~~~~~~~~~~~~~~~~~~~~~~~~~~~~~~~~~~~~~~~~~~~~~~~~~~

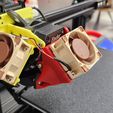
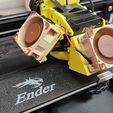
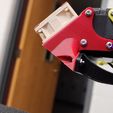
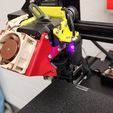
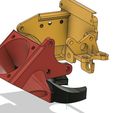
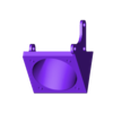
Mounts to replace the hot end fan and part cooling fan with 40 mm noctua fans (either the 10 mm or 20mm version will work).

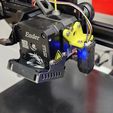
This also relocates the probe mount location to the right side of the hot end, and brings it in line with the nozzle.

The part cooling fan is adjustable up and down to dial in the height for your nozzle clearance. The part cooling fan ducts are easily replaceable as well, so you can replace them easily if they were to become damaged (without needing to reprint the entire assembly).

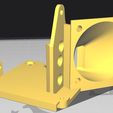
I've also included the "base" to the fan duct so that you can design your own if you have the need.

~~~ Additional Hardware Needed ~~~
10 -- 3mm heat set threaded insert
5 -- 3mm x 6 bolts for fan mounts
8 -- 3mm bolts @ the length for your chosen 40x40 fan
2 -- 3mm nuts

4 -- 3mm x 8 bolts for probe

~~~ Probe Setup ~~~
The probe will likely need to have the wires spliced together to make them long enough to reach the new location.

The new probe offsets are X= 39 and Y= -1 while the Z offset is the same as the default.

The stock bolts may be long enough to attach the probe to the mount, however I found it easier to use 3mm x 8 bolts with two nuts.

2 of the bolts on the print head will need to be removed and replaced with 3mm x 8 bolts.

~~~ Fan Setup ~~~
MAKE SURE YOU HAVE ALL PARTS PRINTED

You may need to step the voltage down depending on your power supply and the fans you are using.

Set the 10 inserts in their locations (4 for each fan mount and 2 for the fan duct off of the part cooling fan).

Replace the existing back plate with the printed one (this includes a channel to route the probe wire). You will also need to remove the original blower fan and it's fan duct, some of these scres will be re-used.

Attach the hot end fan to the mount and re-attach the print head to your printer.

Loosely attach the part cooling fan mount using the four 3 mm x 6 bolts.

Raise the gantry, and attach the fan duct to the mount using two 3 mm x 6 bolts.

Adjust the fan mount until your fan duct has enough clearance and is level, then finish tightening the bolts to secure the assembly.

3D printing settings

For all parts:
- no supports (if printed in the pictured orientation)
- 0.20 layer height
- I used a 0.6 nozzle, but a 0.4 should be fine
- PLA is sufficient for most parts (if not all) but I recommend PETG for the back plate / hot end fan since it may see higher temperatures.
- adjust your hole offset as needed for your printer
- if the two holes to mount the part to the print head are too snug, change the hole offset in your slicer to accomodate.
- you can calibrate your specific printer's hole offset using some calibration prints, each printer can be different.

Advertising


Issue with this design? Report a problem.

Would you like to support Cults?

You like Cults and you want to help us continue the adventure independently? Please note that we are a small team of 3 people, therefore it is very simple to support us to maintain the activity and create future developments. Here are 4 solutions accessible to all:

  • ADVERTISING: Disable your banner blocker (AdBlock, …) and click on our banner ads.

  • AFFILIATION: Make your purchases online by clicking on our affiliate links here Amazon.

  • DONATE: If you want, you can make a donation via Ko-Fi πŸ’œ.

  • WORD OF MOUTH: Invite your friends to come, discover the platform and the magnificent 3D files shared by the community!


Sharing and downloading on Cults3D guarantees that designs remain in makers community hands! And not in the hands of the 3D printing or software giants who own the competing platforms and exploit the designs for their own commercial interests.

Cults3D is an independent, self-financed site that is not accountable to any investor or brand. Almost all of the site's revenues are paid back to the platform's makers. The content published on the site serves only the interests of its authors and not those of 3D printer brands who also wish to control the 3D modeling market.

100% secure payment by credit card, PayPal, Apple Pay, Google Pay, etc.
View all payment options.