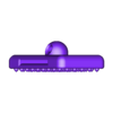
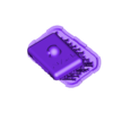
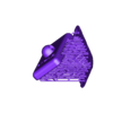
Tactical addition nipple
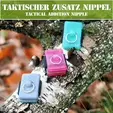
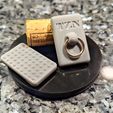
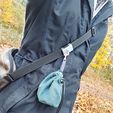
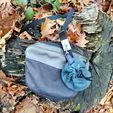
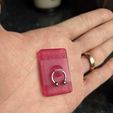
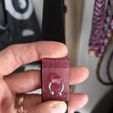
The Tactical Accessory Nipple (TZN or TAN in English) is the perfect gadget for your bag or the carrying strap of your bag. With the help of the add-on nipple, you can quickly and easily attach things like dog treat bags, general small to medium sized bags, flashlights, dog poop bags, pacifiers etc.
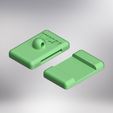
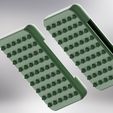
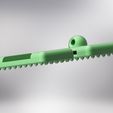
The nipple consists of two parts, both of which are equipped with 54 small tips on one side. These tips provide the necessary grip on the bag strap / on the carrying strap of the bag.
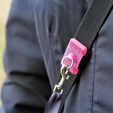
The assembly is directly on the belt and the addition nipple can be removed at any time without a trace or disassembled and attached to another bag. My wife is still using the very first prototype for three months without any problems. The tips still look almost like the first day and the grip of the Tactical Add-on Nipple is still excellent.
To mount the nipple on the belt, all that is needed is a piece of Velcro tape about 90 mm long (20 mm wide).
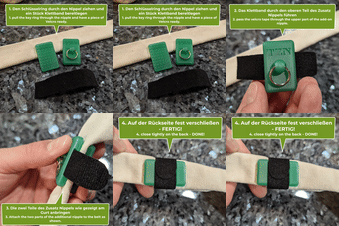
The Velcro tape is simply fed through the top of the nipple. The top is then placed on one side of the belt and the bottom is pressed against it from the other side of the belt. Using the Velcro, both parts are held together on the back of the Tactical Add-on Nipple.
If the Velcro is properly attached, the nipple cannot be moved or can only be moved very slightly and with a great deal of effort. To adjust it, the Velcro must first be loosened again.
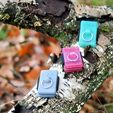
The nipple looks super in a gun gray or green - but also makes super in purple or other colors. So basically a kind of fashion accessory 😊 And of course the part can also be worn when visiting the next club - then of course with nipple piercing XD
Designed the nipple was originally for my wife. She asked me for a way to somehow attach the dog treat bag to your small handbag. From this request, the tactical addition nipple was created to which of course many other useful things can be attached. Through the key ring, the possibilities are almost unlimited.
The purchase price goes 100% into new treats for our dog 😉.
The name is of course due to looks and my wild imagination - but I like it 😉.
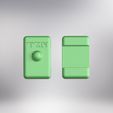
Versions of the Tactical Addition Nipple.
So that all people in the English-speaking world also have fun with the name, I have in addition to the German-language and the clean version (without any embossing) also put an English version with it. Likewise, all versions are present with ready supported.
Dimensions complete: 40 mm x 25 mm x 21 mm (length x width x height).
*Other sizes are available on request - at no extra charge! Just give me some time 😉. The goal should be to cover as many different sizes as possible. A version for tougher demands is already in the works and will of course also be delivered later.
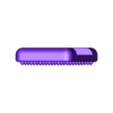
Top
Dimensions: 40 mm x 25 mm x 13.5 mm (length x width x height).
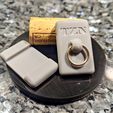
On the top side is the actual nipple. A key ring is pulled through this additional nipple, so that all sorts of things can be attached to it. Of course, this is particularly easy if the things to be attached have a snap hook or similar. Also on the top is the slot for attaching the Velcro. This is guided through the slot. At the bottom of the top there are 54 small tips, which are used to fix the Tactical Add-on Nipple to the belt. Even though the tips are very sharp, they do not leave any damage or marks on most belts.
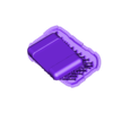
Bottom
Dimensions: 40 mm x 25 mm x 7.5 mm (length x width x height).
At the bottom of the tactical add-on nipple is a recess for the Velcro tape. So that the underside can be fixed properly and also not simply slip under the Velcro, the recess is large enough to hold the underside and secure it against slipping. At the bottom of the underside are likewise 54 small tips, which serve to fix the Tactical Addition Nipple to the belt.
**Assembly
After printing - Before assembly.
After printing, the printed parts still need some sanding with sandpaper. I recommend a 1200 grit for a perfect result. Wet sanding is best! The supports can be removed wonderfully after heating the print briefly under 50 °C warm water.
**Fixation
The Velcro strap is simply threaded through the top of the nipple. The top is then placed on one side of the strap and the bottom is pressed against it from the other side of the strap. By means of the Velcro both parts of the Tactical Add-on Nipple are fixed together. *Tip: Make sure that the Velcro is only as long as necessary! Every millimeter of Velcro that protrudes is a problem, because it can get caught on clothing and the nipple or the Velcro on the nipple suddenly comes loose. If you pay attention to this, the tactical addition nipple holds perfectly! Best to round off the corners of the Velcro a little!
Shopping list for required components.
1 x key ring, 10 - 15 mm Ø
1 x Velcro tape, 20 mm wide, 90 mm long, max. 2 mm thick

/https://fbi.cults3d.com/uploaders/25574804/illustration-file/153c64d3-db76-406f-849f-7a14efcf599c/Vorschauanimation.gif)
