Skip to content

Control Board - Creality + Mosfet

Advertising
Advertising
?
Creation quality: 5.0/5 (1 vote)
Evaluation of members on the printability, utility, level of detail, etc.

  • 1.5k views
  • 31 downloads
  • 1 collection

License
3D design format
Folder details Close
  • Caja_Electrónica_-_Panel_Bloque_v3.stl
  • Caja_Electrónica_-_Panel_Frontal_v2.stl
  • Caja_Electrónica_-_Placas_V2.stl
  • Caja_Electrónica_-_Protector_ventilador.stl
  • Caja_Electrónica_-_Tapa_v2.stl
  • Caja_Electrónica_-_Ventilador_V3.stl
  • Caja_Electrónica_ventilada_v2.stl
  • Caja_Electrónica_ventilada_v47.f3d

Learn more about the formats

Publication date 2022-12-06 at 11:08
?
Published to Thingiverse on: 2020-04-26 at 23:38
Design number 950461

3D printer file info

3D model description

Hi everybody,

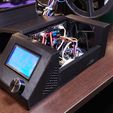
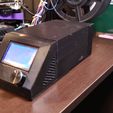
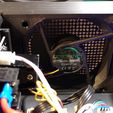
This is a control panel used in my Ender 5 for my V1.1.5 and Mosfets.

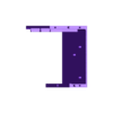
Basically, there are 3 modules:
1) The display module, for the original 12864.
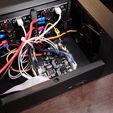
2) The electrical part, for the V1.1.5 and Mosfets.
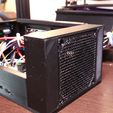
3) The 80mm fan holder.

Then there are 2 prints more:
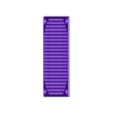
4) The fan protector in honeycomb shape.
5) The lid.

The first 3 modules are assembled together with 4 M3 screws, 8mm long recommended. Sorry, I am not a professional designer and there are some points to improve. You may get a 5mm screw and get a bit short (but functional), or 10mm and be a little bit long, which wouldn't matter in terms of practicality.

The lid is easy to mount and it has been design to have a couple of 6x3 magnets. One the one that holds the box closed, and other one in the joint in the fan module.

The mosfet board holders are for 50x60mm mosfet boards. I would recommend placing them with the cables looking to the display.

BOM used:

M3 screws between 5mm and 10mm.

Mosfet: https://www.amazon.es/gp/product/B077HP7XX9/ref=ppx_yo_dt_b_asin_title_o02_s00?ie=UTF8&psc=1

Fan 80x80x25: https://www.amazon.es/gp/product/B00HKF1LTW/ref=ppx_yo_dt_b_asin_title_o02_s00?ie=UTF8&psc=1

UPDATE 01/05/2020 (europe):
By great suggestion of Alferro7 and because I never liked how to install the display in my first version, I include 2 changes:
- The model for the electrical part, the middle module, now it is reversible. You can place the box at the right or left of the printer. You will find that the holes for assemble the 3 parts now are simetric and you can turn the middle part.
- The display module now it made of 2 separate parts, once you screw the display in a plaque, you can place and screw this plaque into the main body. Much easy to mount.

3D printing settings

-

Advertising


Issue with this design? Report a problem.

Would you like to support Cults?

You like Cults and you want to help us continue the adventure independently? Please note that we are a small team of 3 people, therefore it is very simple to support us to maintain the activity and create future developments. Here are 4 solutions accessible to all:

  • ADVERTISING: Disable your banner blocker (AdBlock, …) and click on our banner ads.

  • AFFILIATION: Make your purchases online by clicking on our affiliate links here Amazon.

  • DONATE: If you want, you can make a donation via Ko-Fi 💜.

  • WORD OF MOUTH: Invite your friends to come, discover the platform and the magnificent 3D files shared by the community!


Sharing and downloading on Cults3D guarantees that designs remain in makers community hands! And not in the hands of the 3D printing or software giants who own the competing platforms and exploit the designs for their own commercial interests.

Cults3D is an independent, self-financed site that is not accountable to any investor or brand. Almost all of the site's revenues are paid back to the platform's makers. The content published on the site serves only the interests of its authors and not those of 3D printer brands who also wish to control the 3D modeling market.

100% secure payment by credit card, PayPal, Apple Pay, Google Pay, etc.
View all payment options.