Skip to content

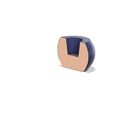
TPU Dampers for Creality - Ender 3/5

Advertising
Advertising
?
Creation quality: 5.0/5 (1 vote)
Evaluation of members on the printability, utility, level of detail, etc.

  • 2.1k views
  • 4 likes
  • 40 downloads

License
3D design format
Folder details Close
  • AmortiguadorPrinterV3.stl

Learn more about the formats

3D model size X 46.9 Γ— Y 46.9 Γ— Z 30 mm
Publication date 2022-12-06 at 11:08
?
Published to Thingiverse on: 2020-04-27 at 21:09
Design number 950459

3D printer file info

3D model description

Hi Everybody,

Tired of having noises and vibrations in the table of the printer, and after realized that one of the main reasons of the lack of quality in my prints is the ineffectiveness of the original dampers (feet, silentblocks...), I have decided to create a set of dampers that allows the printer to move laterally enough to absorb the inertias generated by the carriage.

In order to absorb the inertias the dampers must have 3D flexible movement (XYZ). The majority of the designs I have seen works good in Z, but not so much in XY, or the other way around. The feet dampers that got my Ender 5 originally are very sturdy and did nothing in that matter. This probably apply to al Enders and CRs too.

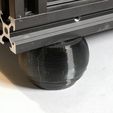
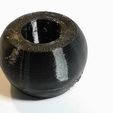
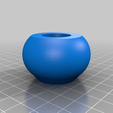
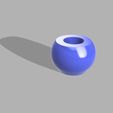
This model is a kind of sock to put to the original feet of the Ender and it is designed for TPU. It works great. The design preserves the shape of the damper during movements because of its round shape without weak points, but also in X and Y because the original feet gets inside of the ball and has movement inside.

In order to work well absorbing inertias and shocks the printing settings are crutial. The minimum infill and wall possible but enough to bear the weight. This is the trick of this model. It resides in printing it with the just amount of TPU. Nobody knows your filament and how to print it better than you. In my case the best compromise between strenght and flexibility to absorb the inertias was:

  • 0.6 nozzle.
  • 0.3 layer height.
  • Only 1 line wall.
  • 0.6 top/botom.
  • 8% infill.

The first attempts with 0.8 wall and top/bottom and 12% infill I got a very sturdy piece, not flexible enough for shocking resistance. Now it works really good but I have to recognize that there are a few layers that could have been better printed.

3D printing settings

-

Advertising


Issue with this design? Report a problem.

Would you like to support Cults?

You like Cults and you want to help us continue the adventure independently? Please note that we are a small team of 3 people, therefore it is very simple to support us to maintain the activity and create future developments. Here are 4 solutions accessible to all:

  • ADVERTISING: Disable your banner blocker (AdBlock, …) and click on our banner ads.

  • AFFILIATION: Make your purchases online by clicking on our affiliate links here Amazon.

  • DONATE: If you want, you can make a donation via Ko-Fi πŸ’œ.

  • WORD OF MOUTH: Invite your friends to come, discover the platform and the magnificent 3D files shared by the community!


Sharing and downloading on Cults3D guarantees that designs remain in makers community hands! And not in the hands of the 3D printing or software giants who own the competing platforms and exploit the designs for their own commercial interests.

Cults3D is an independent, self-financed site that is not accountable to any investor or brand. Almost all of the site's revenues are paid back to the platform's makers. The content published on the site serves only the interests of its authors and not those of 3D printer brands who also wish to control the 3D modeling market.

100% secure payment by credit card, PayPal, Apple Pay, Google Pay, etc.
View all payment options.