Skip to content

Tripod

Advertising
Advertising
?
Creation quality: 5.0/5 (1 vote)
Evaluation of members on the printability, utility, level of detail, etc.

  • 749 views
  • 2 likes
  • 10 downloads

License
3D design format
Folder details Close
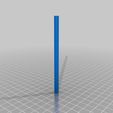
  • bottom_hub_pin_4x34.stl
  • leg_strap_pin_4x29.stl
  • top_hub_pin_6x104.stl
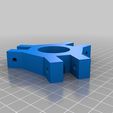
  • tripod_bottom_hub.stl
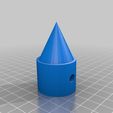
  • tripod_foot.stl
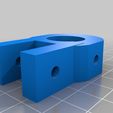
  • tripod_leg_pivot.stl
  • tripod_leg_strap.stl
  • tripod_top_hub.stl

Learn more about the formats

Publication date 2022-12-06 at 15:17
?
Published to Thingiverse on: 2014-08-11 at 00:27
Design number 950732

3D printer file info

3D model description

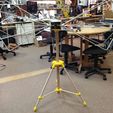
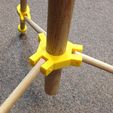
I need a strong, stable, non-metallic tripod for RF/EMC work, and commercially-available ones are expensive. This one is inexpensive and rock-stable. I don't need height or tilt adjustments but you could certainly design a tilt head for it. The top of the post sits 36 inches above the floor using the dowel lengths given in the instructions.

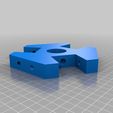
All plastic parts except the top hub were printed on an Afinia. The top hub is a bit too large for the Afinia so I printed on a Zortrax M200; It could probably be trimmed to fit on the Afinia if needed.

The source files can be found and edited at https://tinkercad.com/things/dg7uzMdPeZh

3D printing settings

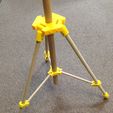
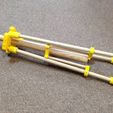
Use oak dowels, not pine or fir. The center post is 1-1/4" dia, the legs 3/4", and the braces 1/2". The design is highly configurable by the choice of dowel lengths, and it's easy to apply the pythagorean theorem to get whatever you want. In my prototype, the center post is 33", the legs are 21-1/2", and the braces are 9-1/2".

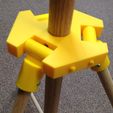
The top hub is pinned to the center post (about 16" from the top) by 3 counter-bored #8 x 3/4" pan-head sheet metal screws.

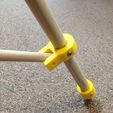
The leg pivots, leg straps, and feet are pinned to the legs with #6 x 5/8" pan-head sheet metal screws. Getting the straps at exactly 90 degrees to the top pivot axis is important.

For the hinged joints you could use bolts or dowels, but I printed my own dowel pins. They're a pretty good friction fit as-is but maybe I'll solvent-weld them in place once I'm finished.

Drilling the braces with 4mm holes for the hinge pins is the trickiest part of the assembly; I recommend a V-block and drill press. The holes at each end need to be parallel with one another or assembly will be difficult.

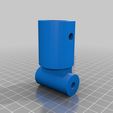
I printed all the parts in ABS. The dowel pins should be oriented horizontally so the layers run longitudinally. The leg pivots should be printed with the pivot axle hole vertical. I printed the feet pointy-end-up, and everything else "flat".

My workspace is carpeted, so the pointy feet work great. If you plan to use this on smooth floors you might want to design rubber-grip feet.

Tags

Advertising


Issue with this design? Report a problem.

Would you like to support Cults?

You like Cults and you want to help us continue the adventure independently? Please note that we are a small team of 3 people, therefore it is very simple to support us to maintain the activity and create future developments. Here are 4 solutions accessible to all:

  • ADVERTISING: Disable your banner blocker (AdBlock, …) and click on our banner ads.

  • AFFILIATION: Make your purchases online by clicking on our affiliate links here Amazon.

  • DONATE: If you want, you can make a donation via Ko-Fi πŸ’œ.

  • WORD OF MOUTH: Invite your friends to come, discover the platform and the magnificent 3D files shared by the community!


Sharing and downloading on Cults3D guarantees that designs remain in makers community hands! And not in the hands of the 3D printing or software giants who own the competing platforms and exploit the designs for their own commercial interests.

Cults3D is an independent, self-financed site that is not accountable to any investor or brand. Almost all of the site's revenues are paid back to the platform's makers. The content published on the site serves only the interests of its authors and not those of 3D printer brands who also wish to control the 3D modeling market.

100% secure payment by credit card, PayPal, Apple Pay, Google Pay, etc.
View all payment options.