--- Videos ---
Impression / Print : https://youtu.be/qLE9OfD13nI
Assemblage v2 / v2 Assembly : https://youtu.be/cKQOOUaG2FM
--- Français (English below) ---
-> Cette pièce est un élément de l'imprimante 3D Delta pliable DeltaFold
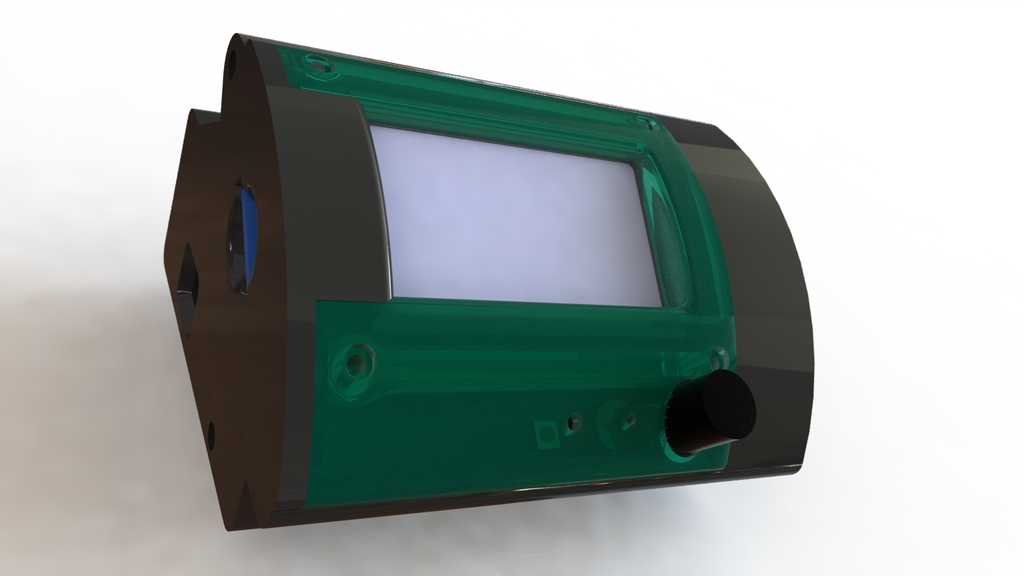
Voici la v3 de mon boîtier de commande pour imprimante 3D. A l'intérieur se logent :
- Carte Arduino Mega
- RAMPS1.4
- Écran LCD 12864
- Un ventilateur 40x40x10
- Éventuellement deux ventilateurs 25x25x10 (max 25x25x15).
Quoi de neuf dans la v3 ?
Le but principal de cette évolution est de positionner le passage des câbles sur le bord du carter principal, ce qui facilite le montage/démontage des cartes câblées. Cette évolution est également motivée par la volonté de réaliser une variante de ce boîtier avec un connecteur 40 broches. Dans cette perspective, et pour des raisons pratiques, il faut pouvoir câbler l'ensemble (cartes et connecteur) à l'extérieur du boîtier, et avoir la possibilité, une fois que tout est câblé, de tout mettre en place en même temps.
Les évolutions :
- Le passage des câbles n'est plus situé au milieu de la face arrière, mais sur le bord du carter.
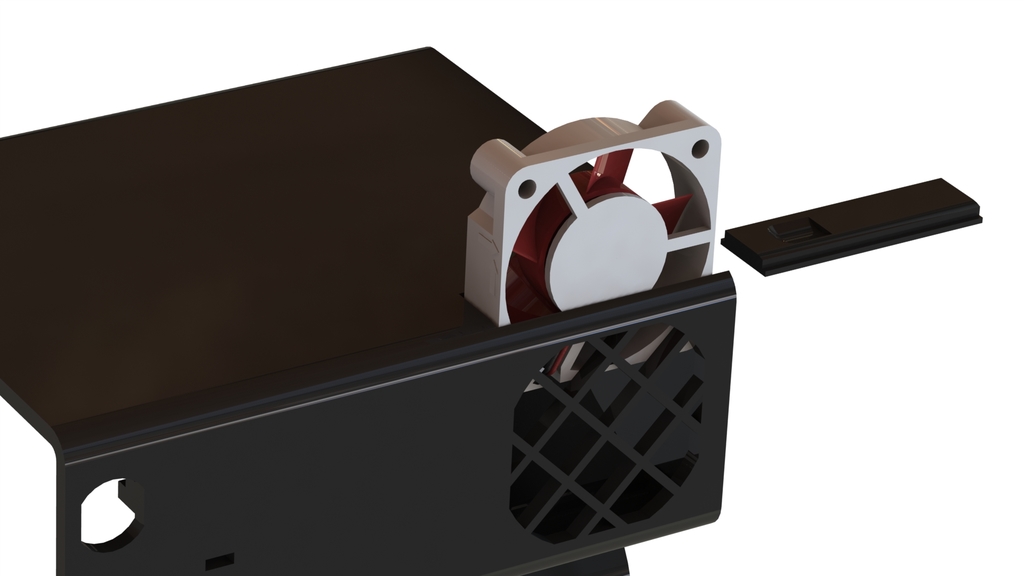
- Le ventilateur 40x40 passe au fond du boîtier, l'emplacement est accessible via une trappe coulissante placée sous le boîtier.
- Le connecteur électrique passe du capot latéral au carter principal
- Des supports matériels superflu ont été supprimés
- Et quelques améliorations mineures ...
Introduction
NB : Toutes les pièces sont conçues pour être imprimées sans support matériel.
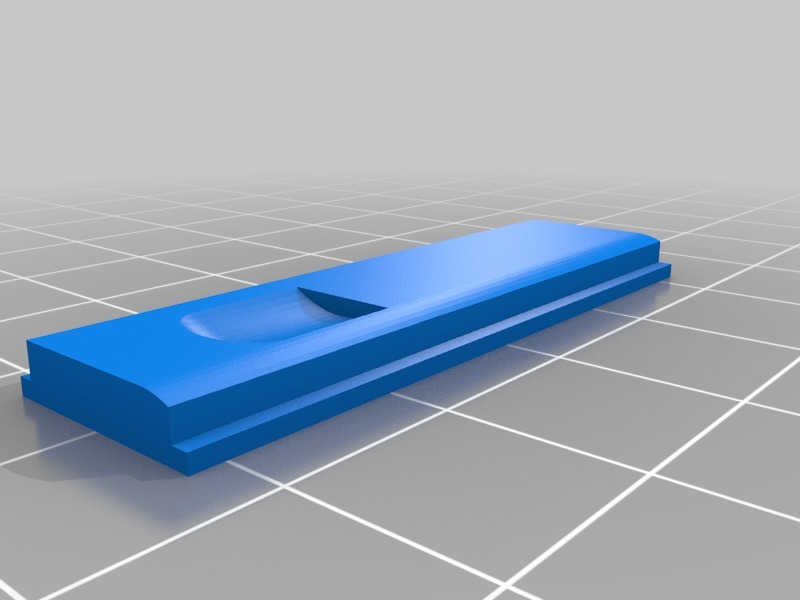
L'assemblage compte quatre pièces imprimées :
- le corps principal + trappe coulissante
- un couvercle latéral
- un capot pour l'écran LCD
Quincaillerie :
- 4 vis M3x20
- 2 vis M3x25 (ou M3x30)
- 1 connecteur électrique femelle 2,1 x 5,5 mm
Préparation
- Imprimez et nettoyez les quatre pièces
Supprimez les supports d'impression du panneau latéral :
Supprimez les supports du capot écran :
Vérifiez que tout s’emboîte correctement
Assemblage
Vous pouvez regarder la vidéo d'assemblage de la v2 (lien en début d'article), c'est strictement identique à l'exception des emplacements du ventilateur 40x40 et du connecteur électrique.
!! Les photo ci-dessous sont celles de l'assemblage du boîtier v2, mais vous devriez vous y retrouvez quand même ;)
(Optionnel) Fixez les ventilateurs 25x25x10 avec des vis M2,5x16. Une vis par ventilateur suffit.

Glissez le ventilateur 40x40x10 dans son logement et fermez la trappe.

Montez le connecteur d'alimentation électrique femelle 2.1 x 5.5

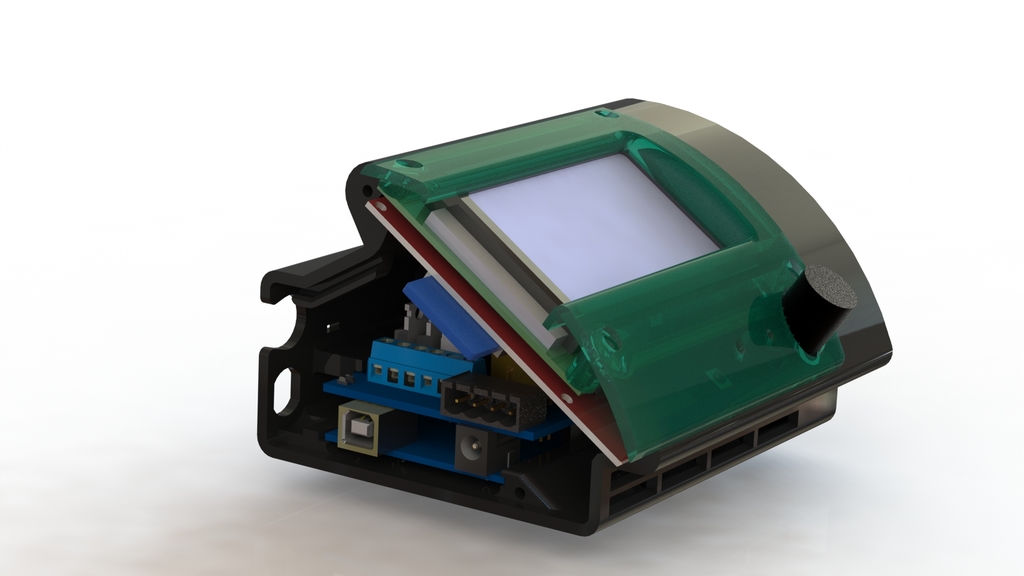
Branchez les deux câbles de l'écran LCD sur la carte RAMPS uniquement.

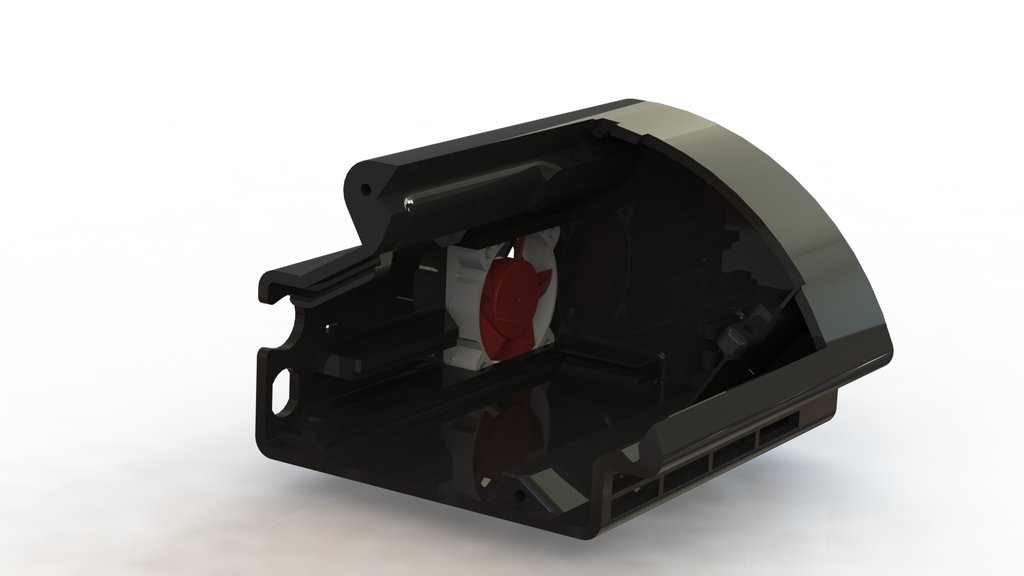
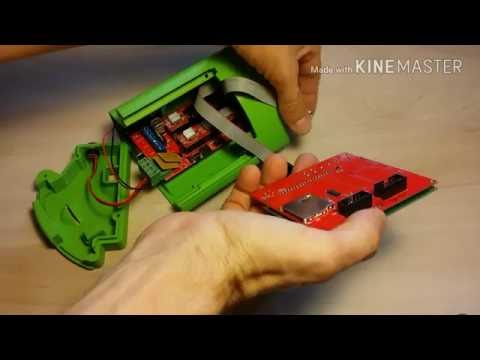
Glissez les cartes Arduino et RAMPS préalablement câblées dans le boitier.

Attachez les câbles (et la gaine si vous en mettez une) en utilisant un collier plastique.
Branchez les câbles du ventilateur et de l'alimentation sur le bornier.

Mettez l'écran LCD en place

Placez son capot dessus et fixez-le avec une vis M3x20 en haut et une vis M3x25 en bas

Mettez le capot latéral en place et fixez-le à l'aide des trois vis M3x20 et la vis M3x25 restante qui se place au bas à gauche du capot d'écran.

Et voilà, c'est fini !
N'oubliez pas de poster une photo de votre réalisation, ça fait toujours plaisir :)
*--- English --- *
-> This piece is an element of the foldable Delta 3D Printer DeltaFold
Here is the v3 of my 3D printer control case. Inside are housed :
- Arduino Mega board
- RAMPS1.4
- 12864 LCD display
- A fan 40x40x10.
- Possibly two fans 25x25x10 (max 25x25x15)
What's new in this v3?
The main purpose of this evolution is to position the passage of the cables on the edge of the main housing, which facilitates the assembly/disassembly of the wired cards. This evolution is also motivated by the desire to make a variant of this housing with a 40-pin connector. In this perspective, and for practical reasons, it is necessary to wire the assembly (cards and connector) outside the case, and have the possibility, once everything is wired, to set everything up at the same time.
Evolutions :
- The passage of the cables is no longer located in the middle of the rear face, but on the edge of the housing.
- The 40x40 fan passes to the bottom of the housing, the location is accessible via a sliding door placed under the housing.
- Electrical connector goes from side cover to main housing
- Superfluous material supports have been removed
- And some minor improvements ...
Introduction
NB : All parts are designed to be printed without material support.
The assembly consists of four printed parts :
- the main body + sliding hatch
- a side cover
- a cover for the LCD screen
Hardware:
- 4 screw M3x20
- 2 screw M3x25 ou M3x30
- 1 female electrical connector 2,1 x 5,5 mm
Prep
- Print and clean the four parts
- Remove the printing material supports from the side panel :
- Remove the printing material support from the LCD frame
- Button passage
4 - Check that everything fits properly
Assembly
You can watch the video assembly of the v2 (link at the beginning of the article), it is strictly identical, except the locations of the 40x40 fan and the electrical connector.
!!The photo below are those of the Assembly of the box v2, but it should be okay ;)
(Optional) Fasten the 25x25x10 fans with M2.5x16 screws. One screw per fan is enough.
Slide the 40x40x10 fan into its housing and close the trapdoor.
Mount the 2.1x5.5 female power connector
Connect the two cables of the LCD on the RAMPS board only.
Slide the Arduino and RAMPS cards previously wired into the case
Clamp the cables (and sheath) using a plastic tie
Connect the fan and the power connector on the power terminal block
Put the LCD screen in place
Place the LCD frame and fix it with one M3x20 screws at the top and one M3x25 screw at the bottom
Install the side cover and secure with the three M3x20 screws and the remaining M3x25 screw located at the bottom left of the display cover..
and that's it!
Don't forget to post a photo of your realization, it's always nice :)
:format(webp)/https://fbi.cults3d.com/uploaders/12913395/illustration-file/cc41f21d-f3e5-4bb2-be12-f4c8e1da8282/BoitierRAMPS_v3_perspective.JPG)


/https://preview3d-images.cults3d.com/gfbs5ggsa2fmdliq0ionz7wpngw8)
/https://preview3d-images.cults3d.com/6q8y4nd3l7iudvnhs3dfr3qa82ia)
/https://preview3d-images.cults3d.com/b0q953hn8riugk52xod32p2wswly)
/https://preview3d-images.cults3d.com/9vxxt8hhds8tv4ase18a5m6c547t)


