###Videos
Assemblage / Assembly : https://youtu.be/Pfc2_j7ps_c
Principe / Principle : https://youtu.be/K5fC5n-m__4
Notice d'assemblage/Assembly instructions : https://youtu.be/f7nWZhbt2ks
Lien vers le modèle / Design link : https://a360.co/2QzRKFR
04/02/2019 New version :
- Fr : Il existe désormais une version avec deux roues crantées que vous trouverez ici (https://www.thingiverse.com/thing:3399418)
- En : There is a new version with two notched wheels which you will find here (https://www.thingiverse.com/thing:3399418)
23/08/2018 Upgrade :
- Fr : ajout d'une variante du chariot coulissant (Extruder_Coulissant_Variante_AxeTrou4mm.stl) : l'axe sur lequel on positionne le roulement est supprimé. A sa place, un trou de 4mm apparait sur la semelle. Il permet de positionner une vis à tête fraisée de 4mm de diametre et 15mm de long en lieu et place de l'axe imprimé. J'ai réalisé cette variante suite au retour d'un utilisateur pour qui l'axe imprimé n'était pas assez solide.
- En : addition of a variant of the sliding carriage (Extrude_Coulissant_Variante_AxeTrou4mm.stl): the axis on which we position the bearing is removed. In its place, a hole of 4mm appears on the sole. It allows to set a countersunk head screw 4mm in diameter and 15mm long in place of the printed axis. This variant is implemented after the return of a user for whom the axis was not strong enough.
20/03/2018 Upgrade :
- Fr : Augmentation de l’épaisseur du carter principal + variante du carter principal avec connecteur pneumatique intégré + vidéo notice d'assemblage
- En : Increasing the thickness of the main case + main housing variant with embedded pneumatic connector + video assembly instructions
--- Français (English below) ---
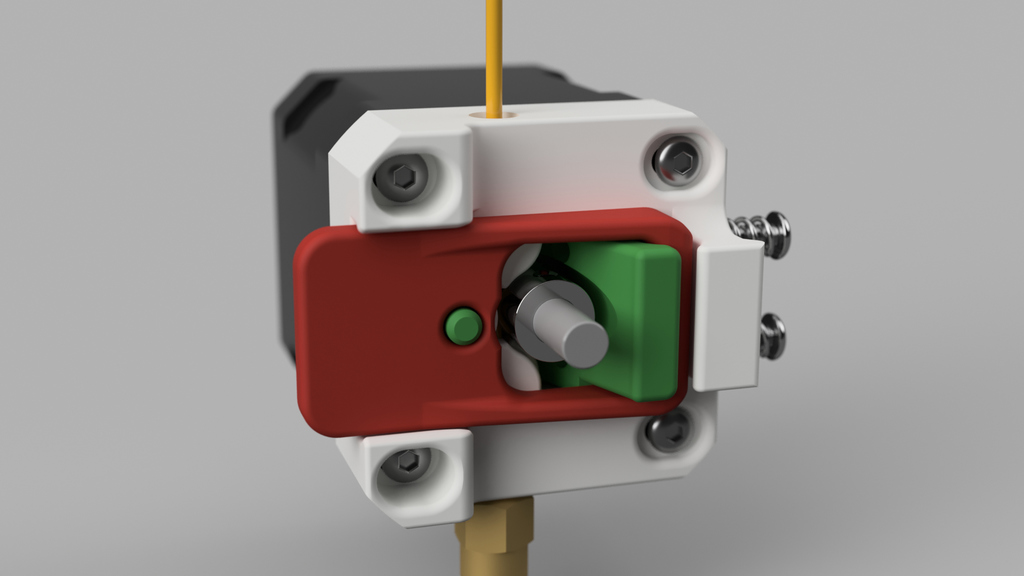
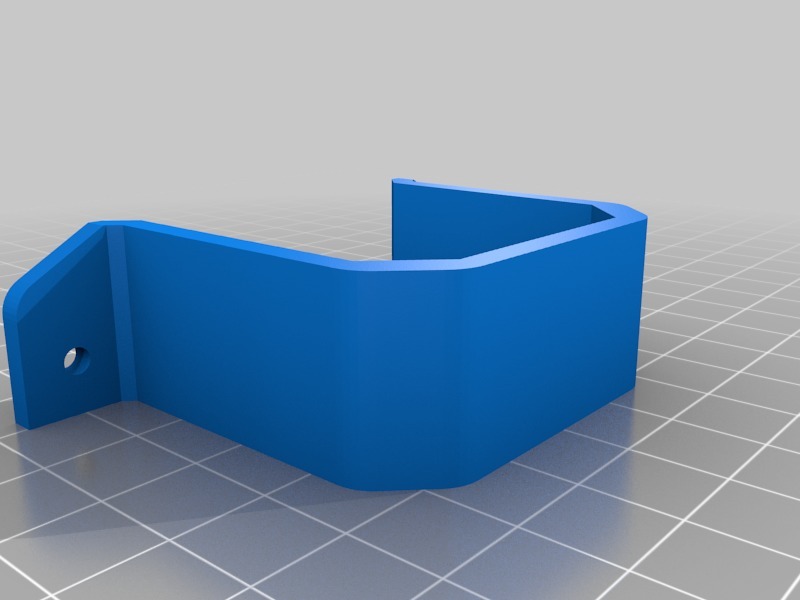
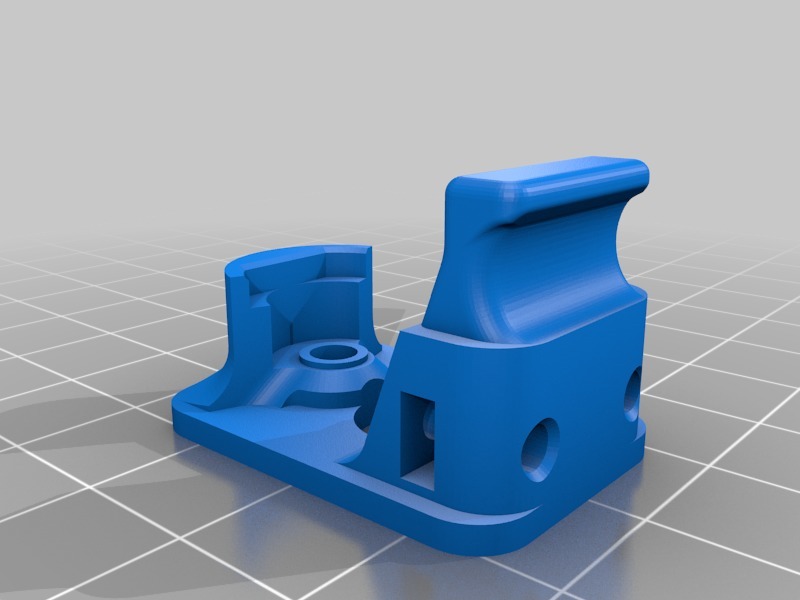
-> Cette pièce est un élément de l'imprimante 3D Delta pliable DeltaFold
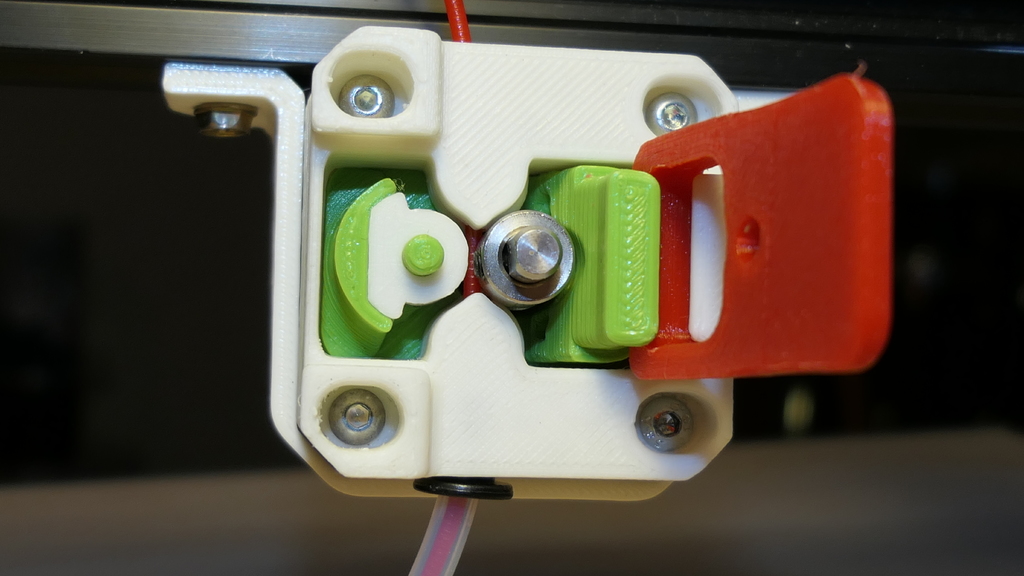
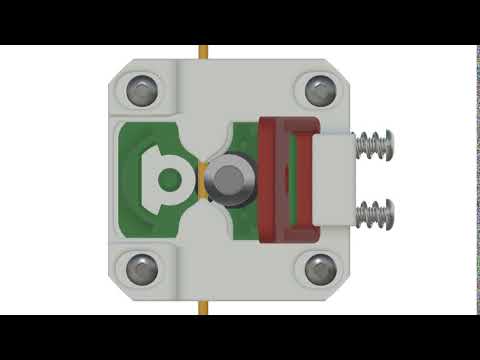
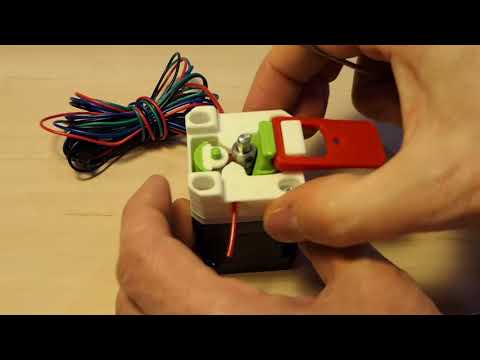
Extruder bistable : Les deux positions, chargement et entraînement du filament, sont mécaniquement maintenues. Plus besoin de tenir un levier d'une main pendant qu'on enfile le filament de l'autre, on peut se servir de ses deux mains... c'est plutôt pratique ;)
Conçu pour les filaments 1,75mm et un montage de type Bowden.
Le réglage de la pression exercée sur le filament s'effectue par deux vis situés sur le coté du dispositif. Ce modèle permet d'extrusion de filament semi-rigide.
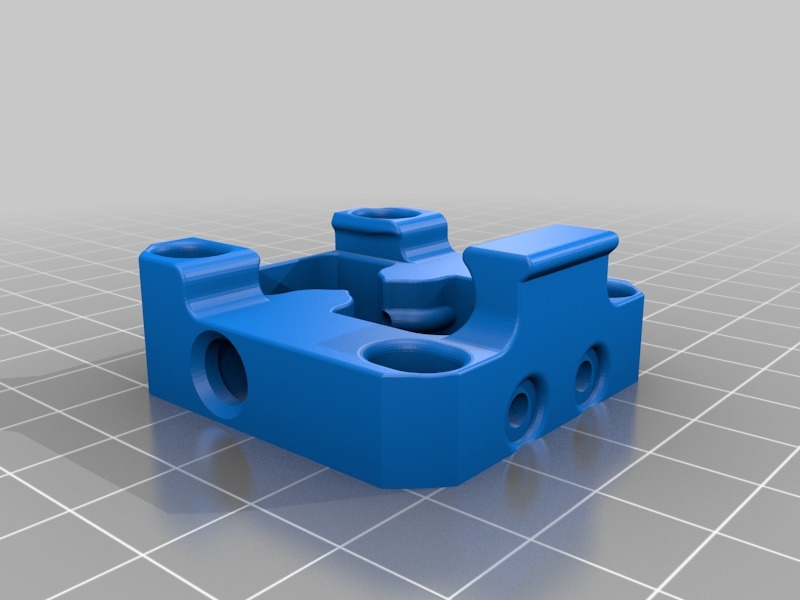
Les pièces sont conçues pour être imprimées sans support matériel. Le dispositif a été modélisé avec Fusion 360
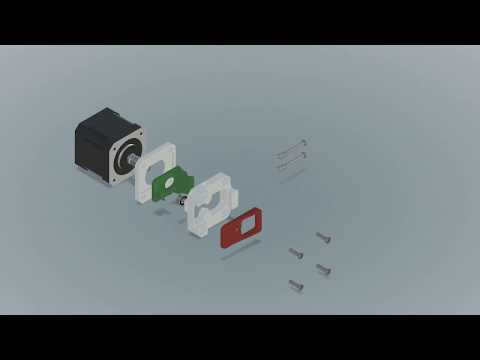
Composants non imprimables :
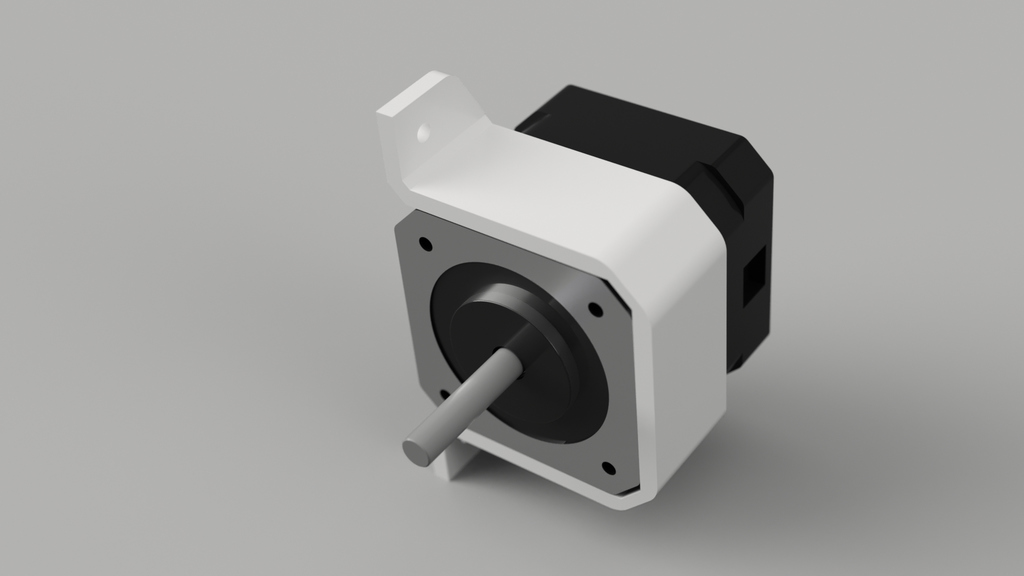
* quatre vis tête six pans creux M3 x 12 pour fixer l'extruder au moteur NEMA17
* deux vis tête six pans creux M3 x 20 pour régler la pression exercée sur le filament
* deux ressorts : diamètre intérieur 3,45mm, diamètre extérieur 4,8mm, hauteur 8mm
* un pignon mk8
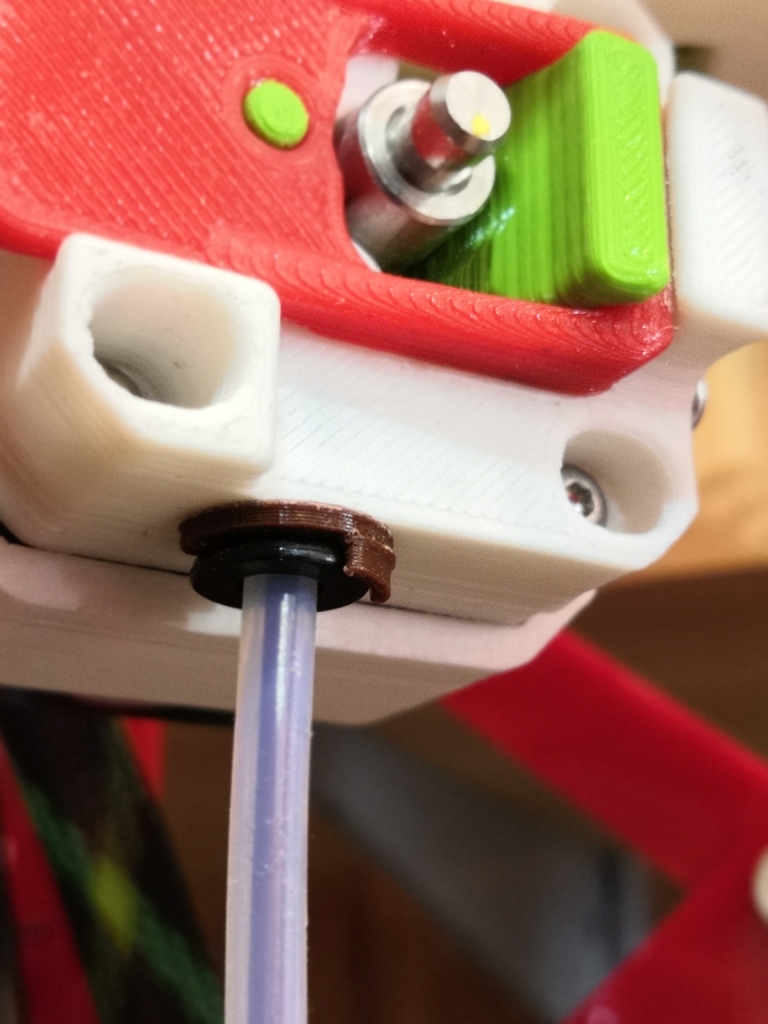
* un roulement à bille 684 (diamètre intérieur=4mm, extérieur=9mm, Epaisseur=4mm)
* un connecteur pneumatique PC4-M6 ou un raccord pneumatique intégré
Assemblage:
Consultez la notice d'assemblage vidéo pour vous aider
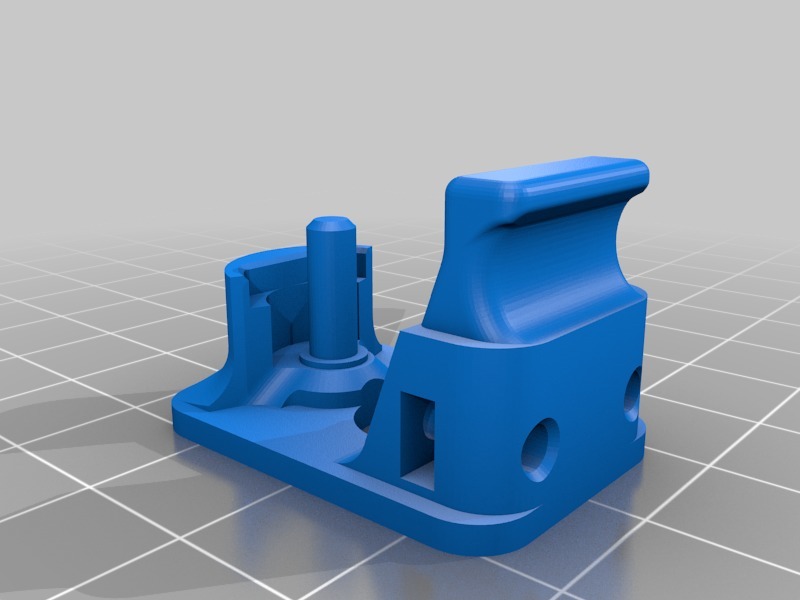
- Sur le carter coulissant (en vert sur la vidéo), montez le roulement à bille sur son axe et vérifiez qu'il tourne sans frottement
- Placez la bague au sommet de cet axe
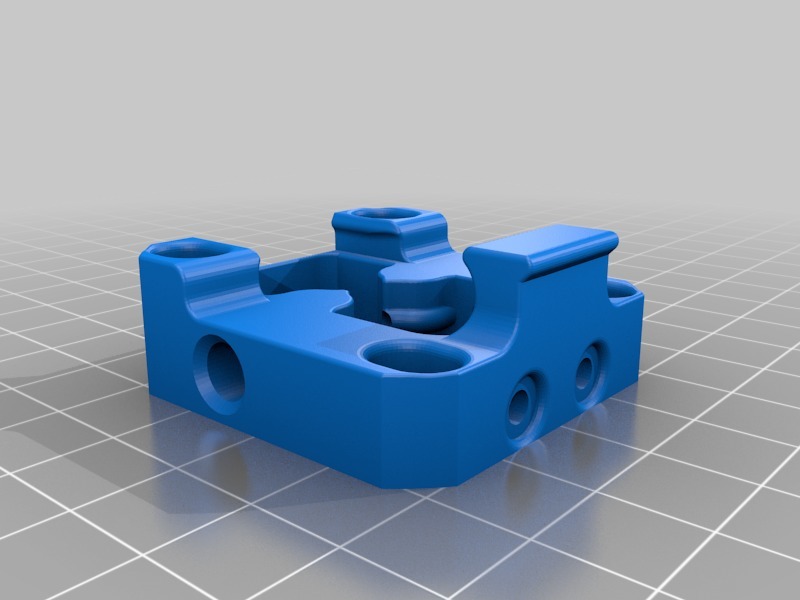
- Positionnez le carter coulissant dans son logement, entre la semelle et dans le carter principal.
- Insérez le levier dans son logement et mettez-le en position "chargement du filament"
- Placez la roue crantée mk8 sur l'arbre du moteur NEMA17 et déterminée sa hauteur en vous aidant d'un filament. L'axe de la gorge de la roue crantée doit être aligné avec l'axe de passage du filament.
- Approchez les quatre vis de fixation du carter sur le moteur sans les serrer
- Faites coulisser l'extruder vers la droite, jusqu'à ce que le filament soit en contact avec le la roue crantée. Dans cette position, le filament et la roue crantée sont en contact mais l'on peut retirer et remettre le filament sans problème. Serrez les quatre vis de fixation du carter en maintenant cette position.
- Mettez le levier en position "entraînement du filament"
- Positionnez les deux vis de tension avec leurs ressorts. Vissez-les alternativement jusqu'à ce que les têtes des vis soient à environ 5mm du carter.
- Si vous faites naviguer le filament, il doit entraîner le moteur. Si ce n'est pas le cas, ajustez le réglage des vis de tension ou la position de carter par rapport à la roue crantée
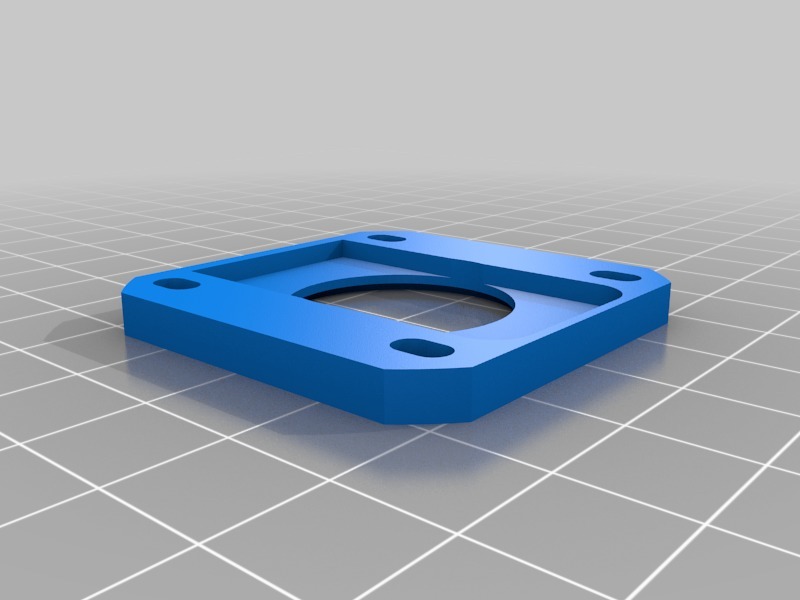
En option, le cerclage pour moteur NEMA17 qui permets de fixer un moteur avec deux vis diamètre 3mm.
*--- English --- *
-> This piece is an element of the foldable Delta 3D Printer DeltaFold
Bistable extruder: Both positions, loading and driving the filament, are mechanically maintained. No need to hold a lever with one hand while threading the filament of the other, you can use both hands ... it's quite convenient;)
Designed for 1.75mm filaments and a Bowden mount.
The pressure on the filament is adjusted by two screws located on the side of the device. This model allows extrusion of semi-rigid filament.
Parts are designed to be printed without material support. The device has been modeled with Fusion 360
Nonprintable components :
* four hexagon socket head screws M3 x 12 to attach the extruder to the NEMA17 motor
* two hexagon head screws M3 x 20 to adjust the pressure exerted on the filament
* two springs: inner diameter 3,45mm, outer diameter 4,8mm, height 8mm
* one pinion mk8
* one ball bearing 684 (Inner Diameter: 4mm, Outer Diameter: 9mm, Thickness: 4mm)
* one pneumatic connector PC4-M6 or an embedded pneumatic fitting
Assembly:
See the Assembly instructions video for help
- On the sliding cover (in green on the video), mount the ball bearing on its axis and check that it rotates without friction
- Place the ring at the top of this axis
- Position the sliding part in its housing, between the soleplate and in the main housing.
- Insert the lever into its housing and put it in position 'filament loading'
- Place the toothed wheel mk8 on the NEMA17 motor shaft and determine its height by using a filament. The axis of the groove of the toothed wheel must be aligned with the axis of the filament.
- Install the four fastening screws without tightening them
- Slide the extruder to the right until the filament is in contact with the toothed wheel. In this position, the filament and the toothed wheel are in contact, but the filament can be removed and replaced without any problem. Tighten the four crankcase mounting screws holding this position.
- Move the lever to the 'filament drive' position
- Position the two tensioning screws with their springs. Screw them alternately until the screw heads are about 5mm from the housing.
- If you navigate the filament, it must drive the engine. If this is not the case, adjust the tension screw setting or the crank position with respect to the toothed wheel
As an option, the NEMA17 motor strapping allows to fix a motor with two 3mm diameter screws.
:format(webp)/https://fbi.cults3d.com/uploaders/12913395/illustration-file/0c71d997-fe63-470d-a058-88bc5f2dea08/Extruder_Tiroir_V5_2018-Mar-13_07-53-13AM-000_CustomizedView29471897912_jpeg.jpg)


/https://preview3d-images.cults3d.com/blohr5t5y9fbr4swjed2k20lf2ig)
/https://preview3d-images.cults3d.com/qjt2ragdz6hj5idz0mssi5y9wkql)
/https://preview3d-images.cults3d.com/85ntoyj4ekbbmbj719hw2jkbfzix)
/https://preview3d-images.cults3d.com/b7awx9jmfsjnzrqr1zk3cor2xw1l)
/https://preview3d-images.cults3d.com/jr034tweljs1v7htq5xcmxno1j3u)
/https://preview3d-images.cults3d.com/ljn6zdofvc59wrr4t5e0txueqluj)
/https://preview3d-images.cults3d.com/tinmr100m2croa2z4qnz2mwrqkpp)
/https://preview3d-images.cults3d.com/yq1544gf0goalpdsmsn6kkc2po8r)
/https://preview3d-images.cults3d.com/5e4vcqs70gf4rl6zu9rg7n21df5x)


